background image

8

INM MTL 9492-PS-PLUS Rev 2

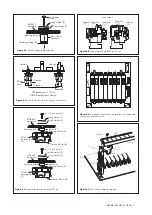
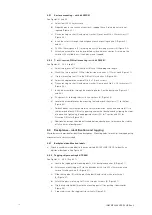
3 .5 Assembly

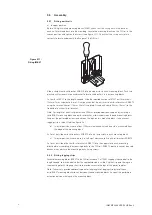
3 .5 .1  Fitting earth rails

a)  In upper position

Before fitting insulating mounting blocks IMB57, check that the swing nuts in the base of 
each unit are turned back into the moulding. Locate the mounting blocks on the DIN rail in the 
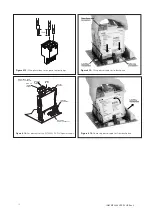
chosen position and tighten the screws (see figure 3.11). Check that the swing nuts rotate 
correctly to locate underneath the flanges of the DIN rail.

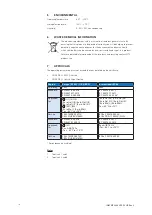
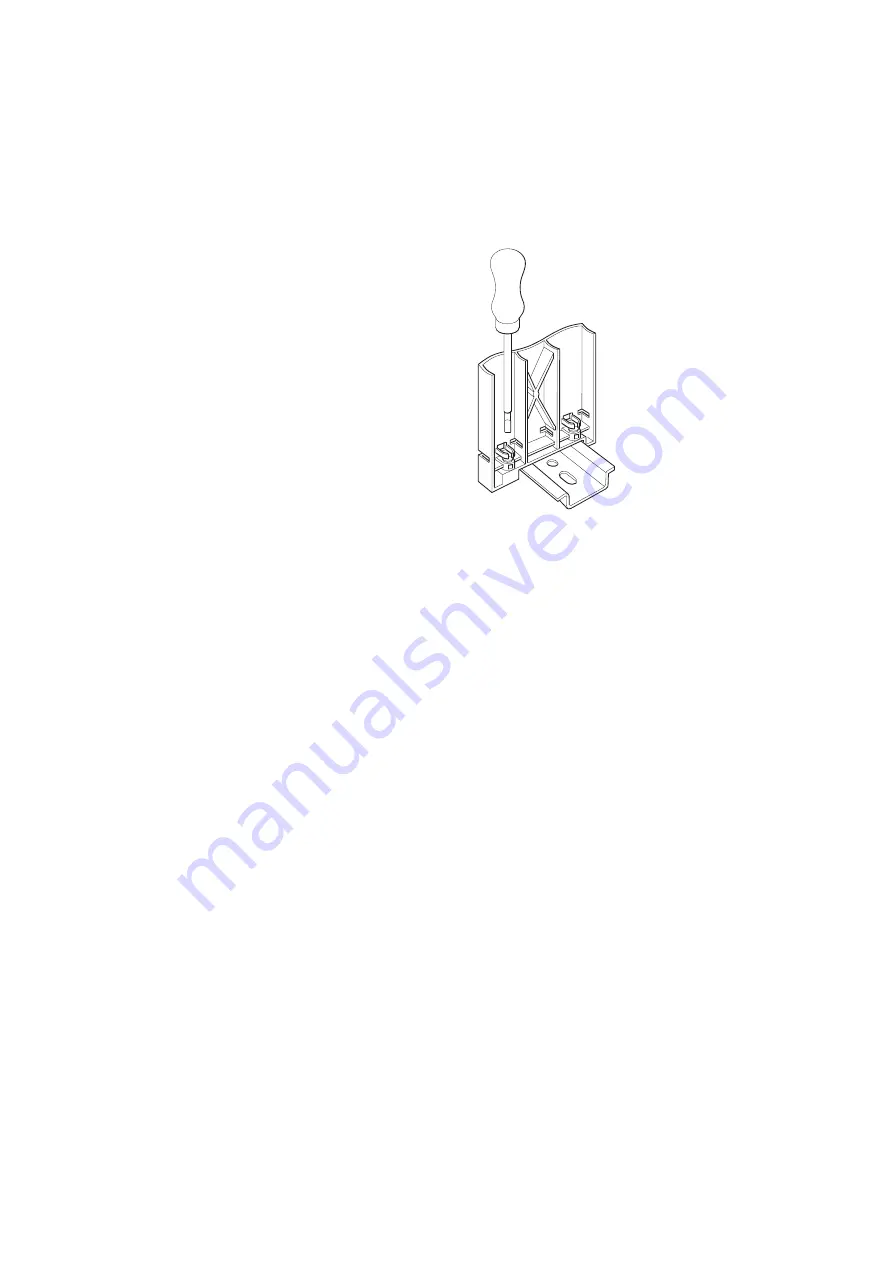
Slide a straight earth-rail bracket ERB57S into the upper slot in each mounting block. Push two 
plastic push fasteners into each bracket to locate the brackets in the mounting blocks.

Cut earth rail ERL7 to the length needed. Slide the required number of ETM7 earth terminals 
(5mm or 7mm wide) onto the rail. Clamp each end of the earth rail to earth-rail brackets ERB57S 
using the terminal clamps (14mm, 35mm

2

) supplied. Fit an earth clamp (10mm, 16mm

2

) to the 

free end of each earth-rail bracket.

Note: For lengths of earth-rail greater than 500mm, provide additional support by installing a 
third IMB57 mounting block and earth-rail bracket, mid-way between the end mounting blocks.  
Snap out the perforated extension between the lugs on this mounting block if a continuous 
tagging strip is to be fitted (see figure 3.4).


b)  In lower position, where at least 150mm clearance exists on one side, measured from  


the edge of the mounting block.

As for a), but slide earth-rail brackets ERB57S into the lower slots in each mounting block.


c)  In lower position, where there is insufficient clearance to fit earth-rail brackets ERB57S.

As for a), but slide offset earth-rail brackets ERB57O into the upper slot in each mounting 
block before assembling the mounting blocks to the DIN rail. ERB57S brackets cannot be used 
because they obscure the mounting blocks' fixing screws.

3 .5 .2  Fitting tagging strips

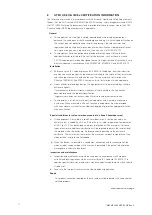
Assemble mounting blocks IMB57 to the DIN rail as above. Cut TAG57 tagging strip and label to the 
length needed, and insert label so that the appropriate side is visible. Clip the strip onto the lugs on 
the mounting blocks. Hinge up the strip to provide access to the tops of the power supplies.

Note: If necessary, provide additional support for long lengths of tagging strip by installing an 
extra IMB57 mounting block mid-way between the end mounting blocks. Snap out the perforated 
extension between the lugs on this mounting block.

Figure 3 .11: 

Fitting IMB57

Summary of Contents for MTL 9492-PS-PLUS

Page 1: ...MTL 9492 PS PLUS Intrinsically safe power supply January 2022 INM MTL 9492 PS PLUS Rev 3 Instruction manual MTL intrinsic safety solutions...

Page 2: ...ECLARATION OF CONFORMITY A printed version of the Declaration of Conformity has been provided separately within the original shipment of goods However you can find a copy of the latest version at http...

Page 3: ...NTING VARIANT 10 4 1 Accessories 10 4 2 Protection of equipment 10 4 3 Backplane mounting 10 4 3 1 Surface mounting with kit SMS01 12 4 3 2 T or G section DIN rail mounting with kit DMK01 12 4 4 Backp...

Page 4: ...se assemblies may not be used in explosion hazard area applications if they have been used previously in general electrical installations WARNING The responsibility for planning installation commissio...

Page 5: ...Device This adaptation is necessary due to restrictions for Hazardous Area use It is not implied that the device conforms to the 802 3af PoE standard 2 DESCRIPTION The MTL 9492 PS PLUS Power Supply i...

Page 6: ...ction to protect the module in the event of its output being short circuited or overloaded This also minimises the power dissipation during the fault to a negligible level thus improving reliability H...

Page 7: ...se 3 1 Protection of equipment When the power supply is mounted in a safe area ensure that the local environment is clean and free of dirt and dust and note the ambient temperature considerations give...

Page 8: ...and or replacement purposes Power conductors The removable power plugs are fitted with screw clamp terminals Note that the conductors should be between 14 and 24 AWG 1 6 and 0 5mm dia in size Plugs lo...

Page 9: ...Check to make sure the bus length is correct for the number of modules involved 2 If the number of modules is less than the maximum number the chain will support cut off the surplus power plugs at th...

Page 10: ...the lower slot but only after insulating mounting blocks IMB57 are clamped to the DIN rail This may not be possible if for example trunking is fitted In this case fit offset earth rail bracket ERB570...

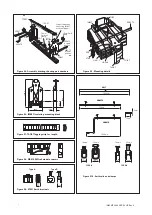
Page 11: ...drawing showing part numbers Figure 3 5 Mounting details Figure 3 6 IMB57 Insulating mounting block Figure 3 7 TAG57 Tagging strip 1m length Figure 3 8 MS010 DIN rail module spacers Figure 3 9 ETM7 Ea...

Page 12: ...d mounting blocks Snap out the perforated extension between the lugs on this mounting block if a continuous tagging strip is to be fitted see figure 3 4 b In lower position where at least 150mm cleara...

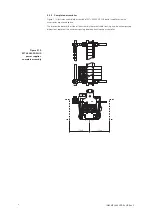
Page 13: ...MTL 9492 PS PLUS power supplies using the accessories mentioned above The broken line boxes either side of the assembly represent cable trunking and the accompanying dimensions represent the minimum...

Page 14: ...ORIES DIN rail 19 inch Earth rail Tagging Spare Surface T or G rack kit strip kit fuse pack SMS01 DMK01 ERK08 TSK08 FUS08 4 2 Protection of equipment When the power supply is mounted in a safe area en...

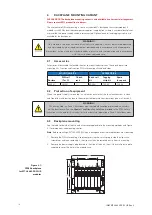
Page 15: ...g procedure T section 12 T section 12 G section 13 G section 13 Fixing Screws End stop 11 OR Figure 4 4 Mounting a backplane onto DIN rail Figure 4 5 Mounting end stops onto DIN rail Figure 4 6 Backpl...

Page 16: ...rs 6 Figure 4 4 h Locate the assemblies over the mounting feet and attach the screws 1 to the feet Figure 4 4 i For backplanes that are mounted in a vertical orientation attach one end stop 11 to the...

Page 17: ...gging strip Figure 4 9 Attaching an earth rail post Figure 4 10 Attaching earth rail terminals and rivets Figure 4 11 Power supply connections PSU A secondary supply can be connected in the same confi...

Page 18: ...pply sources according to the terminal assignments shown in Figure 4 11 The maximum permissible wire size is 2 5mm2 14 AWG b Plug the power supply connectors into the base connectors on the backplanes...

Page 19: ...S Rev 2 Figure 4 13 Wiring hazardous area power output plugs Figure 4 14 Key elements of the MTL 9492 PS PLUS power supply Figure 4 15 Fitting power supplies to backplane Figure 4 16 Removing power su...

Page 20: ...certificate 2014 30 EU EMC Directive 2014 35 EU Low Voltage Directive Region Europe ATEX UK UKEX International IECEx Authority CML CML Standard EN 60079 0 2018 EN 60079 11 2012 EN 60079 26 2006 IEC 6...

Page 21: ...enclosure against i mechanical and thermal stresses in excess of those noted in the certification documentation and the product specification ii aggressive substances excessive dust moisture and othe...

Page 22: ...ed in accordance with the Directive Statutory Requirements and CE and UKCA marked with the Notified Approved Body Identification Number This information applies to products manufactured during or afte...

Page 23: ...19 INM MTL 9492 PS PLUS Rev 2 This page left intentionally blank...

Page 24: ...et Off Old Mahabalipuram Road Sholinganallur Chennai 600 119 India Tel 91 0 44 24501660 24501857 Fax 91 0 44 24501463 E mail mtlindiasales eaton com ITALY MTL Italia srl Via San Bovio 3 20090 Segrate...

Reviews: