background image

1

Section 1: Introduction

Series NRX with PXR - type RF low voltage power (air) circuit breakers instruction manual

   MN013002ENH03   September 2016   www.eaton.com

Section 1: Introduction

Purpose

 This instructional manual is intended to generally cover the 
installation, operation, and maintenance of Series NRX

TM


low voltage power (air) circuit breakers and drawout cas-
settes.  Basic dimensional information is provided for the 
installation of both the circuit breaker and cassette.

Refer to other documentation for more specific details.

1. 

MN013003EN:  Operating Manual for Series NRX PXR 
20/25

1. 

AD013001EN:  PXR 20/25 Time Current Curves

2.  TD013001EN:  Wiring Diagrams for PXR 20/25

3.  Accessory field installation instruction leaflets (IL) dedi-

cated to specific items are available for download at 
www.eaton.com/seriesnrx.

4.  Visit www.eaton.com/seriesnrx for additional support 

documentation.

Safety

All safety codes, safety standards, and/or regulations must 
be strictly observed in the installation, operation, and main-
tenance of this equipment.

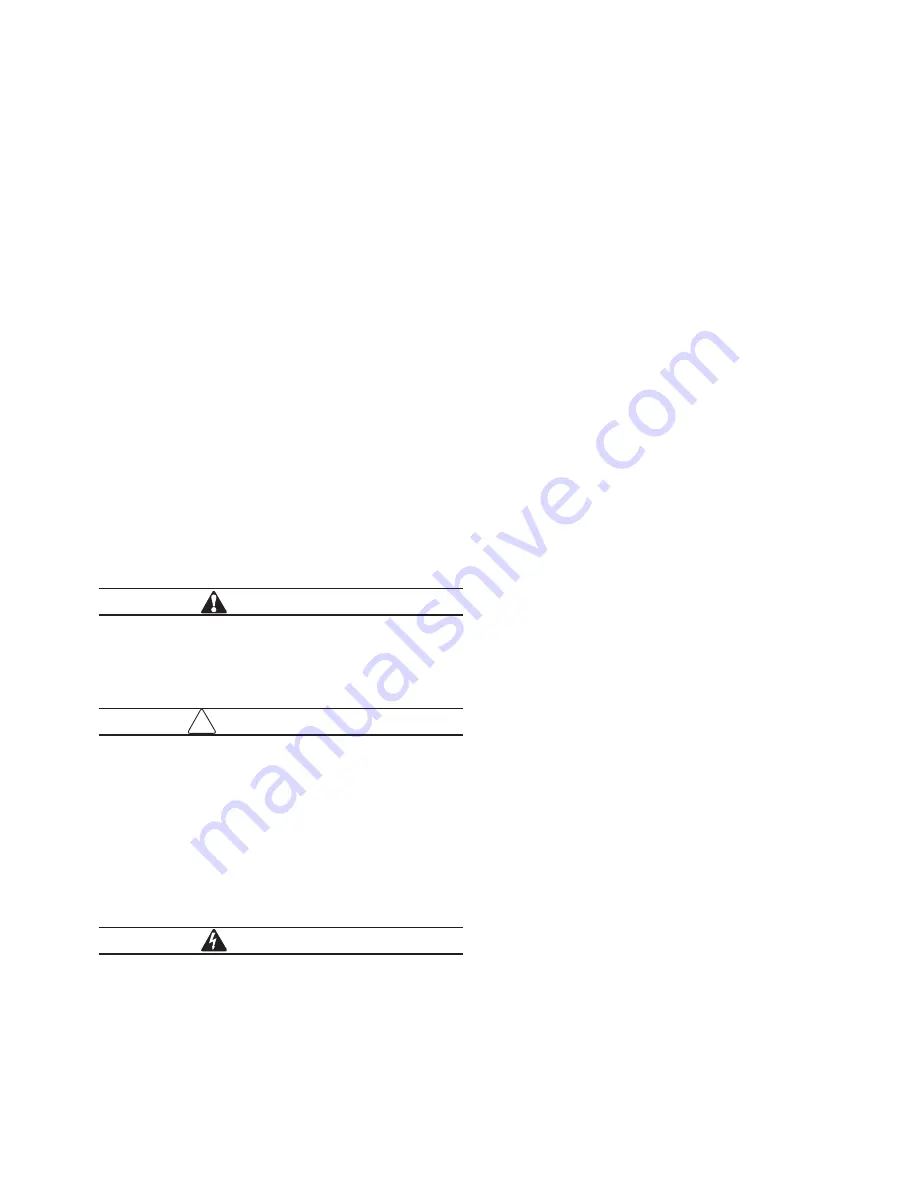
 WARNING 

The warnings and cautions included as part of the pro-
cedural steps in this manual are for personnel safety 
and protection of equipment from damage.  This exam-
ple of a typical Warning is intended to familiarize per-
sonnel with the style of presentation.

 IMPORTANT 

Please read and understand these instructions before 
attempting to unpack, install, operate, or maintain this 
equipment.  Study the breaker and its mechanism carefully 
before attempting to operate it on an energized circuit.

All possible contingencies that may arise during installation, 
operation, or maintenance, and all details and variations 
of this equipment do not purport to be covered by these 
instructions.  If further information is desired by purchaser 
regarding a particular installation, operation, or maintenance 
of particular equipment, contact the local Eaton representa-
tive.

 WARNING 

Series NRX circuit breakers are provided with safety fea-
tures.  Nevertheless, the voltages, currents, and power 
levels available around operational equipment are 
extremely dangerous.  Under no circumstances should 
interlocks and other safety features be made inopera-
tive, as this may result in death, bodily injury, or prop-
erty damage.

Safe practices

To protect personnel associated with the installation, opera-
tion, and maintenance of this equipment, the following prac-
tices must be followed.

1. 

Only qualified electrical personnel familiar with the 
equipment, its operation, and the associated hazards 
should be permitted to work on, install, or operate the 
equipment.

5. Always 

be 

certain that the primary and secondary cir-

cuits are de-energized or the circuit breaker is open and 
removed to a safe work location before attempting any 
maintenance.

6.  For maximum safety, only insert an open, completely 

assembled breaker into an energized cell.

7. Always 

ensure that drawout circuit breakers are in one 

of their designed cell positions, such as CONNECT, 
TEST, DISCONNECT, or WITHDRAWN.  A circuit breaker 
permitted to remain in an intermediate position could 
result in control circuits being improperly connected, 
resulting in electrical failures.

Qualified personnel

For the purpose of operating and maintaining power circuit 
breakers, a person should not be considered qualified if 
the individual is not thoroughly trained in the operation of 
the circuit breaker and how it interfaces with the assembly 
in which it is used.  In addition, the individual should have 
knowledge of the connected loads.

For the purpose of installing and inspecting circuit breakers 
and their associated assembly, a qualified person should 
also be trained with respect to the hazards inherent to 
working with electricity and the proper way to perform such 
work.  The individual should be able to de-energize, clear, 
and tag circuits in accordance with established safety prac-
tices.

General information

The series NRX range of low voltage power (air) circuit 
breakers and switch-disconnectors are designed, manufac-
tured, and tested for use in both switchboard and metal-
enclosed switchgear assemblies in accordance with UL489 
and IEC 60947-2 requirements.  The series NRX range is 
manufactured and tested in an ISO 9001 certified facility.

Series NRX circuit breakers and switch-disconnects are 
available in fixed and drawout mounting configurations and 
offer a variety of different connection solutions.  The fixed 
configuration is designed for rear bus connections.  The 
drawout version, in conjunction with its drawout cassette, 
is a through-the-door design having three breaker posi-
tions with the compartment door closed (CONNECT, TEST, 
DISCONNECT) and one position out of its compartment on 
extension rails (WITHDRAWN). A drawout cassette is also 
designed for rear bus connections.  Continuous current rat-
ings from 800 - 4000 A and interuption capacities up to 
105 kA are available depending on the applicable standard.  
All series NRX circuit breakers are 100 percent rated.

!

Summary of Contents for NRX

Page 1: ...RF low voltage power air circuit breakers instruction manual Instruction Manual MN013002ENH03 Instructions apply to UL489 series NRX RF frame IEC IZMX40 Typical drawout circuit breaker and cassette Typical fixed circuit breaker ...

Page 2: ...KER DESCRIPTION 11 Introduction 11 Installing the drawout circuit breaker in the cassette 11 Rejection interlocks 12 Drawout circuit breaker positioning 12 Installing fixed circuit breaker 14 Basic circuit breaker assembly 14 Operating mechanism 15 Manual operation 15 Electrical operation 16 Anti pump Feature 16 SECTION 4 CIRCUIT BREAKER FEATURES AND ACCESSORIES 16 Introduction 16 Arc chambers 16 ...

Page 3: ...1 Cassette safety shutters 21 Door escutcheon 21 IP55 dust and water resistant cover 21 Mechanical interlock 21 Publications 21 SECTION 5 DIMENSIONAL DRAWINGS FOR INSTALLATION OF DRAWOUT CIRCUIT BREAKERS 23 General 23 Drawout cassette 23 SECTION 6 DIMENSIONAL DRAWINGS FOR INSTALLATION OF FIXED CIRCUIT BREAKERS 39 General 39 Fixed circuit breaker 39 SECTION 7 INSPECTION AND MAINTENANCE 53 General 5...

Page 4: ...3002ENH03 SeriesNRXwithPXR typeRFlowvoltagepower air circuitbreakersinstructionmanual MN013002ENH03 September2016 www eaton com SECTION 8 TROUBLESHOOTING 56 Introduction 56 DISCLAIMER OF WARRANTIES AND LIMITATION OF LIABILITY 58 ...

Page 5: ...r parts could result Use two appropriate lifting straps when using any type of lifting device CAUTION Make certain that the cassette is properly mounted or seated securely on a work table before attempting to have the breaker fully extended on the cassette s drawout rails Failure to comply could result in the cassette tipping for ward resulting in equipment damage and or bodily injury CAUTION Do n...

Page 6: ...vi Instruction Manual MN013002ENH03 SeriesNRXwithPXR typeRFlowvoltagepower air circuitbreakersinstructionmanual MN013002ENH03 September2016 www eaton com ...

Page 7: ...s must be followed 1 Only qualified electrical personnel familiar with the equipment its operation and the associated hazards should be permitted to work on install or operate the equipment 5 Always be certain that the primary and secondary cir cuits are de energized or the circuit breaker is open and removed to a safe work location before attempting any maintenance 6 For maximum safety only inser...

Page 8: ...ype RF Interrupting Ratings Insulated Case Circuit Breaker 3000 A max 208 250 V 24 V 220 250 V 3 Pole RMS Symmetrical Ampere Volt kA 100kA 100kA 240 480 50 60 Hz 160730 Customer P O G O 07 16 RYSC303WMAARTLR2ZADX Instruction manual MN013002EN Use in cassette RY303 Catalog number and description Certification and third party certification markings Factory installed accessories Order information 20 ...

Page 9: ...Figures 2 and 3 Mounted on the dra wout breaker are the primary disconnect finger clusters and levering mechanism These components are located on the breaker to allow Users easy access when performing prod uct inspection or maintenance The cassette provides all the necessary drawout circuit breaker interfaces including primary and secondary connections Standard flat terminal pads on the rear of th...

Page 10: ... Typical NRX type RF drawout circuit breaker ote N Refer to Figure 5 for more visual details of front cover 1 Arc chute cover 2 Front cover 3 Drawout wheels 4 Lifting handle 5 Secondary contacts 6 Primary disconnect finger cluster 7 Phase barriers optional 8 Levering mechanism 9 Available on board lev in tool sold separately 1 4 3 2 1 5 4 3 6 7 8 9 8 ...

Page 11: ...on rail shown in extended and locked position 2 Secondary connectors 3 Lifting handle 4 Interlock plate pins 5 Grounding earthing bar 6 Gas ventilation opening 7 Stationary primary contacts behind shutters 8 Safety shutters optional 9 Primary terminal pad 10 Interphase barrier mounting slot 11 Secondary wiring point identification 12 Drawout extension rail latch 10 5 1 3 2 6 1 7 8 4 3 1 6 9 6 11 6...

Page 12: ...er2016 www eaton com Figure 4 Typical NRX type RF fixed circuit breaker ote N Refer to Figure 5 for more visual details of front cover 1 Front cover 2 Secondary wiring terminals 3 Arc chute cover 4 Lifting handle 5 Primary terminal pad 6 Secondary wiring point identification 7 Installation mounting feet 3 4 2 1 4 5 3 6 7 7 ...

Page 13: ...nly 7 Levering key lock optional drawout only 8 Frame rating module FRM 9 FRM battery cover 10 USB and aux power ports 11 Trip unit 12 Pop out trip indicator option al 13 Off key lock optional 14 Contact status 15 Ready to close status flag 16 Mechanism spring status 17 Manual OFF 18 Manual ON 19 Pushbutton cover mounting holes 20 In rating LCD display on trip unit 21 In rating FRM battery cover 2...

Page 14: ...ect and or install a Series NRX circuit breaker proceed with the following steps Step 1 Carefully open container and remove all packing shipping material and documentation Triangle at top of indicator is partially full or totally full of blue beads Transport was not in keeping with instructions breaker con tainer was tilted or overturned Check breaker closely for dam age Triangle at top of indicat...

Page 15: ...ionmanual MN013002ENH03 September2016 www eaton com Figure 9 Suggested lifting procedures and precautions ote N When using an appropriate lifting device attach the lifting harness in the locations shown in Figure 9 that best fits the circumstances Upright cassette Breaker in cassette Cassette front up Breaker only ...

Page 16: ...ing for ward resulting in equipment damage and or bodily injury Table 1 Approximate weights Item Lbs Kg Drawout breaker three pole 145 66 Drawout breaker four pole 180 82 Fixed breaker three pole 120 55 Fixed breaker four pole 155 71 Drawout cassette three pole 66 30 Drawout cassette four pole 78 35 Lifting handle Lifting area Circuit breaker inspection All circuit breakers once removed from their...

Page 17: ...out circuit breaker a bolted in cassette with movable captive extension rails sup ports the circuit breaker CAUTION It is important to take care when placing a drawout circuit breaker on its extension rails If the circuit breaker is not properly seated on the rails the breaker could fall causing equipment damage and or bodily injury To install the drawout circuit breaker proceed first with the fol...

Page 18: ...e key plate is located on the bottom of the circuit breaker and one is located on the floor of the cassette Rejection pins must be installed in both plates to complete the interlock scheme The switchboard builder is responsible for installing the rejection pins in the appropriate pattern in the rejec tion plates on both the circuit breaker and cassette A rejection pin installation kit including th...

Page 19: ...ition indicator located in the right lower portion of the circuit breaker indi cates DISCONNECT Figure 17 Step 2 If the indicator window indicates anything other than DISCONNECT use the breaker s on board tool racking tool or 3 8 in extension and ratchet to get the circuit breaker in the proper levering position Open the levering access door by sliding it to the left Insert the levering tool into ...

Page 20: ...NNECT position is reached the circuit breaker will no longer move out of the cassette as a result of rotating the levering tool At this point the circuit breaker can be pulled out of the cassette onto its drawout rails IMPORTANT The circuit breaker mechanism is interlocked such that charged closing springs are automatically discharged if the circuit breaker is levered into or out of the cell Disch...

Page 21: ...recess behind the charging handle and pull out and down Figure 24 Step 1 Step 2 It takes approximately seven full downward strokes to complete the charging process It is possible to manually recharge the spring immediately after closing the breaker before it has been tripped open The status of the spring charged or discharged is indicated in the mechanism spring status window just above the pushbu...

Page 22: ...ll block the application of the electrical close command until the breaker is ready Section 4 Circuit breaker features and accessories Introduction The features and accessories of the drawout and fixed con figurations are covered briefly in this section Details and installation instructions on trip units and individual accesso ries are covered in their respective IL s Arc chambers An arc chamber o...

Page 23: ...SB port on the trip unit Please contact your Eaton sales representative for details on proper re program ming of the trip unit Frame rating modules installed on series NRX air cir cuit breakers with PXR are permanent and SHOULD NEVER BE REMOVED The frame rating module battery cover with printed In rating see Figure 7 should not be changed without proper reprogramming of the trip unit The In rating...

Page 24: ...trol type RF frame Figure 14 Series NRX breaker with external PT module Figure 15 Typical breaker master connection diagram NF Figure 16 Typical breaker master connection diagram RF Figure 17 Left side Right side PXR TRIP UNITS ST1 1 2 ST2 UV1 3 4 UV2 OT1C 5 6 OT1M OT1B 7 8 OT2B OT2C 9 10 OT2M N1 11 12 N2 ALM1 ALM2 15 16 ALM3 G1 17 18 G2 24V 19 20 AGND ZIN 21 22 ARMSIN ZCOM 23 24 ZOUT CMM1 25 26 C...

Page 25: ...sory devices are available for use with Series NRX circuit breakers Unless otherwise stated they are all considered optional devices in the sense that they are not provided as standard on a manually operated cir cuit breaker Available accessories are discussed in general terms For more detailed information and or installation instructions refer to individual instruction leaflets dedicated to indiv...

Page 26: ...the spring release is delayed until the closing spring is fully charged and the trip latch is reset not held in the tripped position After these conditions are met and the spring release has activated voltage must be removed to reset the spring release to activate again Latch check switch LCS A latch check switch LCS indicates when the circuit break er is ready to close charged and not held trippe...

Page 27: ...et Refer to IL01301012E for installation information IP55 dust and water resistant cover A hinged dome shaped waterproof cover attaches to the metal compartment door to provide protection for the circuit breaker Mechanical interlock Mechanical interlocks are available to interlock the operation of two or three Series NRX circuit breakers The mechanical interlock holds one or more circuit breakers ...

Page 28: ... Drawout Circuit Breaker 2 Way Cable Interlock Kit IL01301059E RF Series NRX Installation Instructions for Drawout Circuit Breaker 3 Way Cable Interlock Kit IL01301060E RF Series NRX Installation Instructions for Fixed Circuit Breaker 2 Way Cable Interlock Kit IL01301061E RF Series NRX Installation Instructions for Fixed Circuit Breaker 3 Way Cable Interlock Kit IL01301062E RF Series NRX Installat...

Page 29: ...ov ered elsewhere are discussed Drawout cassette A drawout circuit breaker Figure 2 is used in combination with a drawout cassette Figure 3 The cassette provides all the necessary drawout circuit breaker interfaces including automatic primary and secondary connections Standard flat terminal pads on the rear of the cassette provide for a variety of primary connection configurations Optional primary...

Page 30: ...s for installation of drawout circuit breakers SeriesNRXwithPXR typeRFlowvoltagepower air circuitbreakersinstructionmanual MN013002ENH03 September2016 www eaton com Figure 33 Three pole drawout cassette rear bottom views in inches mm ...

Page 31: ...llation of drawout circuit breakers SeriesNRXwithPXR typeRFlowvoltagepower air circuitbreakersinstructionmanual MN013002ENH03 September2016 www eaton com Figure 34 Three pole drawout cassette side views CONNECTED and TEST positions in inches mm ...

Page 32: ...ion of drawout circuit breakers SeriesNRXwithPXR typeRFlowvoltagepower air circuitbreakersinstructionmanual MN013002ENH03 September2016 www eaton com Figure 35 Three pole drawout cassette side views DISCONNECTED and WITHDRAWN positions in inches mm ...

Page 33: ...rawout circuit breakers SeriesNRXwithPXR typeRFlowvoltagepower air circuitbreakersinstructionmanual MN013002ENH03 September2016 www eaton com Figure 36 Three pole drawout cassette top side views with centered three hole horizontal bus adapters in inches mm ...

Page 34: ...drawout circuit breakers SeriesNRXwithPXR typeRFlowvoltagepower air circuitbreakersinstructionmanual MN013002ENH03 September2016 www eaton com Figure 37 Three pole drawout cassette top side views with centered three hole vertical bus adapters in inches mm ...

Page 35: ... drawout circuit breakers SeriesNRXwithPXR typeRFlowvoltagepower air circuitbreakersinstructionmanual MN013002ENH03 September2016 www eaton com Figure 38 Three pole drawout cassette top side views with offset four hole horizontal bus adapters in inches mm ...

Page 36: ...f drawout circuit breakers SeriesNRXwithPXR typeRFlowvoltagepower air circuitbreakersinstructionmanual MN013002ENH03 September2016 www eaton com Figure 39 Three pole drawout cassette top side views with offset four hole vertical bus adapters in inches mm ...

Page 37: ...gs for installation of drawout circuit breakers SeriesNRXwithPXR typeRFlowvoltagepower air circuitbreakersinstructionmanual MN013002ENH03 September2016 www eaton com Figure 40 Four pole drawout cassette rear bottom views in inches mm ...

Page 38: ...allation of drawout circuit breakers SeriesNRXwithPXR typeRFlowvoltagepower air circuitbreakersinstructionmanual MN013002ENH03 September2016 www eaton com Figure 41 Four pole drawout cassette side views CONNECTED and TEST positions in inches mm ...

Page 39: ...tion of drawout circuit breakers SeriesNRXwithPXR typeRFlowvoltagepower air circuitbreakersinstructionmanual MN013002ENH03 September2016 www eaton com Figure 42 Four pole drawout cassette side views DISCONNECTED and WITHDRAWN positions in inches mm ...

Page 40: ...drawout circuit breakers SeriesNRXwithPXR typeRFlowvoltagepower air circuitbreakersinstructionmanual MN013002ENH03 September2016 www eaton com Figure 43 Four pole drawout cassette top side views with centered three hole horizontal bus adapters in inches mm ...

Page 41: ... drawout circuit breakers SeriesNRXwithPXR typeRFlowvoltagepower air circuitbreakersinstructionmanual MN013002ENH03 September2016 www eaton com Figure 44 Four pole drawout cassette top side views with centered three hole vertical bus adapters in inches mm ...

Page 42: ... drawout circuit breakers SeriesNRXwithPXR typeRFlowvoltagepower air circuitbreakersinstructionmanual MN013002ENH03 September2016 www eaton com Figure 45 Four pole drawout cassette top side views with offset four hole horizontal bus adapters in inches mm ...

Page 43: ...f drawout circuit breakers SeriesNRXwithPXR typeRFlowvoltagepower air circuitbreakersinstructionmanual MN013002ENH03 September2016 www eaton com Figure 46 Four pole drawout cassette top side views with offset four hole vertical bus adapters in inches mm ...

Page 44: ...tallation of drawout circuit breakers SeriesNRXwithPXR typeRFlowvoltagepower air circuitbreakersinstructionmanual MN013002ENH03 September2016 www eaton com Figure 47 Three pole four pole drawout cassette front door cutout details in inches mm ...

Page 45: ... circuit breaker Figure 3 is solidly mounted in its structure with no drawout feature The rear connected breaker can be mounted on a suitable horizontal mounting surface using left and right side mounting feet A standard rear connected fixed circuit breaker is supplied with flat primary terminal pads on the rear of the breaker that will accommodate a variety of primary connection configura tions O...

Page 46: ...ings for installation of fixed circuit breakers SeriesNRXwithPXR typeRFlowvoltagepower air circuitbreakersinstructionmanual MN013002ENH03 September2016 www eaton com Figure 48 Three pole fixed breaker rear bottom views in inches mm ...

Page 47: ...awings for installation of fixed circuit breakers SeriesNRXwithPXR typeRFlowvoltagepower air circuitbreakersinstructionmanual MN013002ENH03 September2016 www eaton com Figure 49 Three pole fixed breaker top side views in inches mm ...

Page 48: ...of fixed circuit breakers SeriesNRXwithPXR typeRFlowvoltagepower air circuitbreakersinstructionmanual MN013002ENH03 September2016 www eaton com Figure 50 Three pole fixed breaker top side views with centered three hole horizontal bus adapter in inches mm ...

Page 49: ... of fixed circuit breakers SeriesNRXwithPXR typeRFlowvoltagepower air circuitbreakersinstructionmanual MN013002ENH03 September2016 www eaton com Figure 51 Three pole fixed breaker top side views with centered three hole vertical bus adapter in inches mm ...

Page 50: ... of fixed circuit breakers SeriesNRXwithPXR typeRFlowvoltagepower air circuitbreakersinstructionmanual MN013002ENH03 September2016 www eaton com Figure 52 Three pole fixed breaker top side views with offset four hole horizontal bus adapter in inches mm ...

Page 51: ...n of fixed circuit breakers SeriesNRXwithPXR typeRFlowvoltagepower air circuitbreakersinstructionmanual MN013002ENH03 September2016 www eaton com Figure 53 Three pole fixed breaker top side views with offset four hole vertical bus adapter in inches mm ...

Page 52: ...wings for installation of fixed circuit breakers SeriesNRXwithPXR typeRFlowvoltagepower air circuitbreakersinstructionmanual MN013002ENH03 September2016 www eaton com Figure 54 Four pole fixed breaker rear bottom views in inches mm ...

Page 53: ...awings for installation of fixed circuit breakers SeriesNRXwithPXR typeRFlowvoltagepower air circuitbreakersinstructionmanual MN013002ENH03 September2016 www eaton com Figure 55 Four pole fixed breaker top side views in inches mm ...

Page 54: ...of fixed circuit breakers SeriesNRXwithPXR typeRFlowvoltagepower air circuitbreakersinstructionmanual MN013002ENH03 September2016 www eaton com Figure 56 Four pole fixed breaker top side views with centered three hole horizontal bus adapter in inches mm ...

Page 55: ... of fixed circuit breakers SeriesNRXwithPXR typeRFlowvoltagepower air circuitbreakersinstructionmanual MN013002ENH03 September2016 www eaton com Figure 57 Four pole fixed breaker top side views with centered three hole vertical bus adapter in inches mm ...

Page 56: ...n of fixed circuit breakers SeriesNRXwithPXR typeRFlowvoltagepower air circuitbreakersinstructionmanual MN013002ENH03 September2016 www eaton com Figure 58 Four pole fixed breaker top side views with offset four hole horizontal bus adapter in inches mm ...

Page 57: ...on of fixed circuit breakers SeriesNRXwithPXR typeRFlowvoltagepower air circuitbreakersinstructionmanual MN013002ENH03 September2016 www eaton com Figure 59 Four pole fixed breaker top side views with offset four hole vertical bus adapter in inches mm ...

Page 58: ...installation of fixed circuit breakers SeriesNRXwithPXR typeRFlowvoltagepower air circuitbreakersinstructionmanual MN013002ENH03 September2016 www eaton com Figure 60 Three pole four pole fixed breaker front door cutout details in inches mm ...

Page 59: ...urces could create problems Never use a wire brush to clean any part of the circuit breaker When to inspect Industry standards for this type of equipment recommend a general inspection and lubrication after the number of operations listed in Table 6 This should also be conducted at the end of the first six months of service if the number of operations has not been reached Table 6 Inspection freque...

Page 60: ... the breaker Figure 4 Step 1 Charge the mechanism springs using the charging handle or motor operator Step 2 Close the breaker by applying the rated voltage to the spring release accessory Step 3 Charge the mechanism springs using either the charging handle or motor operator If using motor operator disconnect power to motor prevent automatic recharging Step 4 Open the breaker by applying the rated...

Page 61: ... 1 and 2 on the second contact assembly Figure 63 Step 2 Step 3 Using a Phillips screwdriver remove the four top inserted mounting screws from each arc chute Figure 64 Step 3 Shown without breaker for clarity Tool slot Step 4 Lift the arc chute up and out of the arc chamber Figure 65 Step 4 Step 5 Follow the same procedure to remove the remaining two arc chutes Step 6 Inspect the arc chutes for ob...

Page 62: ...ications and or changes The topics discussed here cover additional actions that relate to updating maintaining or repairing series NRX cir cuit breakers Some actions may not be able to be accom plished in the field In addition this information does not include most accessory devices that are covered by sepa rate instruction leaflets dedicated to individual devices Trip unit replacement To replace ...

Page 63: ... charged check SPRING CHARGED indicator Charge spring manually check voltage to electrical operator replace operator if faulty If equipped with undervoltage release undervoltage release is not energized or is faulty Remove left accessory tray containing UVR and retry closing operation if OK check voltage supply to UVR 85 replace UVR if faulty Circuit breaker locked in OPEN position Check reason fo...

Page 64: ...ERSTANDINGS AGREEMENTS WARRANTIES EXPRESSED OR IMPLIED INCLUDING WARRANTIES OF FITNESS FOR A PARTICULAR PURPOSE OR MERCHANTABILITY OTHER THAN THOSE SPECIFICALLY SET OUT IN ANY EXISTING CONTRACT BETWEEN THE PARTIES ANY SUCH CONTRACT STATES THE ENTIRE OBLIGATION OF EATON THE CONTENTS OF THIS DOCUMENT SHALL NOT BECOME PART OF OR MODIFY ANY CONTRACT BETWEEN THE PARTIES In no event will Eaton be respon...

Reviews: