background image

29

Instruction Leaflet

 IL0131088EN

gültig ab Mai 2015

IZMX mit Auslöseelektronik PXR - Montag

eanweisung für Einschaltauslöser, Melde

schalter Einschaltbereit und Motorantrieb

EATON 

www.eaton.com

Notes (Hinweise)g:

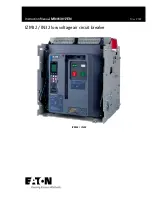
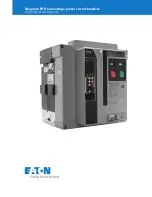
Summary of Contents for Power Defense IZMX40

Page 1: ...DILY INJURY OR PROPERTY DAMAGE WARNING THE INSTRUCTIONS CONTAINED IN THIS IL AND ON PRODUCT LABELS HAVE TO BE FOLLOWED OBSERVE THE FIVE SAFETY RULES DISCONNECTING ENSURE THAT DEVICES CANNOT BE ACCIDEN...

Page 2: ...ase until the circuit breaker is fully charged and the trip latch is reset The LCS is supplied with two leads and a small 2 pin connector 2 External The LCS used for remote indication consists of one...

Page 3: ...release is secured in its mounted position with one captive retaining screw Figure 6 Captive Mounting Screw Step 4 Section 2 Installation of Spring Release Proceed with the following eight steps Step...

Page 4: ...ry bundle secondary wires using industry accepted wire tie practices Step 8 Replace the front cover and secure it in place with the four mounting screws previously removed in Step 1 Section 3 Removal...

Page 5: ...p 2 Step 3 Carefully press the latch check switch down as shown until a snapping sound is heard This sound indicates the switch is properly seated Figure 10 Figure 10 Step 3 Step 4 If the latch check...

Page 6: ...is internally connected to the spring release unplug its connector from the 2 pin plug in the spring release Figure 12 2 Pin Plug for LCS Connection Step 2 Step 3 With the spring release positioned as...

Page 7: ...re provided in Section 2 of this document Figure 15 Motor Operator Motor Operator Location Table 3 Motor Operator Ratings NF Control Voltage Frequency Operational Voltage Range 85 110 Run Current Ampe...

Page 8: ...ocess Section 7 Installation of Motor Operator Proceed with the following 11 steps Step 1 Remove the four screws holding the front cover in place two on each side of the cover Figure 16 Step 1 Step 2...

Page 9: ...ft and position the motor operator so the black actuator lever rests on the pin and is settled in the mounted position IMPORTANT IT IS IMPORTANT THAT THE TWO KEYS ARE PROPERLY ALIGNED AND MATE EASILY...

Page 10: ...d 39 NF 51 RF from the connector plug by inserting the terminal extraction tool included in the externally wired latch check switch kit into the end of the connector plug as shown The tool releases th...

Page 11: ...ep 2 Locate the motor operator and disconnect the appropriate secondary connections as described in Section 9 Figure 27 Step 2 Step 3 Remove the motor operator from the circuit breaker by using an All...

Page 12: ...tabs together with small needle nose pliers and pulling out Figure 31 Figure 30 Tagged Leads Keyed Connector Leads and Connectors Figure 31 Release Tabs Connector Plug Removal Fixed Breaker Connectio...

Page 13: ...for detailed assistance with the removal Drawout Breaker Connections Proceed with the following three steps Step 1 Become familiar with the drawout secondary plug housing where secondary connections a...

Page 14: ...utton discharged Does not actuate No change Hold OPEN button charged Does not actuate No change Spring Release with External Latch Check Switch Testing Place the circuit breaker in the different posit...

Page 15: ...E DIESER GER TE UNTER GEF HRLICHER SPANNUNG UNSACHGEM SSER UMGANG MIT DIESEN GER TEN KANN DESHALB ZU TOD ODER SCHWEREN K RPERVERLETZUNGEN SOWIE ERHEBLICHEN SACHSCH DEN F HREN WARNUNG BEACHTEN SIE BEI...

Page 16: ...ausl sung quittiert worden ist Reset Der Meldeschalter Einschaltbereit wird mit zwei Anschlusskabeln und einem Verbindungsstecker geliefert 2 Der Meldeschalter Einschaltbereit f r die externe Signalis...

Page 17: ...3 Schritt 1 Schritt 2 Entfernen Sie die Frontabdeckung ziehen Sie dabei den Handhebel herunter um die Abdeckung leichter entfernen zu k nnen Abbildung 4 Schritt 2 Schritt 3 Ziehen Sie den Handhebel w...

Page 18: ...hl ssen wie in Abschnitt 9 ausgef hrt Nutzen Sie Kabelbinder wenn n tig Schritt 8 Bauen Sie die Frontabdeckung wieder an Abschnitt 3 Entfernen des Einschaltmagneten F hren Sie die folgenden Schritte a...

Page 19: ...Abbildung 9 Schritt 2 Schritt 3 Dr cken Sie den Meldeschalter Einschaltbereit vorsichtig in die Fassung hinein bis er einrastet Abbildung 10 Abbildung 10 Schritt 3 Sschritt 4 Wenn der Meldeschalter E...

Page 20: ...schalter Einschaltbereit intern an den Einschaltmagneten angeschlossen ist dann l sen Sie den Verbindungsstecker vom Einschaltmagneten Abbildung 12 2 Pin Verbindungsstecker f r Verbindung zu Meldescha...

Page 21: ...e 3 Technische Daten Motorantrieb NRX NF Bemessungssteuer speisespannung Frequenz Arbeitsbereich Anzugsspannung 85 110 Betriebsstrom Ampere Anlaufstrom Leistungsaufnahme VA Erforderliche Zeit f r das...

Page 22: ...ebaut sein dann entfernen Sie diesen wie in Abschnitt 8 beschrieben Wenn kein Motorantrieb eingebaut ist dann fahren Sie mit Schritt 4 fort Schritt 4 Um den Einbau einfach zu gestalten berpr fen Sie o...

Page 23: ...s des Schalters entsprechen Abbildung 19 ausgerichtet werden Nur in dieser Position l t sich der Motorantrieb montieren ACHTUNG ES IST WICHTIG DASS DER MOTORANTRIEB IN DER RICHTIGEN POSITION EINGESETZ...

Page 24: ...Korrektur der Leitungen vorgenommen werden Entfernen Sie die Steuerleitung NRX NF Position 39 NRX RF Position 51 mit dem Steuerleitungstrenner aus dem Verbindungsstecker des Meldeschalters Stecken Si...

Page 25: ...Schritte 1 und 2 Schritt 2 Trennen Sie die Verbindung mit den Steuerleitungsanschl ssen siehe Abschnitt 9 Abbildung 27 Schritt 2 Schritt 3 Entfernen Sie die Halteschrauben mit einem Inbusschl ssel zwe...

Page 26: ...ernt werden indem zwei Halteklemmen mit einer kleinen Zange zusammengedr ckt werden und der Stecker herausgezogen wird siehe Abbildung 31 Abbildung 30 Gekennzeichnete Leitungen Verbindungsstecker Steu...

Page 27: ...r cken und den Stecker herausziehen siehe Abbildung 31 Steuerleitungsverbindungen bei Schaltern in Ausfahrtechnik F hren Sie die folgenden Schritte aus Schritt 1 Machen Sie sich mit den Steuerleitungs...

Page 28: ...rneut einzuschalten Aus Taster gedr ckt halten entspannt Keine Funktionalit t Keine Ver nderung Aus Taster gedr ckt halten gespannt Keine Funktionalit t Keine Ver nderung Funktionspr fung des Einschal...

Page 29: ...nstruction Leaflet IL0131088EN g ltig ab Mai 2015 IZMX mit Ausl seelektronik PXR Montag eanweisung f r Einschaltausl ser Melde schalter Einschaltbereit und Motorantrieb EATON www eaton com Notes Hinwe...

Page 30: ...herein The information contained in this manual is subject to change without notice Haftungsausschluss und Haftungsbeschr nkungen Die Angaben Empfehlungen Beschreibungen und Sicherheitshinweise in di...

Reviews: