Eaton
®
Power Xpert
®
9395P-900 Installation and Operation Manual 164000501—Rev 12
95
44..99..22
TTB
B11 B
Baatttteerryy IInntteerrffaaccee C
Coonnnneeccttiioonnss
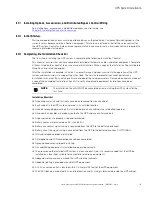
To install wiring to connections:
1.
Verify the UPS system is turned off and all power sources are removed. See
for shutdown instructions.
2.
Unfasten the front door latch and swing the door open (see
).
3.
Remove the door. Remove the retaining screw located inside the door at the bottom hinge pivot point,
then lift the door off. Retain the hardware for later use.
4.
To gain access to terminal block TB1 and the interface entry conduit landing plate, remove the screws
securing the top internal safety shield panel and remove the panel. Retain the hardware for later use (See
5.
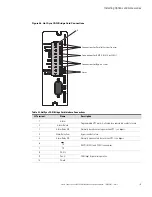
To locate the appropriate terminals and review the wiring and termination requirements, see paragraph
UPS System Power Wiring Preparation
, and
through
.
NOTE
When installing shunt trip and battery aux interface wiring to the UPS interface
terminals, conduit must be installed between the UPS and battery system.
6.
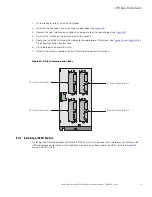
Remove the left interface entry conduit landing plate to drill or punch holes (see
).
7.
Reinstall the interface entry plate and install the conduit.
NOTE
The 9395P system can trip a maximum of six battery cabinets total. This applies to both
the 1085 standard and High Rate series batteries. If more than six battery cabinets in
total are needed in a separate UPM battery configuration, DO NOT hook up the shunt
trips.
8.
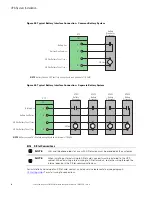
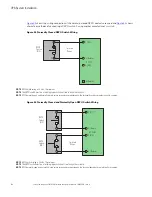
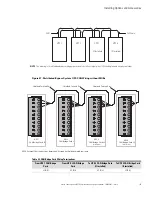
Route the shunt trip (optional) and battery aux wiring from the battery disconnects to the UPS cabinet. See
and
for UPS wiring access information and terminal locations.
9.
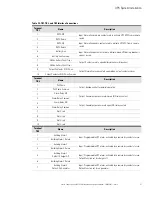
Connect the wiring to the TB1 terminals.
10. Reinstall the top internal safety shield panel and secure with the retained hardware.
11. Reinstall the front door removed in Step 3 and secure with the retained hardware.
12. If wiring X-Slot connections, proceed to paragraph
; otherwise, proceed to Step
13.
13. Close the door and secure the latch.


