Configuring the Card
Eaton Power Xpert Gateway PXGX PDP Card User’s Guide 164202122—Rev 1
30
Configuring HTTP and HTTPS
To configure the ports for Hypertext Transfer Protocol (HTTP) and HTTP over Secure Socket Layer (HTTPS):
1.
Select
Access Control
from the Configuration menu.
2.
Type the TCP port number for HTTP in the
HTTP port
field (the default is 80).
3.
Type the TCP port number for HTTPS in the
HTTPS port
field (the default is 443).
4.
To require a secure connection to the card, select the
Require HTTPS
check box.
5.
Click
Apply
and then
OK
to save the settings.
Configuring the Energy Management System (EMS)
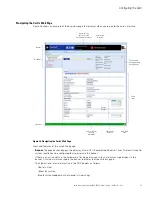
Use the Configuring EMS option to enter panel settings and save them easily to the PDP instead of configuring
through the front panel display.
To configure the EMS:
1.
Select
EMS
from the Configuration menu.
2.
Select a panel number and click
Retrieve
.
The data from the PDP displays in a panel map.
3.
Enter a panel name and specify the percentage of the rating to cause a warning and the percentage of the
rating to cause an alarm.
4.
PDU
/
RPP
only.
The odd numbered breakers display to the left and the even numbered breakers display to
the right. The phases for each breaker are also displayed.
(Optional) Name the breakers for easy identification. The breaker names are saved on the PXGX PDP Card,
but they are not supported on the LCD panel of the hardware.
In the Ganging column, select the type of breaker installed. Select
0 of 0
if the breaker is not configured.
Select
1 of 1
for a single-pole breaker,
1 of 2
for a two-pole breaker, or
1 of 3
for a three-pole breaker. The
fields automatically update for multi-phase breakers.
Set the rating for each breaker, set the limits for warnings and alarms based on a percentage of the rating,
and set the CT (current transformer) ratio.
5.
RPM
only.
The breakers display in a vertical column. The phases for each breaker are also displayed.
(Optional) Name the breakers for easy identification. The breaker names are saved on the PXGX PDP
Card, but they are not supported on the LCD panel of the hardware.
Set the limits for warnings and alarms based on a percentage of the rating and set the CT ratio.
Note:
If you make a mistake, click
Retrieve
again to restore the original values. The values are not saved
until you click Apply and then OK to save the settings.
6.
Click
Apply
and then
OK
to save the settings to the PXGX PDP Card.
7.
If you are configuring several panels, click
Cancel
when prompted to send the configuration down to the
EMS hardware. Repeat Step 2 through Step 6 for each panel.
8.
After completing all panels, click
OK
when prompted to send the configuration down to the EMS
hardware. The PXGX PDP Card transfers the panel data to the PDP. The transfer may take several
minutes.


