Page 7
9130 UPS-EN
ENGLISH
2. Installation
2.5
Connecting the internal battery
Do not make unauthorized changes to the UPS; otherwise, damage may occur to your
equipment and void your warranty.
Do not connect the UPS to utility until installation is completed.
To install the UPS:
1.
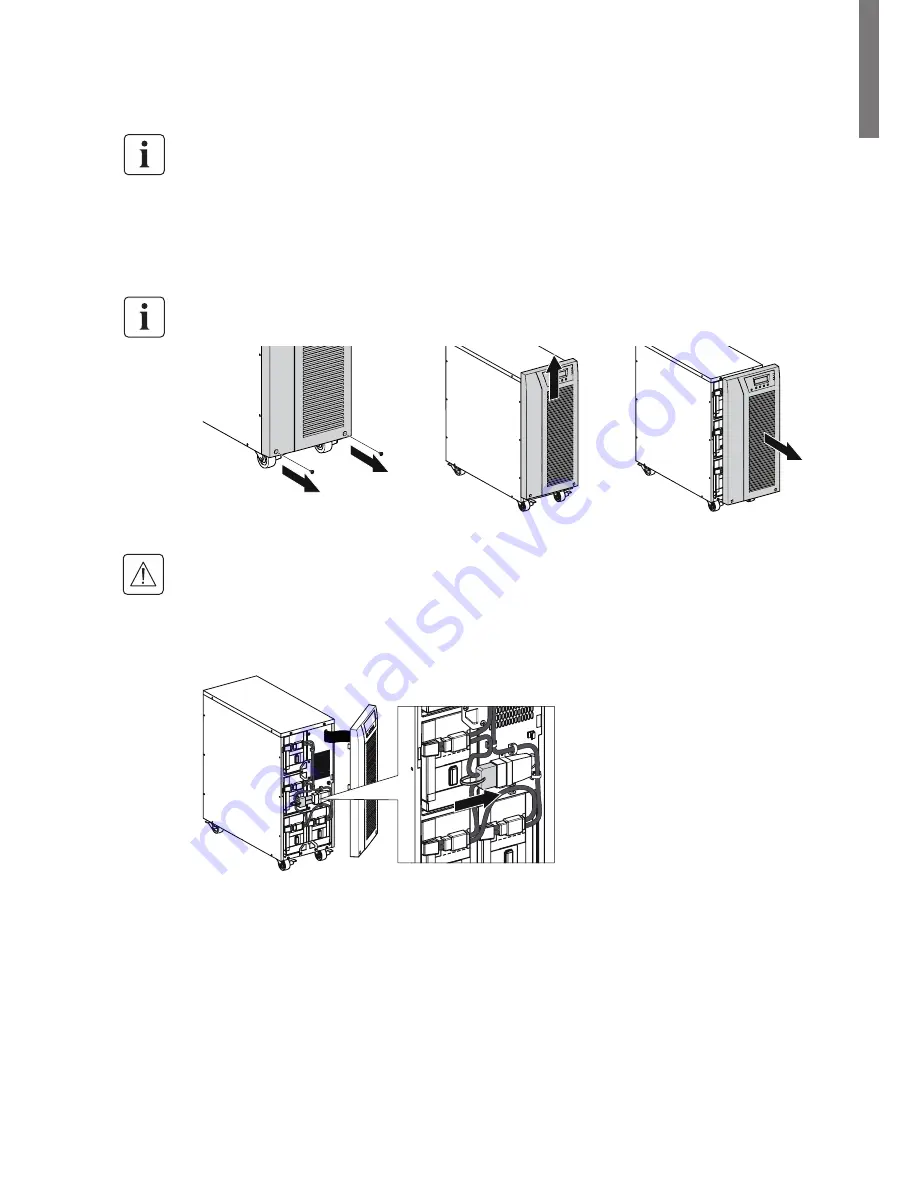
Remove the UPS front cover (
see figure 5
).
To remove the cover:
Remove the 2 fixing screws on the bottom of the cover.
Push upon the bottom of the cover and pull the cover toward you to unclip it from the cabinet.
A ribbon cable connects the LCD control panel to the UPS. Do not pull on the cable or
disconnect it.
Figure 5. Removing the UPS front cover.
A small amount of arcing may occur when connecting the internal batteries. This is normal and
will not harm personnel. Connect the cables quickly and firmly.
2.
Connect the internal battery connector (
see figure 6
).
Connect the black connectors together.
Press the two parts tightly together to ensure a proper connection.
Figure 6. Connecting the UPS internal batteries.
3.
Replace the UPS front cover.
To replace the cover, verify that the ribbon cable is protected, then insert the clips on the back of
the cover into the cabinet and push firmly to snap the cover into place.
Put back the 2 fixing screws on the bottom of the front.
4.
If you are installing power management software, connect your computer to one of the
communication ports or optional connectivity card (see page 21). For the communication ports, use
an appropriate cable (not supplied).
5.
If an remote power-off (disconnect) switch is required by local codes, see "Remote Power-off" (RPO)
on page 22 to install the RPO switch before powering on the UPS.
6.
If you are installing EBM(s), continue to the following section, "Connecting the EBM(s)". Otherwise,
continue to "Installation requirements" on page 8.


