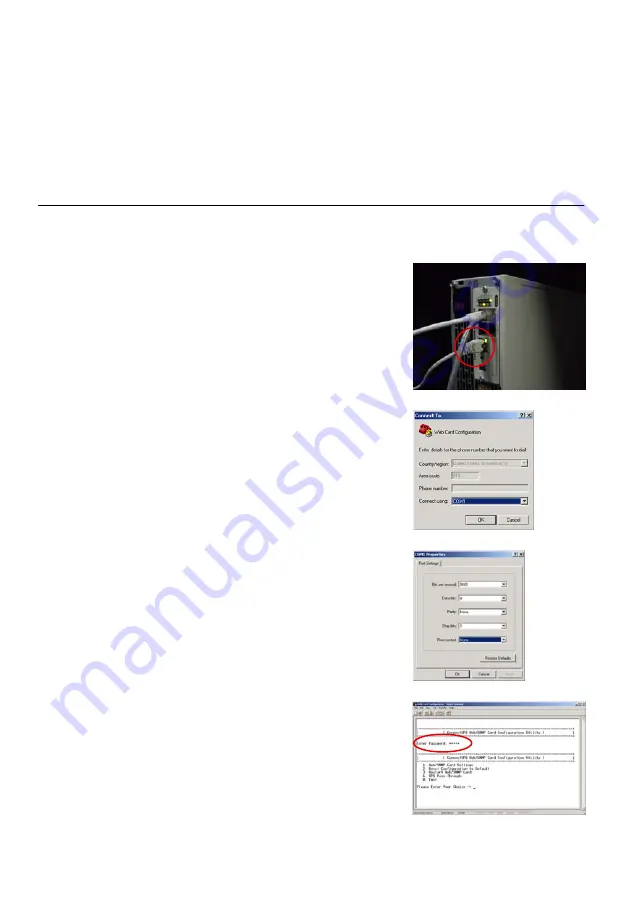
Figure 5.
Install Configuration Cable
Figure 6.
Select Connection
Figure 7.
Configure Port Settings
Figure 8.
Enter Configuration Password
Eaton
®
ConnectUPS
t
Web/SNMP Card (X and BD Models) Quick Start Instructions 164950185Rev B
www.eaton.com/powerquality
6
Section 2
Connect the Card
To connect the card to the computer and start the configuration:
1.
Plug the RJ-45 end of the supplied configuration cable
(labeled “PC”) into the COM port on the card (see Figure 5).
Verify that you have used the port labeled “COM.” The
other ports on the card will not work for configuration.
2.
Plug the other end of the serial cable into the serial COM port
on the computer.
3.
Open your terminal emulation program (such as
HyperTerminal).
4.
Select the appropriate serial connection (such as COM1). See
Figure 6.
5.
Set the serial line to 9600 baud, No parity, 8 data bits, 1 stop
bit, and no flow control (see Figure 7).
6.
Verify that the UPS is turned on.
7.
After a few seconds, press Enter. The Password prompt
appears (see Figure 8).
If the Password prompt does not appear, press Enter again.
If it still does not appear, check the following conditions:
S
Verify the serial line is set to 9600 baud, No parity, 8 data
bits, 1 stop bit, and no flow control.
S
If the serial line settings are correct, check the cabling to
verify all connections are secure.
S
Verify that your terminal program is on the correct
communication port for the serial connection.
S
Verify that the card has power (one or more LEDs on the
card are illuminated). The UPS should be turned on.
8.
Type your
password
(the default is
admin
) and press Enter.
The Main Menu screen appears.


