6
Eaton Rack Power Module
164201675—Rev 02
•
(2) wallmount brackets
•
(4) M4 flat-head screws
•
(8) M4 pan-head screws
If you ordered the Advanced Metering option:
•
Power Xpert Gateway Series 1000 Card (installed in the RPM-3U/3Ui)
•
Configuration (serial) cable
•
Ethernet cable
•
Power Xpert Gateway Series 1000 Card registration card
•
Power Xpert Gateway Series 1000 Card Quick Start Instructions
NOTE
For more detailed information, download the
Power Xpert Gateway Series 1000 Card
User's Guide from the Documentation page on the Power Xpert card once the card is
accessible on the user's network or from www.eaton.com/powerxpert.
22..55
C
Caabbllee TTrraayy IInnssttaallllaattiioonn ((O
Oppttiioonnaall))
NOTE
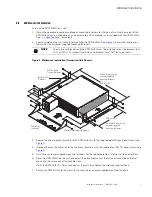
Follow these instructions only if you are installing an optional cable tray on an RPM-3U/
3Ui that will be installed in a rack. If you are mounting the RPM-3U/3Ui on a wall, install
the cable tray as part of the wallmount installation. See the following section,
“
.”
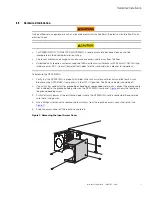
To install the cable tray on an RPM-3U/3Ui that will be installed in a rack:
•
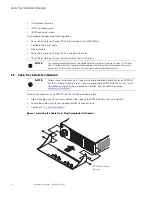
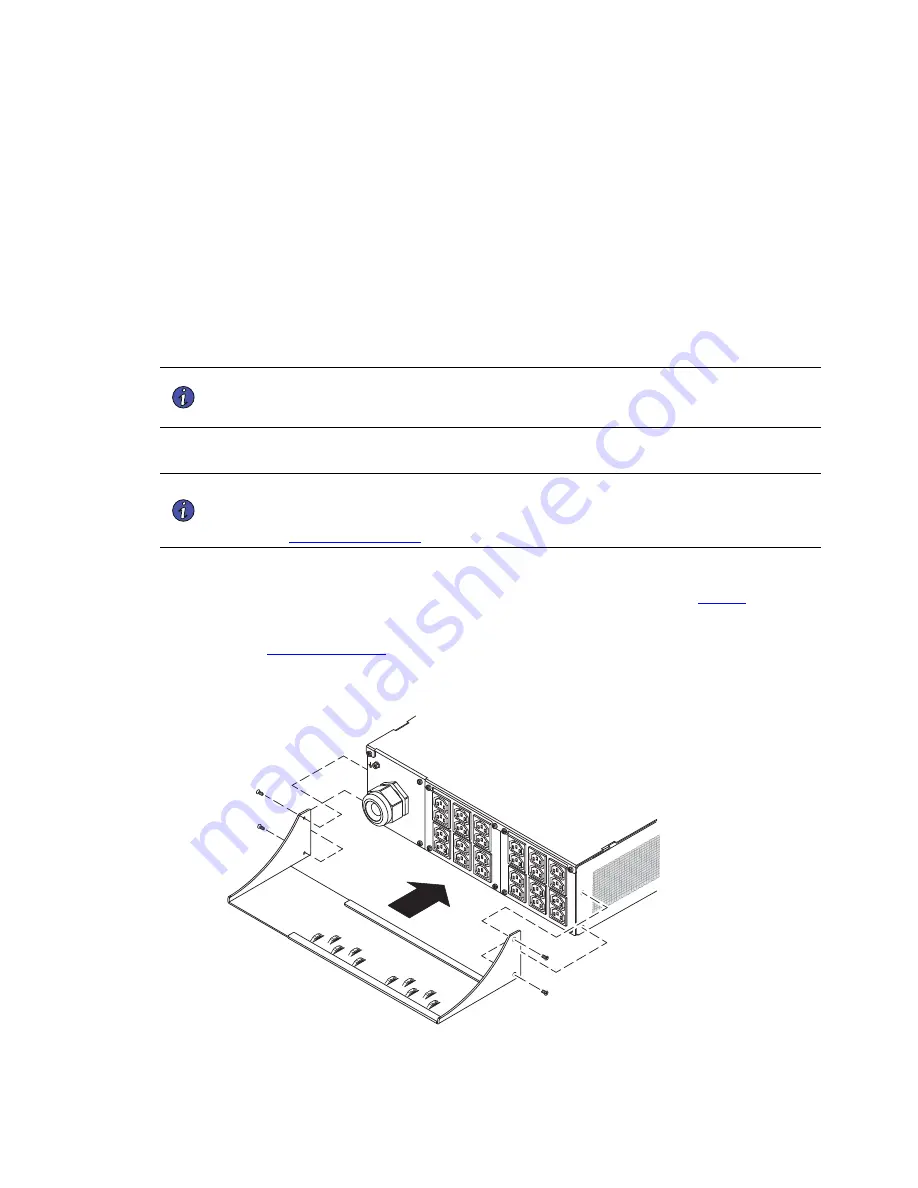
Align the cable tray with the screw holes on the sides of the RPM-3U/3Ui as shown in
.
•
Secure the cable tray with the supplied four M4 flat-head screws.
•
Continue to “
”.
Figure 1. Installing the Cable Tray ( Plug-Receptacle Unit Shown)
M4 Flat-Head Screws
(4 places)
Summary of Contents for RPM-3U
Page 1: ...p n 164201675 Revision 02 24 96A 208Y 120V 400Y 230V User s Guide Eaton Rack Power Module...
Page 4: ......
Page 6: ...vi Eaton Rack Power Module 164201675 Rev 02 Table of Contents...
Page 20: ...14 Eaton Rack Power Module 164201675 Rev 02 Advanced Metering Installation Optional...
Page 24: ...18 Eaton Rack Power Module 164201675 Rev 02 LED Display...
Page 32: ...26 Eaton Rack Power Module 164201675 Rev 02 Service and Support...
Page 34: ...16420167502 164201675 02...


