8
Eaton Rack Power Module
164201675—Rev 02
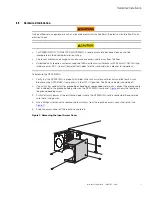
Verify that the number and type of mounting fasteners are appropriate for the type of wall and the weight
of the RPM-3U/3Ui, any installed options, and power cords. See “
” for weights.
22..77
R
Raacckk IInnssttaallllaattiioonn
NOTE
Access to the front, rear, and both sides of the rack is required to install the
RPM-3U/3Ui
in the rack.
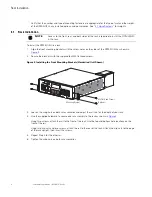
To install the RPM-3U/3Ui in a rack:
1.
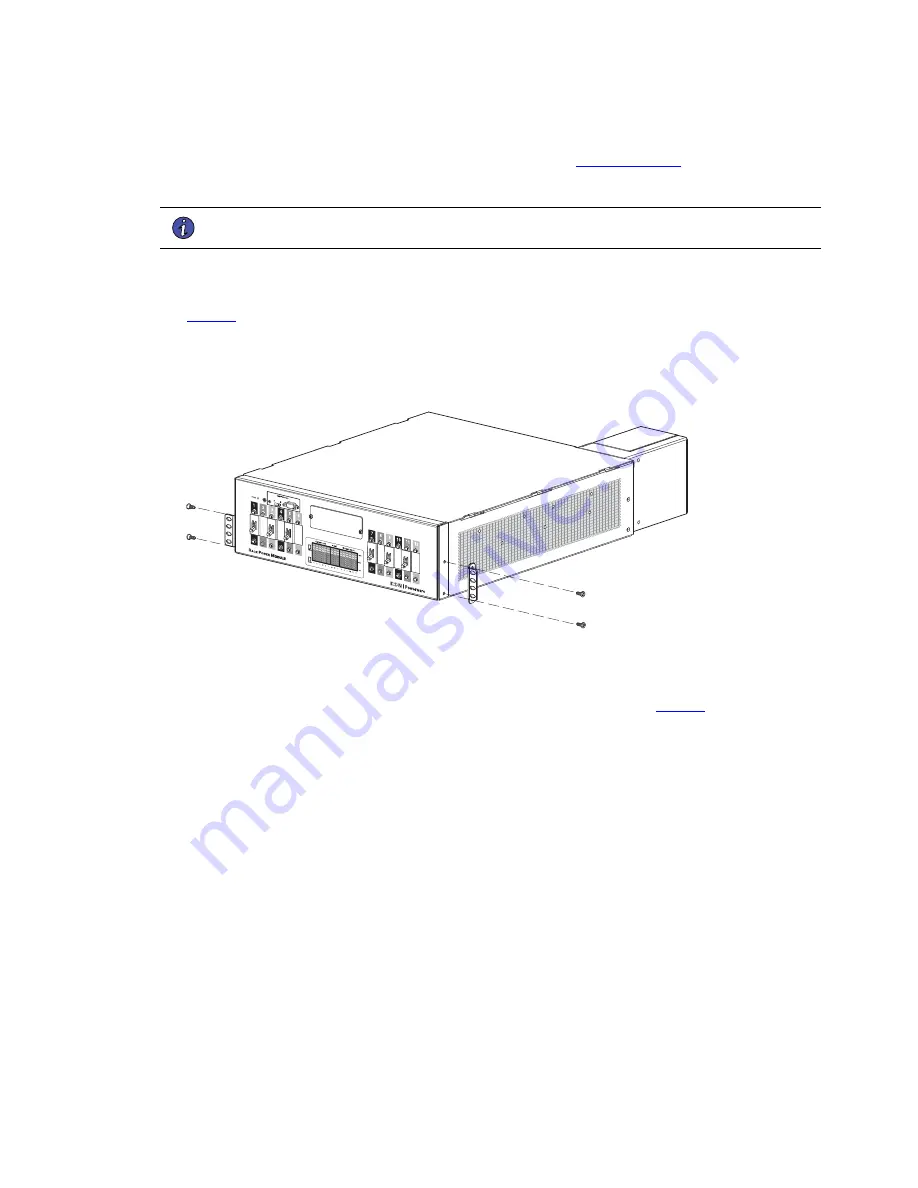
Align the front mounting brackets with the screw holes on the sides of the RPM-3U/3Ui as shown in
2.
Secure the brackets with the supplied four M4 flat-head screws.
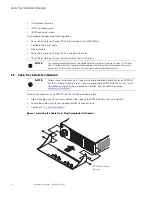
Figure 3. Installing the Front Mounting Brackets (Hardwired Unit Shown)
M4 Flat-Head Screws
(4 places)
Mounting Bracket
3.
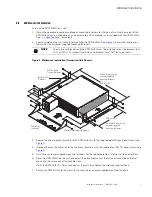
Loosen the wing nuts on both rail assemblies and adjust the rail size for the depth of your rack.
4.
Use the supplied hardware to secure one rail assembly to the rack as shown in
Using two screws, attach the rail to the front of the rack. Use the top and bottom hole locations on the
front of the rail.
Using two clip nuts and two screws, attach the rail to the rear of the rack. Attach the clip nuts to the edge
of the rack upright, then insert the screws.
5.
Repeat Step 4 for the other rail.
6.
Tighten the wing nuts on both rail assemblies.
Summary of Contents for RPM-3U
Page 1: ...p n 164201675 Revision 02 24 96A 208Y 120V 400Y 230V User s Guide Eaton Rack Power Module...
Page 4: ......
Page 6: ...vi Eaton Rack Power Module 164201675 Rev 02 Table of Contents...
Page 20: ...14 Eaton Rack Power Module 164201675 Rev 02 Advanced Metering Installation Optional...
Page 24: ...18 Eaton Rack Power Module 164201675 Rev 02 LED Display...
Page 32: ...26 Eaton Rack Power Module 164201675 Rev 02 Service and Support...
Page 34: ...16420167502 164201675 02...


