Eaton Rack Power Module
164201675—Rev 02
11
22..99
H
Haarrddw
wiirreedd IInnssttaallllaattiioonn
Only qualified service personnel (such as a licensed electrician) shall perform the electrical installation. Risk of
electrical shock.
•
For PERMANENTLY CONNECTED EQUIPMENT, a readily accessible disconnect device shall be
incorporated in the building installation wiring.
•
To prevent mechanical damage, coil and secure any excess cable away from the floor.
•
Hardwired units require a customer-supplied 125A upstream circuit breaker with 35 mm2 (1 AWG) wiring
rated minimum 90°C. Consult local electrical codes for other wire and circuit breaker rating options.
To hardwire the RPM-3U/3Ui:
1.
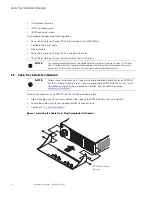
Verify that the RPM-3U/3Ui is properly installed in the rack or wallmount brackets and that each circuit
breaker on the RPM-3U/3Ui front panel is in the OFF (O) position. The Power indicator should be off.
2.
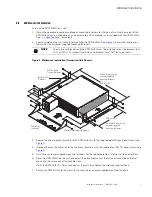
If your rack has conductors for grounding or bonding of ungrounded metal parts, connect the ground cable
(not included) to the ground bonding screw on the RPM-3U/3Ui rear panel.
shows the location of
the ground bonding screw.
3.
Switch off utility power at the distribution point where the RPM-3U/3Ui will be connected. Be absolutely
sure there is no power.
4.
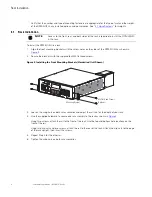
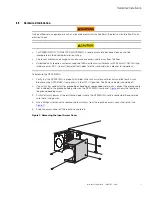
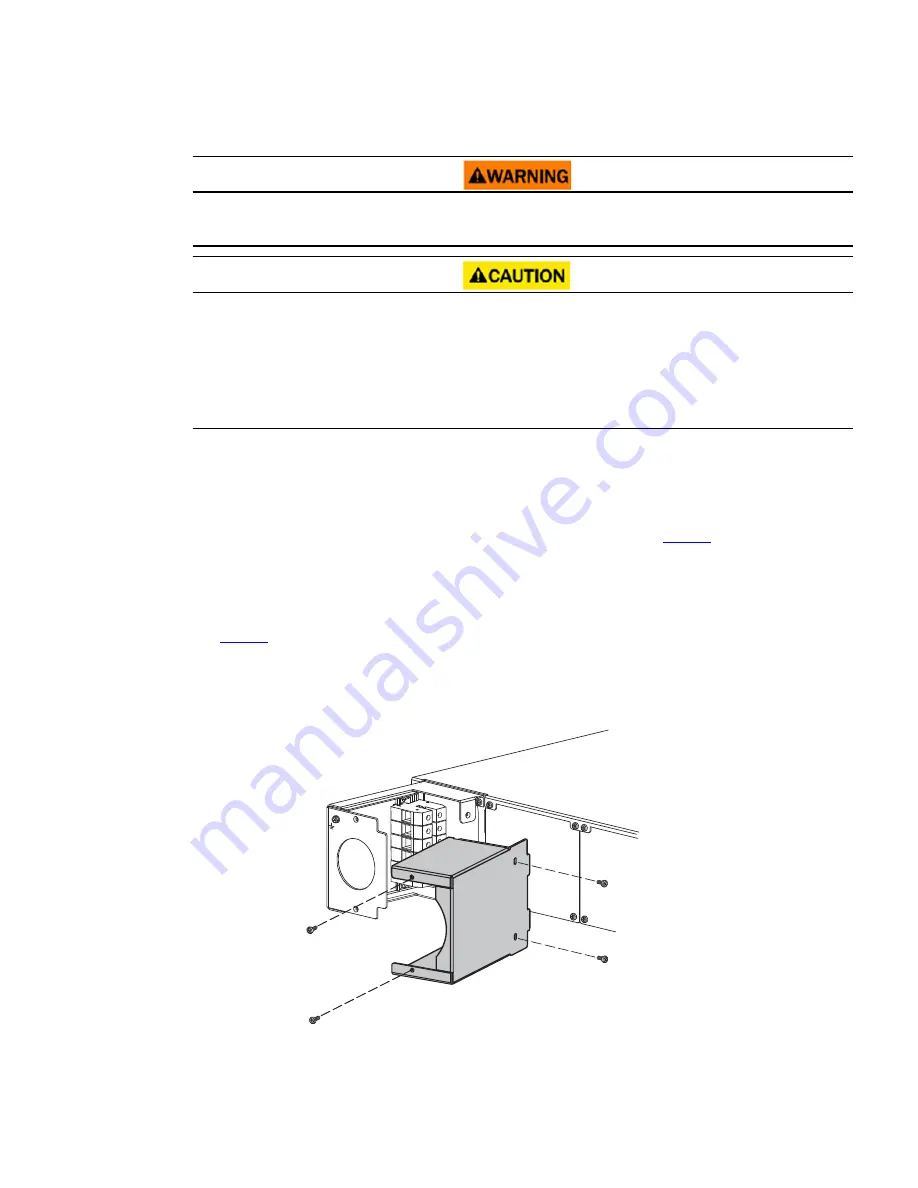
Use a Phillips screwdriver to remove the four screws from the input box access cover and retain (see
5.
Slide the access cover off the input box and retain.
Figure 7. Removing the Input Access Cover
Summary of Contents for RPM-3U
Page 1: ...p n 164201675 Revision 02 24 96A 208Y 120V 400Y 230V User s Guide Eaton Rack Power Module...
Page 4: ......
Page 6: ...vi Eaton Rack Power Module 164201675 Rev 02 Table of Contents...
Page 20: ...14 Eaton Rack Power Module 164201675 Rev 02 Advanced Metering Installation Optional...
Page 24: ...18 Eaton Rack Power Module 164201675 Rev 02 LED Display...
Page 32: ...26 Eaton Rack Power Module 164201675 Rev 02 Service and Support...
Page 34: ...16420167502 164201675 02...


