


12
www.eaton.com/wireless
call toll free: 1-800-663-8806
DM-R260-0056A R1
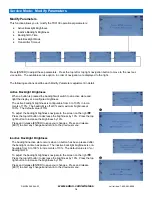
Service Mode
Service Mode is available on all TD3100 configurations and allows the operator to adjust the RCU’s characteris-
tics. For example, the LCD backlight can be adjusted to operate under various lighting conditions.
Once the RCU is put in to service mode a unique display screen is used to view or modify each option. Navigation
and option selection/modification is controlled by four buttons as described by the
Enter Service Mode
and
Naviga-
tion
.
The following sections describe each option in detail and how to execute or modify it.
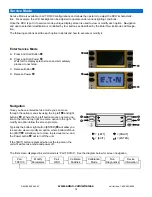
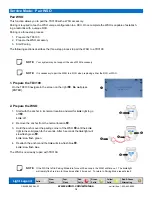
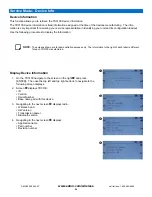
Enter Service Mode
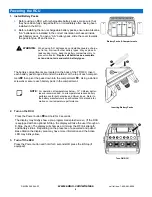
A. Press and Hold Button
B. Press and Hold Power
Wait for the display splash screen and immediately
proceed to next step.
C. Release Button
D. Release Power
Navigation
Once you have entered service mode you can move
through the option menus by using the top left
and right
buttons
. Where the top left button moves one menu op-
tion to the left and top right one menu option to the right. To
modify an option follow the screen prompts.
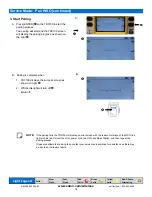
Typically the bottom right button [ENTER]
will allow you
to execute, view or modify an option, where bottom left but-
ton [EXIT]
will allow you to move to previous menu, and
the Power button
will turn off the unit.
If the [EXIT] button is pressed when at the top menu, the
unit will exit service mode and power off.
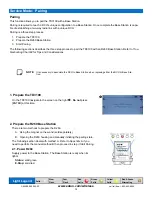
The first screen displayed in service mode is “Pair TD3100”. See the diagram below for screen navigation.
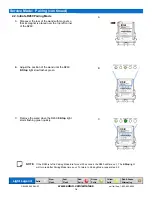
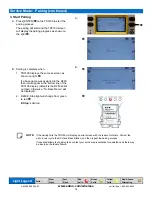
Pair
TD3100
Modify
Parameters
Pair
WSO
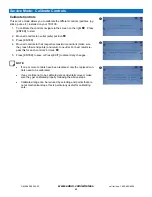
Calibrate
Paddles
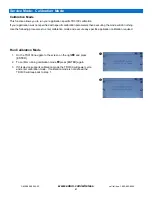
Calibration
Mode
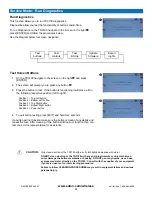
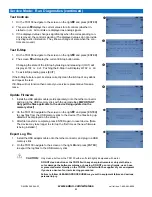
Run
Diagnostics
Device
Information
= [ENTER]
= [EXIT]
= [LEFT]
= [RIGHT]


