14
Tripp Lite by Eaton SmartOnline Series User Guide 614-21325—Rev 01
To install the cabinets:
1.
Place the UPS and external battery pack(s) on a flat, stable surface in their final location in the tower
orientation. If installing additional external battery cabinets, place them next to the UPS.
2.
Attach the mounting feet and stabilizer brackets.
3.
Adjust the LCD on the UPS.
4.
Rotate the logo on the UPS and external battery packs into the correct orientation.
5.
Attach the extended battery pack stabilizer brackets to each cabinet.
6.
Always keep 6" or 150 mm of free space behind the UPS rear panel for ventilation.
22..44..44
EExxtteennddeedd B
Baatttteerryy P
Paacckk TToow
weerr C
Coonnnneeccttiioonnss
NOTE
A small amount of arcing may occur when connecting an external battery pack to the
UPS. This is normal and will not harm personnel.
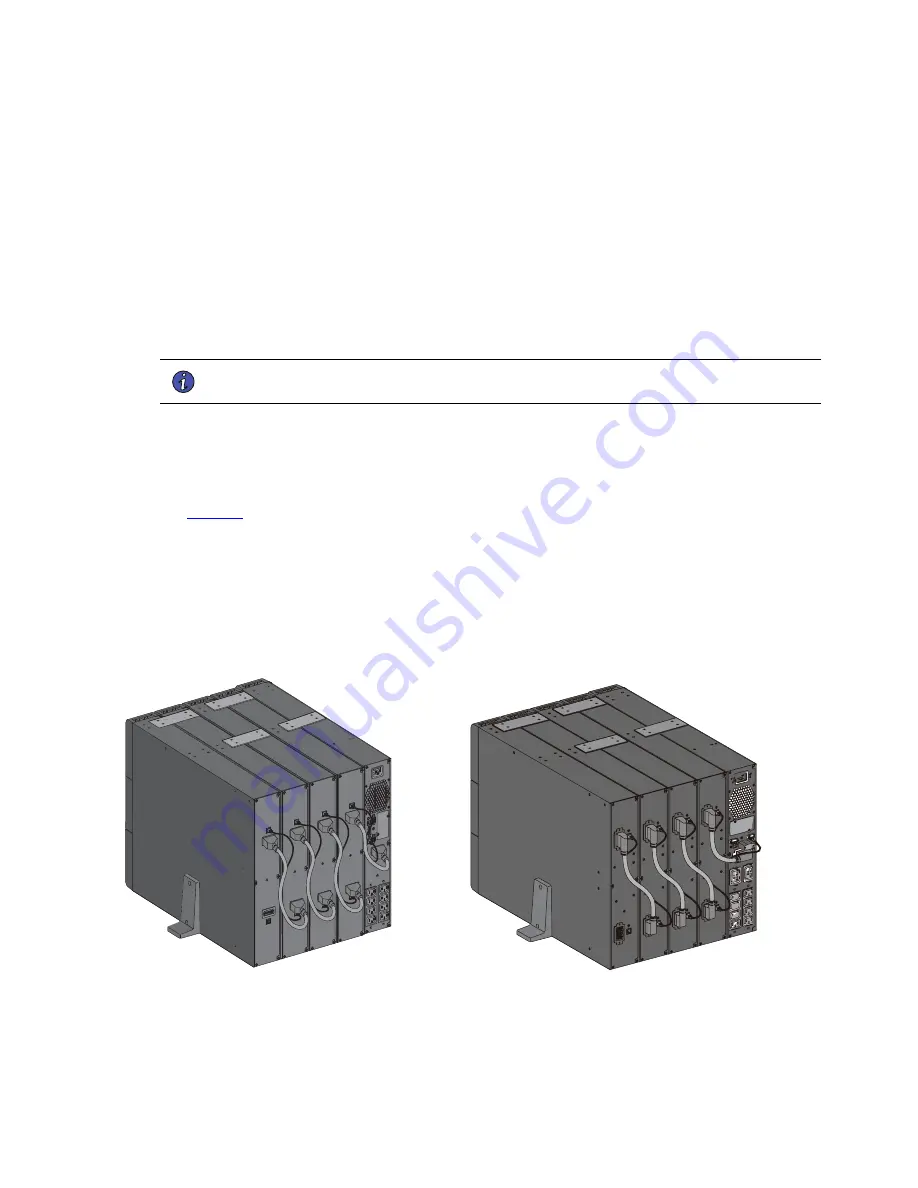
To connect the external battery packs to the UPS:
1.
Insert the external battery pack cable into the UPS battery connector quickly and firmly.
2.
Plug the external battery pack power cable(s) into the external battery connector(s) and repeat until all
external battery packs are connected. Up to 4 external battery packs may be connected to the UPS. See
.
3.
Verify that the external battery pack connections are tight and that adequate bend radius and strain relief
exist for each cable.
4.
Connect the battery detection cable(s) to the connector of the UPS and of the external battery pack(s).
Figure 13. Tower Mount External Battery Pack Connections
BP36RT / BP48RT
BP72RT
Summary of Contents for Tripp Lite SmartOnline Series
Page 12: ...6 Tripp Lite by Eaton SmartOnline Series User Guide 614 21325 Rev 01 Rear Panels...
Page 38: ...32 Tripp Lite by Eaton SmartOnline Series User Guide 614 21325 Rev 01 Retrieving the Event Log...
Page 48: ...42 Tripp Lite by Eaton SmartOnline Series User Guide 614 21325 Rev 01 Service and Support...
Page 54: ...614 2132501 614 21325 01...


