48
UPS 20-40 kVA, 230/400 V 50/60 Hz output
User’s Guide
1025358
Revision D
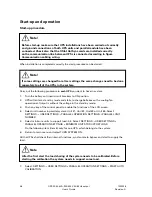
Start-up and operation
Start-up procedure
Note!
Before start-up make sure that UPS installations have been carried out correctly
and ground connections of both UPS units and parallel module have been
connected. Check also that the XSlot HotSync cards are installed correctly
an the communication line between UPSs is connected according to figure
Communication cabling wiring.
When installation is completed correctly the start procedure can be started.
Note!
If some settings are changed from User settings the same changes need to be done
separately to all of the UPSs in the system.
Carry out the following procedure to
each UPS
you want to have in system.
1. Turn the battery and input circuit breakers to ON position.
2. UPS will enter a stand-by mode and starts to charge batteries with a cooling fan
operational. Output is without the voltage in the stand-by mode.
3. Push any key of the control panel to enable the functions of the LCD screen.
4. Select unit number in parallel system: Unit #1, Unit #2, Unit #3 or Unit #4. Select:
SETTINGS
->
USER SETTINGS
->
PARALLEL OPERATION SETTINGS
->
PARALLEL UNIT
NUMBER
5. Select minimum units to support load: 0-4. Select: SETTINGS
->
USER SETTINGS
->
PARALLEL OPERATION SETTINGS
->
MINIMUM UNITS TO SUPPORT LOAD
Do the following item (item 6) only for one UPS, which belongs to the system.
6. Return to main menu and select TURN SYSTEM ON.
All the UPSs shall check their internal functions, synchronize to bypass and start to supply the
load.
Note
After the first start the load sharing of the system needs to be calibrated. Before
starting the calibration the system needs to support some load.
7. Select: SETTINGS
->
USER SETTINGS
->
PARALLEL OPERATION SETTINGS
->
START AUTO
CALIBRATION


