


Installation and Connection of the Machine
The machine is equipped with the following accessories:
-
Power supply 5 x 2.5 mm² connected to the rinsing machine
-
Supply hose with matching connectors and joints
-
Draining hose, 1 bottle carrier basket, 1 carrier for crates, 1 template
-
The following conditions described on the installation plan would be necessary
-
The water outlet should not be higher than 60 mm from the machine base (refer
to the illustration)
-
Fresh water tab of the machine at a ¾’’ supply line
-
Required water pressure 2.5 bars of permanent flow pressure
-
Three-phase power connection with components for current protection (magnetic-
thermal and differential). The main switch to be installed on (omnipolar section)
should have a clearance between the contacts equal or higher than 3 mm.
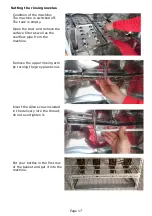
The machine has to be levelled with the height-adjustable feet.
Check the correct position inside the machine (basket slipway) with a spirit
level - not on the housing.
It is necessary that the door can be opened and closed with ease.
Remove the white protective film from the machine.
The water inlet, water outlet, power cable as well as the hose for the dosing
medium are pre-installed in the machine.
The machine has to be connected to a mains voltage of
400 volts 50 Hz
.
Attention:The installations need to be performed by a licensed
company!!
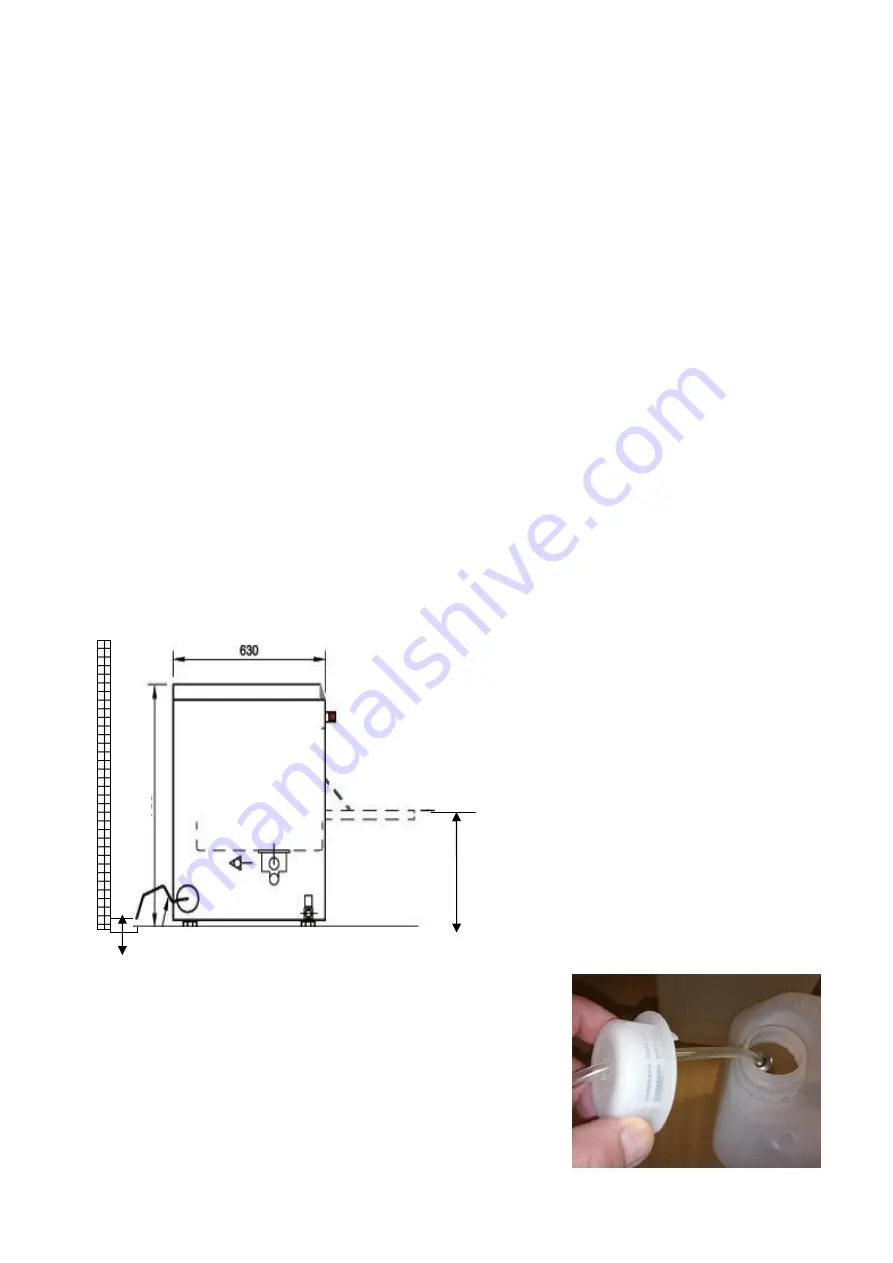
330 mm (Bottom to the inside edges of
the door)
Page 2
Lower edge water drain
max. 60 mm from the floor
Take the container with chemicals and drill a
hole of about 8 mm Ø into the lid
Insert the hose through the lid and fix the
weight and the suction filter on. Screw the lid
back onto the container.
The suction filter should lie at the bottom of the
container. Attention: There is a risk of acid
burns when using chemicals. Observe the
hazard warnings.
Summary of Contents for GS 21
Page 8: ...Page 8 ...
Page 9: ...Page 9 ...


