ERI
EN
16
www.eberg.eu
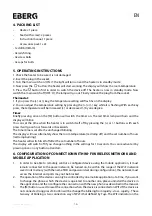
4. PACKING LIST
•
Heater: 1 piece
•
Feet (with screw): 2 pieces
•
Instruction manual: 1 piece
•
Accessories pack 1 set:
- 1x drill bit (8mm)
- 4x rails fitting
- 4x screw bolts
- 4x caps for bolts
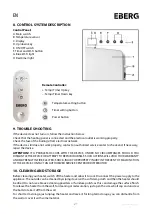
5. OPERATING INSTRUCTIONS
1. Check the heater to be sure it is not damaged.
2. Insert the plug in the socket.
3. Turn the main switch on (ON: I): the light will turn on and the heater is in standby mode.
4. Now press the button: the heater will start working. The display will show the room temperature.
5. Press the button first in order to switch the device off. The heater is now in standby mode. Now
switch the main switch off (OFF: O); the lamp will go out. Finally remove the plug from the socket.
Thermostat:
1. If you press the (+) or (-) key, the temperature setting will flash 5x on the display.
2. You can adjust the temperature setting by pressing the (+) or (-) key while it is flashing. With each key
press, the temperature will be increased (+) or decreased (-) by one degree.
Timer:
Briefly pressing once on the (M) button will switch the timer on. The red timer lamp will burn and the
display will blink.
You can set the time when the heater is to switch itself off by pressing the (+) or (-) buttons: with each
press it will go an hour forwards or backwards.
The timer time is set after 5x unchanged blinking.
The display will now alternately show the room temperature (red lamp off) and the set number of hours
(red lamp burning).
The heater will switch itself off after the set number of hours.
The display will switch off if you change nothing in the settings for 10 seconds. You can reactivate it by
pressing once on any button at random.
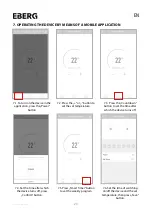
6. CONFIGURATION OF CONNECTION WITH WI-FI WIRELESS NETWORK AND
MOBILE APPLICATION
1.
In order to be able to remotely control a configured device using the mobile application, it must
remain connected to the power network, be turned on, be within the range of the Wi-Fi network
saved in its memory (with the name SSID and password set during configuration), this network must
access the internet and ports may not be blocked.
2.
The operation of the device can only be controlled by one mobile application at a time. If you want
to change the phone which the device is operated to another one, please uninstall the device in
the application and then configure the connection with the new phone as described in the manual.
3.
The (M) button is used to reset the connection when the device is connected on WiFi. If the device is
not connected, long press M button will be change the blinking from rapidly - slow - rapidly... These
two way of blinking is two connection way of Wi-Fi that defined by Tuya. The WiFi indicator on the

