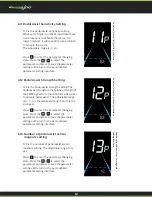
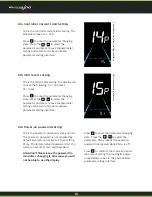
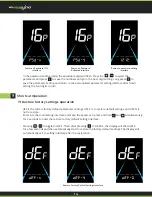
background image

4

Routine Operations

5

5.1 Power On/Off

5.2 Display Interface Switching

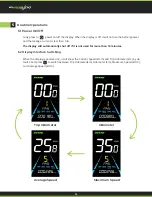
Long press to          power on/off the display. When the display is off, it will not use the battery power 

and the leakage current is less than 1uA.      

When the display is powered on, it will show the Current Speed (km/h) and Trip Odometer (km) by de-
fault. Short press        to switch between Trip Odometer(km), Odometer (km), Maximum Speed (km/h), 
and Average Speed (km/h).

The display will automatically shut off if it is not used for more than 10 minutes.

Trip Odometer

Average Speed

Odometer

Maximum Speed

Summary of Contents for NC-81F

Page 1: ...NC 81F USER MANUAL Electric Bike Display...

Page 2: ...Interface Switching 5 3 Walk Boost Mode and Cruise Enable Setting 5 6 Battery Level Display 5 4 Turning On Off Lights 5 7 Error Code Display 5 5 PAS Level Selection 5 8 Brake Prompt Display Personaliz...

Page 3: ...nce 8 2 Warranty Doesn t Cover 11 11 12 12 12 13 13 13 14 15 15 15 15 15 16 16 7 8 9 10 11 6 9 Start Up Setting 6 10 Drive Mode Setting 6 11 Pedal Assist Sensitivity Setting 6 14 Controller Current Li...

Page 4: ...ric bicycle Model NC 81F 36V 48V 52V power supply Display rated current 15mA Display maximum current 30mA Shutdown leakage current 1uA Supplied current to the controller 50mA Operating temperature 20...

Page 5: ...and total mileage Walk boost mode Light ON OFF Error code indicator Cruise control indicator optional Bluetooth connection indicator optional Personalized parameter settings e g wheel diameter speed...

Page 6: ...Odemeter MAx Speed Average Speed Speed Unit KM H MPH Light On Off Cruise PAS Level Value and Unit 4 2 Functional Areas 4 3 Button Definitions The NC 81F display is equipped with five buttons on the c...

Page 7: ...the leakage current is less than 1uA When the display is powered on it will show the Current Speed km h and Trip Odometer km by de fault Short press to switch between Trip Odometer km Odometer km Max...

Page 8: ...light becomes dim Press again to make the controller turn off the lights and the backlight restore brightness The whole bicycle is at stable speed Long press and the bicycle will enter the cruise stat...

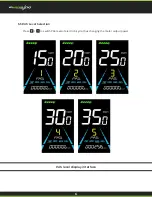
Page 9: ...6 5 5 PAS Level Selection Press to switch PAS level of electric bicycle thus changing the motor output power PAS level display interface...

Page 10: ...r code see Schedule 1 for a detailed definition of the error code When the error code appears on the display please troubleshoot the problem in time the electric bicycle will not be able to drive norm...

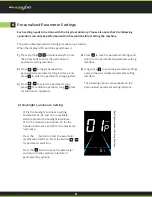
Page 11: ...press for subtraction operation 4 5 1 2 3 Press to save the parameter settings and return to the personalized parameter setting interface Long press to save the parameter settings and exit the person...

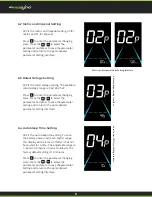
Page 12: ...fault setting is 10 minutes Press to enter the parameter changing state Press the to select the parameter and press to save theparameter setting and return to the personalized parameter setting interf...

Page 13: ...changing state Press the to select the parameter and press to save theparameter setting and return to the personalized parameter setting interface Press to enter the parameter changing state Press th...

Page 14: ...assist and electric Press to enter the parameter changing state Press the to select the parameter and press to save theparameter setting and return to the personalized parameter setting interface Pre...

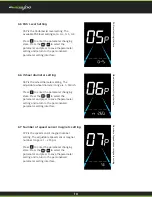
Page 15: ...nd 5 is the strongest 13P is the number of pedal assist sensor magnets setting The adjustable range 5 12 pcs Press to enter the parameter changing state Press the to select the parameter and press to...

Page 16: ...er PSd y means the power on password is activated while PSd n is off Press to comfirm the mode and enter the state of setting the four digits power on password or exit to the personalized parameter se...

Page 17: ...n password setting interface Shortcut Operation 7 7 1 Restore factory settings operation dEF is the restore factory default parameter settings dEF Y is to restore default settings and dEF N is not to...

Page 18: ...nector Female terminal Controller connector Quality Assurance and Warranty Wire connection diagram 8 9 8 1 Warranty info 9 1 Standard wire connection sequence 8 2 Warranty does not cover Yolin will of...

Page 19: ...and do not plug and unplug the display while it is powered on 10 Avoid bumping the display as much as possible Please do not change the parameter settings at will otherwise normal riding cannot be gu...

Reviews: