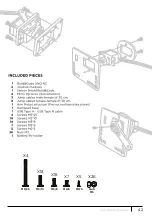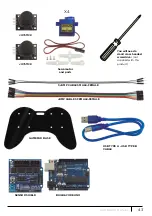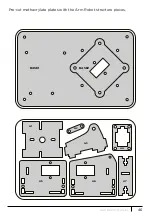
52
ARM ROBOT
MANUAL
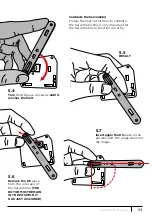
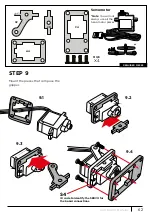
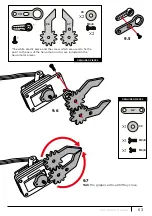
4.4
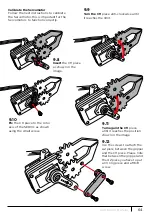
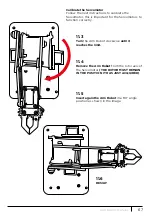
Turn
the D6 piece clockwise
until it reaches
the limit.
4.6
Remove the D6
piece
from the rotor axis of
the Servomotor
(THE
ROTOR MUST REMAIN
IN THE POSITION IT
HAS JUST ACQUIRED)
4.7
Insert again the D6
piece
in the position and angle
shown in the image.
4.8
Fix the D6
piece to the rotor axis
using the small screw included in
the Servomotor pieces.
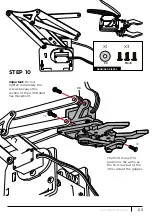
4.5
RESULT
Calibrate the Servomotor:
Follow the next instructions to calibrate the Servomotor, this is
very important for the Servomotors to function correctly.
Summary of Contents for Arm Robot
Page 2: ...LANGUAGE INDEX Choose the language SPANISH FRENCH ITALIAN ENGLISH DEUTSCHLAND...
Page 3: ...ndice Interactivo 3 ARM ROBOT MANUAL...
Page 5: ...5 ARM ROBOT MANUAL M3 25 M3 10 M3 8 M3 6 M2 5 TUERCA M3 X4 X18 X18 X7 X5 X26...
Page 38: ...38 ARM ROBOT MANUAL...
Page 39: ...39 ARM ROBOT MANUAL...
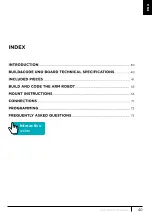
Page 40: ...Interactive index 40 ARM ROBOT MANUAL ENG...
Page 42: ...42 ARM ROBOT MANUAL M3 25 M3 10 M3 8 M3 6 M2 5 Nuts M3 X4 X18 X18 X7 X5 X26...
Page 75: ...75 ARM ROBOT MANUAL...
Page 76: ...76 ARM ROBOT MANUAL...
Page 77: ...Interactif sommaire 77 ARM ROBOT MANUAL FR...
Page 79: ...79 ARM ROBOT MANUAL M3 25 M3 10 M3 8 M3 6 M2 5 crous M3 X4 X18 X18 X7 X5 X26...
Page 112: ...112 ARM ROBOT MANUAL...
Page 113: ...113 ARM ROBOT MANUAL...
Page 114: ...Indice Interattivo 114 ARM ROBOT MANUAL IT...
Page 116: ...116 ARM ROBOT MANUAL M3 25 M3 10 M3 8 M3 6 M2 5 DADO M3 X4 X18 X18 X7 X5 X26...
Page 149: ...149 ARM ROBOT MANUAL...
Page 150: ...150 ARM ROBOT MANUAL...
Page 151: ...Interaktive Index 151 ARM ROBOT MANUAL DE...
Page 188: ...Arm Robot Electronic and programming kit Arm Robot and double joystick gamepad ebotics com...

