background image

    TABLE OF CONTENTS 

Rear Shock Preload Settings.................................... 9

6

Setting Rear Shock Preload...................................... 9

7

Setting Front Fork Preload....................................... 9

8

Adjusting Suspension Damping: ………................. 9

9

Setting Front Fork Rebound Damping...................... 9

9

Setting Front Fork Compression Damping..............

  100

Setting Rear Shock Rebound Damping....................

   101

Setting Rear Shock Compression Damping.............

   101

Recommended Suspension Settings: ……................ 10

2

MAINTENANCE AND LUBRICATION 

Safe Operating Maintenance: ………..................... 

10

3

Break-in Maintenance: ……………....................... 

10

3

Initial Service Check: ……………......................... 

10

4

First 620 Miles (1000 Kilometers)........................... 10

4

Service Intervals and Performance: ………............ 10

4

Engine Lubrication: ……………............................ 10

5

15

Summary of Contents for EBR 1190RS 2013

Page 1: ...2013 EBR OWNERS MANUAL EBR 1190RS MODEL Part Number C1000 2B6 1 ...

Page 2: ...ded may result in minor or moderate injury CAUTION used without the safety alert symbol Indicates a potentially hazardous situation which if not avoided may result in property damage EBR MOTORCYCLES ARE FOR ON ROAD USE ONLY This motorcycle is not equipped with a spark ar rester and is configured only to be ridden on the road Off road usage in certain areas could be ille gal Please obey local laws ...

Page 3: ...3 ...

Page 4: ...ience The unique styling first rate handling and exciting community delivered to you by EBR will redefine the way you think about motorcycle riding Please read through this manual carefully and thoroughly and consider the Notes emphasized by the EBR Staff Take care of yourself and your EBR motorcycle in all the ways detailed in this manual and the thrill of the road will stretch before you Our goa...

Page 5: ...r this valuable service It is recommended that any emission system maintenance be performed by an authorized EBR dealer Your EBR motorcycle conforms to all applicable U S Federal Motor Vehicle Safety Standards and U S Envi ronmental Protection Agency regulations effective on the date of manufacture When enjoying your EBR motorcycle be sure to ride safely defensively and within the limits of the la...

Page 6: ...lve the issue with the dealership you can contact the EBR Customer Service Department by calling 262 642 1627 or write to Attention EBR Customer Service Department EBR LLC 2799 Buell Drive East Troy WI 53120 USA For efficient service and support please have the following information available to give to the Customer Service Representative Your name address and phone number Motorcycle V I N Vehicle...

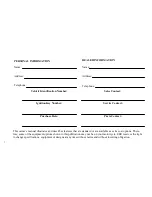
Page 7: ...rvice Contact Parts Contact This owner s manual illustrates and describes features that are standard or are available as extra cost options There fore some of the equipment options shown in this publication may not be on your motorcycle EBR reserves the right to change specifications equipment or designs at any time without notice and without incurring obligation 7 ...

Page 8: ...les 25 Rules of the Road 32 Accessories and Cargo 33 IDENTIFICATION Vehicle Identification Number EBR 1190RS 36 Labels 40 SPECIFICATIONS Specifications 2013 EBR 1190RS 41 Tire Data EBR 1190RS 43 45 Gasoline Blends 45 Fuel 47 Catalytic Converter 47 8 ...

Page 9: ...Switch 48 Turning Motorcycle On Off 49 Parking the Motorcycle 50 Locking Steering 50 Hand Controls 51 Electric Starter Switch 52 Engine OFF RUN Switch 52 Throttle Control Grip 52 Clutch Hand Lever 53 Horn Switch 53 Headlamp High Low Beam Switch 53 Passing Lamp Switch 53 Turn Signal Switch 54 9 ...

Page 10: ...een 54 Tachometer 54 Menu button 56 button 56 View button 57 Indicator Lamps 57 Warning Lamps 57 Odometer Functions Digital Speedometer 59 Odometer 59 Clock 59 Information line 59 Trip Odometers 59 Service Odometer 59 Low Fuel Odometer F trip 60 10 ...

Page 11: ...Lamps 60 Neutral Indicator Lamp 60 High Beam Indicator Lamp 60 Warning Lamps 60 Low Fuel Lamp 60 Check Engine Lamp 60 Engine Over Temperature Lamp 61 Oil Pressure Lamp 61 Low Battery Voltage Lamp 62 Initialization Sequence 62 Lap timer 63 11 ...

Page 12: ...LE OF CONTENTS Gear Shift Lever 65 Adjusting Foot Controls 68 Adjusting Hand Levers 69 Fuel Filler Cap 70 Removal 70 Installation 70 Refueling 71 Steering Head Lock 72 Sidestand 72 Rear View Mirrors 73 12 ...

Page 13: ... in 75 The First 600 Miles 1000 Kilometers 75 Pre Riding Checklist 76 Sidestand Interlock 78 Starting the Engine 78 Stopping The Engine 79 Shifting Gears 80 Getting Started 80 Upshift Acceleration 80 Downshift Deceleration 81 Seat 83 Rider Seat Removal 83 85 Rider seat installation 13 ...

Page 14: ...nitions 88 Fine Tuning Suspension 89 Changes in Load 89 Ride Quality Enhancement 90 Enhanced Steering Quickness 90 Chassis Control Handling Enhancement 91 Cold Weather Riding Less Than 65 F 18 C 91 Suspension Tuning 95 Changes in Load 94 Adjusting Preload 96 14 ...

Page 15: ...g 99 Setting Front Fork Compression Damping 100 Setting Rear Shock Rebound Damping 101 Setting Rear Shock Compression Damping 101 Recommended Suspension Settings 102 MAINTENANCE AND LUBRICATION Safe Operating Maintenance 103 Break in Maintenance 103 Initial Service Check 104 First 620 Miles 1000 Kilometers 104 Service Intervals and Performance 104 Engine Lubrication 105 15 ...

Page 16: ...e 121 Engine Oil Change 110 Drain Oil 110 Change Filter Cartridge 112 Fill with Oil 112 Winter Lubrication 113 Fuel Filter 114 Final Drive Chain 114 Chassis Lubrication 118 Front Fork Oil 118 Air Filter 119 Coolant Level 121 Storage 120 Hydraulic Clutch 124 General 128 Checking Fluid Level 128 Brakes 130 16 ...

Page 17: ...on 133 When To Replace Tires 133 Shock Absorber 134 Spark Plugs Coils 134 Ignition Timing 134 Idle Speed 134 Wheel Bearings 135 Coolant Type 121 Voltage Regulator 135 Battery General 136 Type 136 Voltmeter Test 136 Cleaning and Inspection 136 Charging 138 17 ...

Page 18: ...g 140 Positive Cable 140 Negative Cable 140 Headlamp 141 Headlamp Alignment 143 Headlamp Adjustment 144 Horizontal Adjustment 144 Vertical Adjustment 145 COSMETIC MAINTENANCE Polishing 125 Minor Scratch Removal 126 Major Scratch Removal 126 18 ...

Page 19: ...enance 124 Wheel Care 127 Frame and Swingarm Care 127 TROUBLESHOOTING Troubleshooting General 146 Engine 146 Starter Does Not Operate or Does Not Turn Engine Over 146 Engine Turns Over But Does Not Start or Starts Hard 146 Starts But Runs Irregularly or Misses 147 A Spark Plug Fouls Repeatedly 147 19 ...

Page 20: ...ubrication System 148 Engine Leaks Oil From Cases or Hoses 148 Electrical System 148 Alternator Does Not Charge 148 Alternator Charge Rate is Below Normal 148 Transmission 148 Transmission Shifts Hard 148 Transmission Jumps Out of Gear 149 Clutch Slips 149 Clutch Drags or Does Not Release 149 Clutch Chatters 149 Brakes 149 20 ...

Page 21: ... EBR 151 California Evaporative Emission Controls 2013 Models 152 EPA Noise Regulations in the United States 152 Warranty Service Information 153 Reporting Safety Defects in the United States 153 NHTSA Statement 153 NHTSA Contact Information 154 LIMITED MOTORCYCLE WARRANTY 2013 EBR MOTORCYCLE LIMITED WARRANTY 155 12 Months Unlimited Miles 155 Duration 155 21 ...

Page 22: ...Y 2013 EBR NOISE CONTROL SYSTEM LIMITED WARRANTY 158 Other Rights 159 Recommendations for Required Maintenance 159 2013 EBR EMISSION CONTROL SYSTEM LIMITED WARRANTY 160 Other Rights 161 Recommendations for Required Maintenance 161 MAINTENANCE SCHEDULING Regular Service Intervals EBR 1190RS 162 Service Literature EBR 1190RS 167 22 ...

Page 23: ...TABLE OF CONTENTS Notes 23 ...

Page 24: ...TABLE OF CONTENTS Notes 24 ...

Page 25: ...ance instruc tions in this manual Follow these basic rules for your personal safety Know and respect the Rules of the Road See SAFETY FIRST Rules of the Road EBR Models You should also read and know the contents of the Motorcycle Handbook for your State Before starting the engine check for proper operation of brake clutch shifter and throttle controls Inspect fuel and oil supply Do not use afterma...

Page 26: ...sure and hot coolant and steam can escape which could cause severe burns Allow engine to cool before servicing cooling system Cooling fans operate automatically even when the ignition switch is off Keep hands away from fan blades Contact with a rotating fan blade can result in minor or moderate injury CAUTION At operating temperature the radiator and oil cooler contain hot fluids Contact with the ...

Page 27: ...e United States the Motorcycle Safety Foundation offers beginning and experienced rider safety courses Call 949 727 3227 for information Travel at speeds appropriate for road and conditions and never travel faster than posted speed limit Excessive speed can cause loss of vehicle control which could result in death or serious injury Know your limits as a rider Do not exceed the legal speed limit or...

Page 28: ...avate an unstable condition NOTE New riders should gain experience under various con ditions while riding at moderate speeds Operate your motorcycle defensively Remember a motorcycle does not afford the same protection as an automobile in an accident One of the most common accident situations occurs when the driver of the other vehicle fails to see or recognize a motorcycle and turns left into the...

Page 29: ...maintenance operations as indicated in the regular service interval table Lack of regular maintenance at the recommended inter vals can affect the safe operation of your motorcycle which could result in death or serious injury Do not operate motorcycle with loose worn or dam aged steering or suspension systems Contact an EBR dealer for repairs Loose worn or damaged steering or suspension component...

Page 30: ...ratings can affect stability and handling which could result in death or serious injury Be sure tires are properly inflated balanced and have adequate tread Inspect your tires regularly and see an EBR dealer for replacements Riding with ex cessively worn unbalanced or under inflated tires can adversely affect stability and handling which could result in death or serious injury GVWR is the sum of t...

Page 31: ...posts terminals and related acces sories contain lead and lead compounds and other chemicals known to the State of California to cause cancer and birth defects or other reproductive harm Wash hands after handling Observe warnings on labels of brake and battery flu ids and cleaning compounds Failure to follow warn ings could result in death or serious injury Consult an EBR dealer regarding any ques...

Page 32: ...at it is your turn Always use your signals when preparing to pass a vehi cle change lanes turn or stop All traffic signs including those used for the control of traffic at intersections should be obeyed promptly SLOW DOWN signs near schools and caution signs at railroad crossings should always be observed and your actions governed accordingly When intending to turn signal at least 100 ft 30 m befo...

Page 33: ...an posted speed limit Ex cessive speed can cause loss of vehicle control which could result in death or serious injury Operating this motorcycle in a reckless manner in cluding performing wheelies stoppies or burnouts can lead to parts failure or loss of control which could result in death or serious injury Improper loading of cargo or installation of accesso ries can affect motorcycle stability a...

Page 34: ...e motorcy cle as low as possible to minimize the change in the mo torcycle s center of gravity Distribute weight evenly on both sides of the vehicle and do not load bulky items too far behind the rider or add weight to the handlebars or front forks Be sure cargo is secure and will not shift while riding Pe riodically recheck load Accessories that change the operator s riding position can increase ...

Page 35: ...t Ex cessive speed can cause loss of vehicle control which could result in death or serious injury Do not use aftermarket parts which can adversely affect performance and handling Removing or alter ing factory installed parts can adversely affect per formance and could result in death or serious injury Keep tail lamp visible at all times Do not place ob jects on license plate bracket blocking tail...

Page 36: ...VEHICLE IDENTIFICATION NUMBER EBR 1190RS MODELS 36 ...

Page 37: ...riginally manufactured in the United States 2 Motorcycle Type A Superbike 3 Body Type A Full faired 4 Market A USA B Europe C Japan D Canada 5 Net Brake Horse Power A 25 50 HP B 51 75 HP C 76 100 HP D 101 150 HP F 151 175 HP G 176 200 HP Table 1 EBR V I N Breakdown 2013 Models 37 ...

Page 38: ...VALUES 6 Engine Type 2 2 cylinder 7 Check Digit Must calculate for each VIN 8 Model Year C 2012 D 2013 9 Plant Location E East Troy 10 Sequential Production Number 000001 000002 000003 Etc Table 1 EBR V I N Breakdown 2013 Models 38 ...

Page 39: ...NOTES 39 ...

Page 40: ...ure 2 for safety and maintenance labels which were on the vehicle when new If removed replace ment labels may be purchased for your motorcycle Refer to Table 2 for label descriptions General Warning label Frame Modification Warning label Battery Warning label Fuse and Relay label 40 ...

Page 41: ...certification in some markets due to timing of this documents publication and printing variance in testing methods and or vehicle differences Cus tomers seeking officially recognized regulatory specifications for their vehicle should refer to certification doc uments and or contact their respective dealer or distributor 41 ...

Page 42: ...Table 5 Drivetrain Table 6 Cooling System Table 7 Liquid Capacities Table 8 Sprocket teeth 42 ...

Page 43: ...Table 9 Transmission Gear Ratios Table 11 Tires Table 10 Bulb Chart 43 ...

Page 44: ...Table 12 Dimensions Table 13 Weights 44 ...

Page 45: ... 11 Always check tire pres sure before riding Tire pressures are listed with tires cold GASOLINE BLENDS EBR Your EBR motorcycle was designed to get the opti mal performance and efficiency using unleaded gaso line Most gasoline sold is blended with alcohol and or ether to create oxygenated blends The type and amount of alcohol or ether added to the fuel is important to consider Do not use gasoline ...

Page 46: ...ncy of your bike If you experience one or more of these problems we recommend you try a different brand of gasoline or higher octane rating FUEL Refer to Table 14 Always use a good qual ity unleaded gasoline Octane ratings are usually found on the pump Avoid spills Slowly remove filler cap Do not fill above bottom of filler neck insert leaving air space for fuel expansion Secure filler cap after r...

Page 47: ...rs Do not operate catalytic converter equipped vehicle with engine misfire If you operate the vehicle under this condition the exhaust will become abnormally hot which can cause vehicle damage including emis sion control loss Use only unleaded fuel in catalytic converter equipped motorcycles Using leaded fuel will damage the emission control system 47 ...

Page 48: ...BR 1190RS The automatic on headlamp feature provides in creased visibility of the rider to other motorists Be sure headlamp is on at all times Poor visibility of rider to other motorists can result in death or serious injury The ignition headlamp key switch controls the distribu tion of power to the ignition and lamps The key can be removed when the key switch is in the OFF LOCK or PARKING LAMP po...

Page 49: ...ment Cluster will sweep the ta chometer and calibrate at zero RPM B The Instrument Cluster will perform a bulb check All indicator lamps and warning lamps will illu minate briefly Check that all lamps are lit C The LCD screen will illuminate and display the time odometer in its last selected mode before key off digital speedometer and an introductory text mes sage NOTES The check engine lamp may r...

Page 50: ...t cluster are illuminated The front and rear turn signals can also be activated 1 Turn handlebars full left 2 Turn the key counterclockwise to the PARKING LAMP position to turn on the parking lamps Key may be removed Locking Steering Head Instructions on locking the steering head 1 Turn the handlebars full left 2 Turn the key counterclockwise to the LOCK position Key may be removed Parking Lamp Lo...

Page 51: ...Figure 4 Figure 5 Clutch Lever Passing Lamp Switch High Beam Low Beam Turn Signal Switch Turn Signal Cancel Button Horn Switch Run OFF Electric Starter Switch Throttle Control Grip 51 ...

Page 52: ...ngine OFF RUN switch to turn on ignition pow er NOTES The Engine OFF RUN switch must be in the RUN position to start or operate the engine The Engine OFF RUN switch should be used to shut the engine off 1 To shut the engine off push the top of the OFF RUN switch to the ignition OFF position 2 See Figure 3 Turn the ignition headlamp key switch counterclockwise to the OFF position to turn the igniti...

Page 53: ...r to engage clutch Horn Switch See Figure 4 The horn is operated by pushing on the horn switch located on the left hand controls Headlamp High Low Beam Switch The headlamp high low beam switch is located on the left hand controls The switch has two positions to acti vate the headlamps high or low beams See Figure 4 Press the top of the headlamp high low beam switch to activate the high beam Press ...

Page 54: ...e green left or right turn signal indicator will flash when the turn signals are in use INSTRUMENT CLUSTER LCD Screen See Figure 6 The LCD Screen displays a digital speed ometer odometer clock and text messages The LCD screen is illuminated when the ignition key switch is in the ON or PARKED position See CONTROLS AND INDICATORS LCD Screen Tachometer See OPERATING RECOMMENDATIONS section Do not ope...

Page 55: ...uel Warning Light Amber Turn signal Indicator Green High Beam Indicator Blue MENU Button Button MEM Button VIEW Button Neutral Light green Oil Pressure Warning Light Red Check Engine light Amber Figure 6 55 ...

Page 56: ...o display The selected display will resume after a key off key on cycle Menu Button The MENU button is used to configure the information shown on the instrument cluster With the engine run ning press the MENU button to scroll through the following screens Backlight ON OFF 12 24 hour clock setting Clear Service Counter Units F C Miles KPH Imperial Diagnostics Historic codes plus live data Clear Lap...

Page 57: ...e conditions that require attention View button The VIEW button is used to select the information being displayed on the right side center of the LCD screen With the engine running press the VIEW button to scroll through the following screens Main odometer RPM Battery voltage Lap time See Figure 6 Press the VIEW button to scroll to the infor mation you want to display The selected display will res...

Page 58: ...Speedometer Odometer Or RPM Battery Voltage Lap Time Gear Indicator Clock Information Line Shift Light RPM Engine Temperature Figure 7 58 ...

Page 59: ...rd mileage until reset Use the trip odometers for tracking distances between two points or for determining gasoline consumption be tween fuel stops Each trip odometer can be reset sepa rately using the following steps 1 Turn the ignition key to ON 2 Click the button to display the desired trip odom eter TRIP 1 or TRIP 2 3 Press and hold the MEM switch until the selected trip odometer resets to 0 0...

Page 60: ... indicator lamp illumi nates when the headlamp high beam is on WARNING LAMPS See Figure 6 Three warning lamps are located on the edges of the instrument cluster The warning lamps illuminate briefly when the ignition is first turned on If lamps remain lit begin flashing or turn on after the initial diagnostics the vehicle has a condition that will require attention When a warning lamp is illuminate...

Page 61: ... to starting engine Conditions that could cause the red oil pressure indicator lamp to illuminate during operation include Incorrect oil level or diluted oil Oil line clogged with ice and sludge preventing oil circulation in freezing weather Grounded oil pressure switch wire Faulty oil pressure switch Damaged or improperly operating bypass valve Improper oil pump operation If the oil pressure indi...

Page 62: ...ce 1 Rider turns key to ON position 2 The instrument cluster performs self diagnostics and bulb check The indicator lamps and warning lamps illuminate briefly 3 The LCD screen displays the digital speedometer clock odometer in its last selected mode and introductory text message 4 Rider starts engine 5 If any errors are detected when starting the vehicle an error message is displayed on the LCD sc...

Page 63: ...lap timer requires a motorcycle mounted receiver and a trackside beacon These are sold separately 1 Activate by scrolling to the Lap Time mode by press ing the button 2 Review all lap time info by pressing OK MEM button 3 When the dash detects a lap signal with the receiver from a beacon it will automatically switch and show lap time The lap time will be shown for 10 seconds and then switch to sho...

Page 64: ...Table 15 64 ...

Page 65: ...t gear position that can be found by pushing the gear shift lever full stroke downward Neutral is located between first and second gear The green neutral indicator lamp on the dash will illuminate when the transmission is in neutral To shift from first gear to neutral lift the gear shift lev er one half of its full stroke When the motorcycle is standing still and the engine is not running shifting...

Page 66: ...Figure 24 Upshift Pattern Figure 25 Downshift Pattern 66 ...

Page 67: ...the rear wheel brake and is located on the motorcycle s right side Operate the rear brake pedal with the right foot The front brake hand lever controls the front wheel brake and is located on the right handlebar Operate the hand lever with the fingers of the right hand Do not position fingers between hand control lever and handlebar grip Improper hand positioning can impair control lever operation...

Page 68: ...r preference 1 See Figure 26 Loosen the fastener from the toe peg 1 2 Slide toe peg to the desired position Adjust the peg angle as needed 3 Tighten the fastener to 48 72 in lbs 5 4 8 1 Nm NOTE To adjust the rear brake master cylinder pushrod see an EBR Dealer Figure 26 Adjustment bolt 68 ...

Page 69: ... hand lever position rotate steering to full left and full right positions to make certain the lev ers do not contact the fairing Do not position fingers between hand control lever and handlebar grip Improper hand positioning can impair control lever operation and cause loss of vehi cle control which could result in death or serious injury Figure 27 Adjustment knob 69 ...

Page 70: ...surized air in fuel tank can force gasoline to escape through filler tube Gas oline is extremely flammable and highly explosive which could result in death or serious injury Do not spill fuel onto the motorcycle while refueling Immediately wipe up fuel spills on your motorcycle Fuel can cause damage to cosmetic surfaces Removal 1 See Figure 28 Push down on center lever 2 Turn counterclockwise 3 Li...

Page 71: ...Maximum Fill Level is at Bottom of Baffle Figure 29 71 ...

Page 72: ...tion Move handle bars slightly until locked 4 Attempt to turn the handlebars to the right to verify that the steering head is locked Handlebars should not turn 5 Remove key from the ignition headlamp key switch This motorcycle does NOT have a locking sidestand Park the motorcycle on a level firm surface An un balanced motorcycle can fall which could result in death or serious injury The sidestand ...

Page 73: ...e of mirror will look smaller and farther away than they actually are Use caution when judging the size or relative distance of objects seen in rear view mirrors Always adjust the rear view mirrors to clearly reflect the area behind the motorcycle before riding To adjust mir rors gently press on edge of mirror glass to rotate mirror within the housing Do not change the position of the mirror housi...

Page 74: ...mission in neutral Run ning an engine at high RPM can result in engine damage Do not exceed the maximum safe RPM specified be low under any conditions Exceeding the maximum safe engine RPM can result in equipment damage The maximum recommended safe engine speed is 11500 RPM Have the engine checked regularly and keep it well tuned Do not coast for long distances with the engine off or idling The tr...

Page 75: ...anship that are built into your new motorcycle will give you optimum performance right from the start To allow your engine to wear in its critical parts we recommend that you observe the riding rules provided below for the first 600 mi 1000 km Adhering to the se suggestions will help future durability and perfor mance 1 During the first 300 mi 500 km of riding keep the engine speed below 6000 rpm ...

Page 76: ...fore riding your motorcycle at any time make a gen eral inspection to be sure it is in safe riding condition Stop the engine when refueling or servicing the fuel system Do not smoke or allow open flame or sparks near gasoline Gasoline is extremely flammable and highly explosive which could result in death or seri ous injury Avoid spills Slowly remove filler cap Do not fill above bottom of fill pla...

Page 77: ...eely with out binding 6 Check steering for proper operating by turning the handlebars through the full operating range Handle bars should turn smoothly without binding Be sure tires are properly inflated balanced and have adequate tread Inspect your tires regularly and see an EBR dealer for replacements Riding with ex cessively worn unbalanced or under inflated tires can adversely affect stability...

Page 78: ...n with the sidestand down while the transmission is in neutral and the clutch is re leased STARTING THE ENGINE Shift transmission to neutral before starting engine to prevent accidental movement which could result in death or serious injury The engine should be allowed to run slowly for 30 60 seconds This will allow the engine to warm up and let oil reach all surfaces needing lubrication Failure t...

Page 79: ...n neutral indicator lamp on dash panel and verify neutral position by rolling mo torcycle forward and rearward 6 Press electric starter switch to operate starter 7 Release electric starter switch when engine starts NOTE The motorcycle will have a reduced RPM range until the engine is warmed up If you read this section and still have questions about the correct operation of your motorcycle talk to ...

Page 80: ...utch lever slowly to engage the clutch and at the same time gradually open the throttle in one smooth motion Upshift Acceleration See figure 32 Gear shift pattern is first gear down next five gears up Engage second gear after the motorcycle has reached the appropriate shifting speed Refer to Table 15 1 Close the throttle 2 Disengage the clutch pull clutch lever in 3 See Figure 31 Lift the gear shi...

Page 81: ...s higher than those listed in the Changing Gear Speeds table Shifting to lower gears when speed is too high can cause the rear wheel to lose traction and lead to loss of vehicle control which could result in death or serious injury See Figure 32 Gear Shift pattern is first gear down next five gears up Refer to table 16 for shifting speeds Figure 31 Gear Shift Lever Table 15 81 ...

Page 82: ...ower gear while partially closing the throttle so the engine accelerates as soon as the clutch lever is released NOTES Disengage the clutch completely before each gear change Partially close the throttle so the engine will not drag when clutch is again engaged clutch lever is released Shift to neutral before stopping engine Shifting mechanism can be damaged by shifting gears while engine is stoppe...

Page 83: ...th to Fourth 40 65 Fourth to Third 30 50 Third to Second 20 30 Second to First 10 15 Table 16 Downshift Deceleration Gear Speeds SEAT Rider Seat Removal 1 See Figure 34 Remove four T30 TORX screws 3 Slide tail cowl assembly rearward to remove 83 ...

Page 84: ...Figure 34 Seat Fasteners Seat removal 4 T 30 screws 84 ...

Page 85: ... with rear of tail 3 Rotate front of cowl down while sliding it forward 4 See Figure 36 Overlap the battery pan with the cowl as the cowl is rotated down and slid forward 5 Install seat with four T30 TORX screws and tighten to 85 94 in lbs 9 6 10 6 Nm Figure 35 Figure 36 Overlap Battery Pan and Tail 85 ...

Page 86: ...ausing loss of control which could result in death or serious injury Do not carry a passenger Seat cowl is a cosmetic part that is not designed to support passenger weight Operating motorcycle with a passenger seat ed on seat cowl can adversely affect passenger safety which could result in death or serious injury 86 ...

Page 87: ...when you take delivery of your motorcycle If the preload adjustment is correct and you have the rebound and compression damping set at the factory recommended points the motorcycle should handle and ride properly Damping is set at the factory for the average solo rider under nor mal riding conditions The rider may make adjustments to compensate for individual riding styles and varying road condi t...

Page 88: ... by the weight of the motorcycle Rider Sag The amount the rear shock and fork springs are compressed by the weight of the rider on the motor cycle Preload An adjustment made to the rear shock and front fork springs to limit vehicle and rider sag to a standard percentage of total suspension travel Compression and rebound adjusting valves may be damaged if too much force is used to turn the ad justo...

Page 89: ...adversely affect stabil ity and handling which could result in death or seri ous injury Changes in Load Changes in the load carried requires changes in the pre load settings Carrying less weight than was used for setting up the suspension requires decreasing the amount of preload Increasing the load carried requires adding more preload Do not exceed the motorcycles Gross Vehicle Weight Rating GVWR...

Page 90: ...ounterclockwise by 1 4 1 2 turn Enhanced Steering Quickness The response to steering input quickness may be enhanced by adjusting the vehicles front rear ride height This adjustment effectively decreases the vehicles rake angle This is achieved by adjusting the preload to increase front sag and reduce rear sag 1 Adjust suspension for rider weight See OPER ATION Factory Suspension Settings 2 Reduce...

Page 91: ...g the damping adjuster positions when operating outside the normal ambient tempera ture range of 65 95 F 18 35 C 1 Adjust suspension for rider weight See OPERA TION Factory Suspension Settings 2 Reduce front and rear compression damping and re bound damping by turning adjuster counterclockwise Do not operate motorcycle with loose worn or dam aged steering or suspension systems Contact an EBR Deale...

Page 92: ...92 Notes ...

Page 93: ...93 Notes ...

Page 94: ... Suspension Settings Begin the pro cess by putting all the damping settings as recommended Ride the motorcycle over a variety of surfaces and bumps at different speeds If the suspension is set properly the vehicle will feel stable and comfortable CHANGES IN LOAD Changes in the load carried requires changes in the preload settings Carrying less weight than was used for setting up the suspension req...

Page 95: ...ut doesn t return to ground quickly after bumps This is more pronounced over a se ries of bumps and is often referred to as packing down Reduce rebound damping Bike bottoms in dips or while cornering Increase compression damping Bike has excessive brake dive Harsh ride particularly over washboard surfaces Reduce compression damping Bumps transfer through handlebars or seat Suspension seems not to ...

Page 96: ...n the infor mation plate located on the frame steering head Do not pull a trailer with a motorcycle Pulling a trailer can cause tire overload reduced braking efficiency and adversely affect stability and handling which could re sult in death or serious injury ADJUSTING PRELOAD See OPERATION Suspension Adjustments for more in formation about suspension tuning Rear Shock Preload Settings See Figure ...

Page 97: ...preload by turning the black preload adjuster knob See OPERATION Factory Suspension Settings for factory suspension settings table 19 A Rotate adjuster clockwise to increase preload B Rotate adjuster counter clockwise to decrease pre load Shock Pre load Adjuster 97 ...

Page 98: ...is the minimum preload setting Both forks should be adjusted equally Forks that are not properly adjusted can lead to loss of control which could result in death or serious injury 2 Turn the preload adjuster nut clockwise the recom mended amount specified in OPERATION Factory Suspension Settings table 19 98 ...

Page 99: ... NOTE Adjust suspension to the recommendation if possible but never force adjusters beyond their mechanical stops Setting Front Fork Rebound Damping 1 See Figure 39 Using a screwdriver turn the rebound adjuster screw clockwise until it stops This is the maxi mum rebound damping setting 2 Turn the adjuster screw counterclockwise the recom mended amount specified in table 19 Rebound Preload 99 ...

Page 100: ...sing a screwdriver turn the compression damping adjuster clockwise until it stops This is the maximum compression damp ing setting 2 Turn the adjuster counterclockwise the recom mended amount specified in table 19 Figure 40 left Fork Compression Preload 100 ...

Page 101: ...Turn the rebound adjuster counterclockwise the recom mended amount specified in table 19 Setting Rear Shock Compression Damping 1 See Figure 41 Turn the compression adjuster clockwise until it stops This is the maximum compression damping setting 2 Turn the compression adjuster counterclockwise the rec ommended amount specified in table 19 Rebound Compression 101 ...

Page 102: ...10 86 95 9 11 11 9 11 11 210 230 95 104 10 10 10 10 10 10 230 250 104 113 11 9 9 11 9 9 250 270 113 122 12 8 8 12 8 8 270 to GVWR 122 to GVWR 13 7 7 13 7 7 Front spring preload is set by loosening adjuster counterclockwise until it stops at minimum then counting the num ber of turns in to get to the desired setting All damping adjuster settings are done by tightening adjuster counter clockwise to ...

Page 103: ...ulic lines and fittings for leaks Also check brake pads and discs for wear 5 Cables for fraying or crimping and free operation 6 Engine oil level 7 Engine coolant level 8 Clutch fluid level and condition Hydraulic lines and fittings for leaks 9 Headlamp tail lamp brake lamp and directional lamp operation BREAK IN MAINTENANCE NOTE New Motorcycle initial service is required to keep your new motorcyc...

Page 104: ... 5 Check clutch fluid level Check hydraulic lines and fittings for leaks 6 Check oil lines for leaks 7 Check tire pressure and inspect tread 8 Check throttle cable adjustments 9 Check operation of all electrical equipment and switches 10 Check coolant level in expansion tank Check tightness of hose clamps Clean radia tor and oil cooler fins 11 Check drive chain and sprockets 12 Check sidestand 13 ...

Page 105: ...cold extreme heat very dusty environ ment very bad roads through standing water etc you should perform the regular maintenance inter vals more frequently to ensure the safe operation of your motorcycle Failure to maintain your motorcy cle could result in death or serious injury ENGINE LUBRICATION Engine oil is a major factor in the performance and ser vice life of the engine Always use the proper ...

Page 106: ...dealer to change back to 100 percent AMSOIL Do not switch lubricant brands indiscriminately be cause some lubricants interact chemically when mixed Use of inferior lubricants can damage the en gine Advanced Synthetic Motorcycle Oil Viscosity Product Lowest Ambient Temperature Cold Weather Starts Below 50 F 10 C AMSOIL SAE 15W50 RD50QT EA Above 40 F 4 C Excellent AMSOIL SAE 10W30 RD30QT EA Below 40...

Page 107: ...ion Do not overfill oil tank Doing so can result in oil car ryover to the air box leading to equipment damage and or equipment malfunction Do not switch lubricant brands indiscriminately Some lubricant brands will interact with each other chemically when they are mixed together Use of in ferior lubricants can damage the engine Oil Level Cold Check Perform engine oil level Cold Check as follows An ...

Page 108: ...0 minutes and 5 miles 8 kilometers 2 Park the motorcycle on the sidestand while idling and remove the oil fill plug 3 Idle the engine one 1 minute Shut off the engine Figure 44 filler plug 4 Read the oil level in the sight gauge a Below the lower line Add oil in 3 4 fl oz 0 1 L increments until the level is between the upper and low er lines Refer to Table 20 b Between the upper and lower lines It...

Page 109: ...Figure 45 Oil Site Glass Location Right side in front of clutch Oil Site Glass Figure 46 Oil Site Glass Level Indication Low Level Line High level Line 109 ...

Page 110: ... clutch and transmis sion 1 Place a suitable container under the motorcycle 2 See figure 44 Unscrew and remove fill plug from oil fill hole Replace o ring if torn or damaged 3 See Figure 47 Remove the left engine oil drain plug located in the crank case Wipe any accumulated debris from magnetic tip on drain plug and replace the aluminum washer 4 See Figure 48 Remove the right oil drain plug locate...

Page 111: ...Figure 47 Engine oil drain plug left side Figure 48 Engine oil drain plug Right side Drain Plug Drain Plug 111 ...

Page 112: ... filter cartridge into cover until properly seated C Install oil filter cover with filter onto crankcase with two screws Tighten screws to 97 in lbs 11 Nm 9 Fill oil through filler hole using recommended oil from Table 20 Always verify proper hot oil level in sight glass Do not overfill I Oil capacity with filter change is approximately 3 3 U S quarts 3 1 liters J Oil capacity without filter chang...

Page 113: ...urns off after a few seconds when engine speed is 1000 RPM or above 14 Check oil filter cover drain plugs hoses and oil cooler for leaks 15 Check hot oil level See MAINTENANCE AND LUBRICATION Checking Oil Level Figure 49 WINTER LUBRICATION In colder climates the engine oil should be changed often If motorcycle is used frequently for short trips less than 15 miles 24 kilometers in ambient tempera t...

Page 114: ...be blown out through the crankcase breather If the engine is not run frequently and now allowed to warm up this water will mix with the engine oil to form a sludge that will harm the engine FUEL FILTER The fuel pump assembly located in the frame fuel cell includes a fuel filter The fuel filter does not require any maintenance CHAIN DRIVE See figure 52 Adjust chain to 35 mm 2 mm as shown To adjust ...

Page 115: ...Figure 50 Axle Figure 51 Chain tension adjustors Rear Axle Tension Adjustors Ensure same distance on both sides of swingarm 115 ...

Page 116: ...Figure 52 Adjustment Measurement 35 mm Adjustment Distance 116 ...

Page 117: ...117 Notes ...

Page 118: ...ntrols clutch controls fuel filler cap igni tion switch and sidestand every 6200 miles 10 000 km Check for a smooth range of movement and proper operation See an EBR Dealer for service as required 4 Rear swingarm pivot bearings are sealed and do not require additional lubrication Check for smooth range of movement and proper operation See an EBR Dealer for service as required NOTE Lubricate all co...

Page 119: ...ping Incorrect recoil action will result if there is insufficient oil in either side of fork AIR FILTER Install air filter before running engine Failure to do so can draw debris into the engine and could result in engine damage See Figure 56 Remove air box cover and air filter cover and inspect filter element at proper mileage intervals Refer to Table 26 Inspect more often under dusty condi tions ...

Page 120: ...cle out of storage this list will be your reference checklist to get your motorcycle in operating condition Do not store motorcycle with gasoline in the tank within the home or garage where open flames pilot lights sparks or electric motors are present Gaso line is extremely flammable and highly explosive which could result in death or serious injury Placing Motorcycle in Storage If motorcycle is ...

Page 121: ...sages which reduces cooling system efficiency leading to overheating and engine damage Checking Level in Coolant Sight Gauge Quick Check See Figure 57 A coolant sight gauge is located in the tail section under the rider seat on the left side of the bike The sight gauge shows whether the coolant level is near the COLD FULL line on the expansion tank With the coolant cool and the motorcycle on its s...

Page 122: ... a well ventilated area Irritation to skin or eyes can occur from vapors or direct contact In case of skin or eye contact flush thoroughly with water and go to the hospital if necessary Dispose of used coolant accord ing to federal state and local regulations Do not remove the radiator filler cap when the en gine is hot The cooling system is under pressure and hot coolant and steam can escape whic...

Page 123: ...ng products NOTE If the coolant expansion tank is empty when the engine is cold it is possible that air has been drawn into the cooling system The system must be purged of any trapped air and refilled with coolant See the service manual for instructions on the correct procedure Clean the inlet surface of the radiator regularly Leaves and other debris can collect on the radiator surface and degrade...

Page 124: ... parts could be damaged if abra sive cleaners are used WINDSHIELD MAINTENANCE Polycarbonate windscreens windshields require proper attention and care to maintain Failure to maintain polycarbonate properly can result in dam age to the windshield windscreen Do not use benzene paint thinner gasoline or any other type of harsh cleaner on the windshield Doing so will damage the windshield surface Do no...

Page 125: ...ques outlined in this manual to avoid damaging body panels Washing To wash follow the instructions below 1 Rinse surface with water 2 Wash with a high quality car wash 3 Rinse surface thoroughly with water 4 Dry with a clean chamois or soft dry natural fiber cloth Polishing Polishing body panels results in greater surface gloss and a protective coating 1 Clean and dry surfaces to be polished See W...

Page 126: ...y panels follow the instructions below 1 To remove light surface scratches and rubs use a high quality scratch remover as recommended 2 Make sure treatment is applied with a moist cloth and by hand not machine NOTE Black body panels are more prone to suffer permanent cosmetic damage if attempts to remove scratches are overdone Major Scratch Removal There is no repair procedure for severely scratch...

Page 127: ... installed in front and rear wheels It is imperative that the wheels are cared for weekly to guard against corrosion and pitting Corrosion of these components is not considered to be a defect in materials or workmanship See an EBR dealer for cleaning polishing and waxing products FRAME AND SWINGARM CARE The aluminum frame of this motorcycle is the fuel tank Drilling welding cutting grinding sandin...

Page 128: ...destand on a level surface turn the handlebar so the clutch master cylinder reservoir is level 2 Verify the fluid level in the fluid reservoir 3 If the fluid level is at or below the MIN line rotate the front forks to access the fluid reservoir and re move the cover stiffener and diaphragm 4 Inspect the cover stiffener and diaphragm for dam age Replace the diaphragm if necessary D O T 4 hydraulic ...

Page 129: ...ss of con trol which could result in death or serious injury Prior to starting after extended periods of storage place transmission in gear and push vehicle back and forth several times to assure proper clutch disen gagement MAX MIN Figure 57 129 ...

Page 130: ...quivalent NOTE Do not overfill the clutch master cylinder reservoir Leave sufficient volume in the reservoir to accommodate the rise in fluid level as the clutch friction disks wear 6 Carefully place the diaphragm stiffener and cover on the master cylinder reservoir and tighten by hand BRAKES Inspect brake pads for wear at service intervals If you ride under adverse conditions steep hills heavy tr...

Page 131: ...t contact of D O T 4 brake fluid with eyes can cause irritation Avoid eye contact In case of eye contact flush with large amounts of water and get medical attention Swallowing large amounts of D O T 4 brake fluid can cause digestive discomfort If swallowed obtain medical attention Use in a well ventilated area KEEP OUT OF REACH OF CHIL DREN D O T 4 brake fluid will damage painted and body panel su...

Page 132: ...smatching can result in damage to the tire bead allow tire slippage on the rim or cause tire failure which could result in seri ous injury or death Replace worn tires with new tires identical to those that came on the motorcycle as original equipment Other tires may not fit correctly or may be hazardous to use Tires are a critical safety component Contact an EBR dealer for tire repair or replaceme...

Page 133: ...re tread remains Always replace tires before the tread wear indicator bars appear on the surface of the tire See Figure 58 The location of tread wear indicator bars are identified by TWI markings on the tire sidewalls When to Replace Tires New tires are needed if any of the following conditions exist 1 Tread wear indicator bars become visible on the tread surfaces 2 Tire cords or fabric become vis...

Page 134: ...or caus ing high resistance which may result in minor or moderate injury The engine is equipped with plug top coils To inspect the spark plugs the coils must be removed See the service manual for proper service procedure Refer to Table 4 Only the specified spark plugs with the proper gap should be installed IGNITION TIMING Spark timing is advanced electronically as engine speed increases to suit s...

Page 135: ...cessories If your combined electrical accessories operating at any one time consume more electrical current than your vehicle s charging system can produce the electrical consumption can discharge the battery and cause vehicle electrical system damage See an EBR dealer for advice about the amount of current consumed by additional electrical accessories or for necessary wir ing changes NOTE The vol...

Page 136: ...ath or serious injury Voltmeter Test The voltmeter test provides a general indicator of battery condition Check the voltage of the battery to verify that it is in a charged condition If the open circuit disconnected voltage reading is below 12 3 V charge the battery and then re check the voltage Cleaning and Inspection Battery top must be clean and dry Dirt and electrolyte on the battery can cause...

Page 137: ... CRACKED LITHIUM ION DO NOT BURN OR INCINERATE MUST RECYCLE Figure 58 Battery Warning Label 4 Check the battery posts for melting or damage caused by over tightening 5 Inspect the battery for discoloration a raised top or a warped or distorted case This might indicate that the battery has been frozen overheated or overcharged 6 Inspect the battery case for cracks or leaks 137 ...

Page 138: ...ive cable should contact ground with negative cable connected causing sparks which could result in death or serious injury Connect positive battery cable first If positive cable should contact ground with negative cable connected causing sparks which could re sult in death or serious injury Do not reverse the charger connections described in the following steps or the charging system of the motorc...

Page 139: ...e diode leakage and maintaining computer memory with the vehicle off If the battery is going to be left in an unridden bike for more than 2 months 8 weeks disconnect and remove the battery from the vehicle 2 If the battery is removed from a bike after sitting for 2 months or more attach a trickle charger to the battery to top it off and then store it as you normally would 3 The EBR Lightweight Nan...

Page 140: ...from the DISCHARGED battery 6 Start motorcycle 7 Disconnect cables in reverse order of steps 2 3 4 5 That is steps 5 4 3 2 JUMP STARTING EBR MOTORCYCLES EBR does not recommend jump starting a motorcycle However there may be circumstances when it is necessary to do so Therefore we suggest jump starting be per formed as follows Be sure jumper cables touch only appropriate battery terminals or ground...

Page 141: ...service manual for bulb replace ment Never touch the quartz bulb Fingerprints will etch the glass and decrease the bulb life Grab the bulb with paper or a clean dry cloth Failure to do so could result in bulb damage Handle bulb carefully and wear eye protection Bulb contains gas under pressure which if not handled carefully could cause serious eye injury Figure 59 headlamp assembly Low Beam High B...

Page 142: ...Figure 60 Headlight Alignment 25 feet 7 6 m Adjust center of light pattern to be 2 1 Inches 53 3 mm below low beam bulb 142 ...

Page 143: ...eeded NOTE See Figure 60 To aid in properly placing the motorcy cle a perpendicular line can be drawn on the floor For best results choose an area with minimum light 3 See Figure 60 Draw a vertical line on the wall 4 Position motorcycle so that the front axle is 25 feet 7 6 meters from the wall NOTE As the weight of the rider will compress the suspen sion slightly have a person whose weight is app...

Page 144: ...nter of the hot spot brightest area of light beam should be centered where the two lines inter sect B Adjust headlamp alignment if necessary HEADLAMP ADJUSTMENT Horizontal Adjustment Horizontal adjusters are located behind the fairing headlamp assembly If horizontal adjustment left or right is required locate adjuster screw on right side of bike be hind fairing To move beam to the right turn adjus...

Page 145: ...justment See Figure 62 The vertical headlamp adjusters are located on the left side of the bike behind the fair ing To lower beam turn adjuster clockwise To raise beam turn adjuster counter clockwise Figure 62 Left side Adjusters 145 ...

Page 146: ...e run switch in OFF position 2 Ignition switch is not ON 3 Discharged battery or loose or corroded con nections solenoid chatters 4 Clutch lever not squeezed against handlebar or transmission not in neutral 5 Blown fuse Engine Turns Over But Does Not Start or Starts Hard 1 Fuel tank is empty 2 Discharged Battery or loose or damaged bat tery terminal connections 3 Spark Plugs are loose defective fo...

Page 147: ...to damaged wire insulation 6 Water or dirt in fuel system See dealer 7 Fuel level too low Add gasoline 8 Inoperative fuel injector See dealer 9 Obstructed fuel tank vent valve or pinched vent tube See dealer 10 Engine management system failure See dealer 11 Intake manifold leak See dealer A Spark Plug Fouls Repeatedly 1 Fuel mixture too rich See dealer 2 Incorrect spark plug Pre Ignition or Detona...

Page 148: ...ts See dealer 2 Imperfect seal at gaskets washers etc See dealer 3 Restricted oil line or oil screen See dealer ELECTRICAL SYSTEM Alternator Does Not Charge 1 Regulator not grounded See dealer 2 Engine ground wire loose or damaged See dealer 3 Loose or damaged wires in charging circuit See dealer Alternator Charge Rate is Below Normal 1 Weak battery 2 Excessive use of add on accessories 3 Loose or...

Page 149: ...ee dealer BRAKES Brakes Do Not Hold Normally 1 Master cylinder low on fluid See dealer 2 Brake line contains air bubbles See dealer 3 Master cylinder piston worn See dealer 4 Brake pads contaminated with grease or oil See Dealer 5 Brake pads badly worn See dealer 6 Brake discs badly worn or warped See dealer 7 Brake fades because of heat build up Excessive braking or pads dragging See dealer 8 Bra...

Page 150: ...for required proof of service during the warranty period 4 Keep receipts covering any parts service or mainte nance performed These records should be transferred to each subsequent owner Do not use aftermarket parts which can adversely affect performance and handling Removing or alter ing factory installed parts can adversely affect per formance and could result in death or serious injury Use only...

Page 151: ...NOTE Installing off road or competition parts to enhance per formance may void your new motorcycle warranty See an EBR dealer for details It is possible to overload your motorcycle s charging system by adding too many electrical accessories If your combined electrical accesso ries operating at any one time consume more electrical current than your vehicles charging system can produce the electrica...

Page 152: ... of the causing thereof 1 The removal or ren dering inoperative by any person other than for the purposes of maintenance repair or replacement of any device or element of design incorporated into any new vehicle for the purpose of noise control prior to its sale or delivery to the ultimate purchaser or while it is in use or 2 the use of the vehicle after such device or element of design has been r...

Page 153: ...acing com REPORTING SAFETY DEFECTS IN THE UNITED STATES U S Only Safety defects must be reported to the National Highway Traffic Safety Administration NHTSA and EBR NHTSA Statement If you believe that your vehicle has a defect which could cause a crash or could cause injury or death you should immediately inform the National High way Traffic Safety Administration NHTSA in addi tion to notifying EB...

Page 154: ...ail the post card at the back of this manual This is necessary in the event that the Company needs to contact the owner concerning information that could affect the safe oper ation of this motorcycle OWNER TRANSFER IDENTIFICATION FORM When purchasing a pre owned EBR we encour age you to submit an Owner Transfer Notifica tion Form It is critical that the new owner infor mation is sent to EBR New ow...

Page 155: ... ap ply to you TO THE FULLEST EXTENT ALLOWED BY LAW EBR AND ITS DEALERS SHALL NOT BE LIABLE FOR LOSS OF USE INCONVIENIENCE LOST TIME COMMERCIAL LOSS OR OTHER INCI DENTAL OR CONSEQUENTIAL DAMAGES Some states do not allow the exclusion or limitation of incidental or consequential damages so the above limita tion or exclusion may not apply to you This warranty gives you specific legal rights and you ...

Page 156: ...0 USA Exclusions This warranty will not apply to any motorcycle as fol lows 1 Which has not been operated or maintained as speci fied in the Owner s Manual 2 Which has been abused misused improperly stored used off the highway or used for racing or competi tion of any kind 3 Which is not manufactured to comply with the laws of the market in which it is registered 4 Installing off road or competiti...

Page 157: ...elivery that has not been documented by the selling dealer prior to retail delivery 4 Defects or damage due to the motorcycle caused by alterations outside of EBR factory specifications Important Read Carefully 1 Our dealers are independently owned and operated and may sell other products Because of this EBR IS NOT RESPONSIBLE FOR THE SAFETY QUALITY OR SUITABILITY OF ANY NON EBR PART ACCES SORY OR...

Page 158: ...expired portion of this limited warranty will be transferred to sub sequent owners upon the resale of the motorcycle during the warranty period If the motorcycle was used as a de monstrator then the Warranty period may have started and or expired prior to the initial retail sale See an EBR dealer for details THERE IS NO OTHER EXPRESS WARRANTY OTHER THAN THE SEPARATE MOTORCYCLE AND EMISSIONS WARRAN...

Page 159: ...ONSEQUEN TIAL DAMAGES Some states do not allow the exclusion or limitation or consequential damages so the above limitation or ex clusion may not apply to you Other Rights This warranty gives you specific legal rights and you may have other rights which vary from state to state Recommendations for Required Maintenance It is recommended that any noise system mainte nance be performed by and authori...

Page 160: ...41 miles 30 000 km whichever expires first Any unexpired portion of this limited warranty will be transferred to Subsequent owners upon the resale of the motorcycle dur ing the warranty period If the motorcycle was used as a demonstrator then the warranty period may have started and or expired prior to the initial retail sale See an EBR dealer for details THERE IS NO OTHER EXPRESS WARRANTY OTHER T...

Page 161: ...AL OR CONSEQUENTIAL DAMAGES Some states do not allow the exclusion or limitation or consequential damages so the above limitation or exclu sion may not apply to you Other Rights This warranty gives you specific legal rights and you may have other rights which vary from state to state Recommendations for Required Maintenance It is recommended that any emission system mainte nance be performed by an...

Page 162: ...When servicing your motorcycle bring this owners manual to the dealership and complete the information needed in the blank col umns listed Perform the service and maintenance operations as indicated in the regular service interval table Lack of regular maintenance at the recommended inter vals can affect the safe operation of your motorcycle which could result in death or serious injury If you ope...

Page 163: ...oil Replace X X X X X X X 1 Engine oil filter cartridge Replace X X X x Air Cleaner Replace filter ele ment X X X Crankcase breather Inspect X X X Tires Check con dition pres sure tread X X X X X X X 4 Drive chain and sprockets Inspect adjust and lubricate X X X X X X X 2 Throttle brake clutch controls side stand Inspect service as required X X X X X X X 2 Table 26 Regular Service Intervals 163 ...

Page 164: ...disks Inspect for wear X X X X X X X Spark Plugs Replace X X 2 Electrical switches and equipment Check operation X X X X X X X Front Fork Oil Replace X X 2 Exhaust System Inspect for leaks cracks and loose or missing fasteners or heat shields X X X X X X X 5 Battery Check Battery and clean connections 5 Cooling System Inspect level check clamps for tightness X X X X X X X 2 Coolant Replace 2 6 Rep...

Page 165: ...alve clearance Inspect X X X X X X 4 2 Road test Verify compo nent and system functions X X X X X X X Notes 1 Perform annually or at least specified interval whichever comes first 2 Should be performed by an authorized EBR dealer unless you have proper tools data and qualifications 3 Change D O T 4 fluid and flush brake and clutch systems every 2 years 4 Could vary with frequency of operation and ...

Page 166: ...ician Name Technician Signature 620 mi 1000 km 6 2000 mi 10 000 km 12 400 mi 20 000 km 18 600 mi 30 000 km 24 800 mi 40 000 km 31 000 mi 50 000 km 37 200 mi 60 000 km 43 400 mi 70 000 km 49 6000 mi 80 000 km Table 27 Owner s Maintenance Records 166 ...

Page 167: ...isit any EBR dealer or go to ErikBuellRacing com to purchase a service or parts manu al for your motorcycle Factory authorized manuals are the most complete and detailed source of information outside of your EBR dealer 167 ...

Page 168: ...75 Break in Maintenance 103 C California Evaporative Emission Controls 2013 Models 152 Catalytic Converter 47 Charging 138 Chassis Control Handling Enhancement 91 Chassis Lubrication 118 Check Engine Lamp 60 Checking Level in Coolant Sight Gauge 121 Cleaning Your Motorcycle 123 Cleaning Between Washings 123 Clock 59 Clutch Hand Lever 53 Cold Oil Check Pre Ride 107 168 INDEX ...

Page 169: ... Electric Starter Switch 52 Engine Lubrication 105 Engine OFF RUN Switch 52 Engine Oil Change 110 Engine Over Temperature Lamp 61 EPA Noise Regulations in the United States 152 F Fill with Oil 112 Final Drive Chain 114 Fine Tuning Suspension 89 Fork Oil 118 Frame and Swingarm Care 127 Front Fork Compression Damping 100 Front Fork Preload 98 169 ...

Page 170: ...70 G Gear Shift Lever 65 Getting Started 80 Gasoline Blends 45 General 48 H Hand Controls 52 Headlamp 141 Headlamp Adjustment 144 Headlamp Alignment 143 Headlamp High Low Beam Switch 53 High Beam Indicator Lamp 60 Horn Switch 53 Hot Oil Check 108 Hydraulic Clutch 128 170 ...

Page 171: ...ing 134 Information line 59 Initialization Sequence 62 Inspection Tires 133 J Jump Starting 140 L Labels 40 Lap timer 63 LCD Screen 54 Locking Steering 50 Low Battery Voltage Lamp 62 Low Fuel Lamp 60 Low Fuel Odometer F trip 60 171 Initial Service Check First 620 Miles 104 ...

Page 172: ...mp 60 NHTSA Statement 153 NOISE CONTROL SYSTEM LIMITED WARRANTY 158 O Odometer 59 Oil Filter Cartridge 112 Oil Level 107 Oil Pressure Lamp 61 Operating Recommendations EBR 1190RS 74 P Parking the Motorcycle 50 Passing Lamp Switch 53 Polishing 125 Positive Cable 138 Pre Riding Checklist 76 172 ...

Page 173: ...ervals EBR 1190RS 163 Reporting Safety Defects in the United States 151 Ride Quality Enhancement 90 Rider Seat Installation 85 Rider Seat Removal 83 Rules of the Road 32 S Safe Operating Maintenance 103 Safe Operating Rules 25 Seat 83 Service Intervals and Performance 104 Service Literature EBR 1190RS 167 Service Odometer 59 Shifting Gears 80 Shock Absorber 134 Sidestand 72 173 ...

Page 174: ...ng The Engine 79 Storage 120 Suspension Adjustments 87 Suspension Damping 97 Suspension Definitions 88 Suspension Tuning 89 T Tachometer 54 Throttle Control Grip 52 Tires 132 Tire Data EBR 1190RS 43 45 Tire Replacement 133 Trip Odometers 59 Troubleshooting General 146 Turning Motorcycle On Off 49 Turn Signal Indicator Lamps 60 Turn Signal Switch 54 174 ...

Page 175: ... 57 Voltage Regulator 135 Voltmeter Test 136 W Warning Lamps 60 Warranty and Maintenance 150 Warning Lamps 57 Warranty Service Information 153 WARRANTY 2013 EBR MOTORCYCLE 155 Washing 125 Windscreen Maintenance 124 Wheel Bearings 135 Wheel Care 127 Winter Lubrication 113 button 56 175 ...

Page 176: ...176 ...

Page 177: ...177 ...

Page 178: ...178 ...

Reviews: