background image


CPX200NB ALARM CONTROL UNIT – USER MANUAL 


17 / 30 


EN 

7 – Other damages  

To  display  more  detailed  information  about  other  damages,  press 


button. 

1 – Clock fault 
2 – Fault of central unit settings 
3 – 

Keypads tamper


To  display  more  detailed  information  about  keypads  tamper,  press 

 button. 

1 – Keypad tamper 1 

2 – Keypad tamper 2 
3 – Keypad tamper 3 
To return to the 

Other damages

, press


 button. 


To return to the main fault menu, press 

7.3.


ZONE BLOCKING 

The zone blocking function allows de-activating stand-by mode of any zones or 

bypassing any damaged lines. Also, zones which are not in stand-by mode and which 
the user has access to can be blocked. Zones remain blocked until de-arming. 
System informs the user about that fact with quickly flashing LED marked with the 

number of the blocked zone. 

Zone blocking: 

1.


Enter the number of the function 

 and confirm with 

. Enter the 

user code and press 

. 3-tone beep will confirm the correct code input.


Note: If incorrect code is entered the keyboard will emit long 

constant sound. Enter the correct code once again. 

2.


Use buttons numbered 1 to 7 to select zones you want to block.


3.


Change the zones blocking status by pressing numbered buttons  (LEDs with 
relevant  zone  number  will  go  on/off).  Press 

  to  confirm  blocking  of 

selected  zones.  3  beeps  will  confirm  the  change.  To  cancel  the  entered 
changes, press 

.


7.4.


ADDING A NEW USER 

You can add a new user code here. New codes can be added by the administrator 
only.  3  beeps  will  confirm  the  successfully  entered  function.  Default  admin  code: 
1111. 


Note: Individual code cannot be the same; if any code is the 

same as another one, it will not be recorded.


Summary of Contents for CPX200NB

Page 1: ...EN ALARM CONTROL UNIT CPX200NB User manual Version of the manual v1 6 Date of issue 2016 01 08 Firmware version 2 3 7 GPRS transmitter configurator version 1 3 54 10 OSM server version 1 3 53 3...

Page 2: ...not be deemed to be providing any warranties either express or implicit including but not limited to any implied warranties of merchantability or fitness for a particular purpose unless it is required...

Page 3: ...SYSTEM 12 5 2 ALARM DISPLAY 12 5 3 ALARM MUTE 12 6 PARTITION HANDLING 13 6 1 ARMING DISARMING WITH SELECTING PARTITIONS 13 6 2 QUICK ARMING DISARMING PARTITIONS 13 7 USER FUNCTIONS 15 7 1 ALARMS MEMO...

Page 4: ...sized facilities The central unit is equipped with 3 outputs and 7 wired zones with the possibility to be divided into 2 partitions Dedicated KP16 LED keypad was designed in a modern discreet style P...

Page 5: ...100mA PARTITIONS 2 partitions with the possibility to assign any number of zones to each of them KEYBOARD cooperation with LED keyboard KP16 ability to connect up to three keypads TRANSMISSION Transmi...

Page 6: ...arged battery established connection with server connected keypad no sensors connected 120mA 1100mA 18VAC Average current consumption lack of external supply without keypad with keypad fully charged b...

Page 7: ...ION Power supply voltage 10 13 8 VDC Power consumption typ 20 mA max 80 mA Keypad weight 70 g Size of casing 99 x 82 x 19 mm Keypad type LED 16 status LEDs 4 mode LEDs ALARM ARMED SYSTEM PROG Button l...

Page 8: ...ellow Flashing light means that in the control unit s memory there are faults that has already ceased there was power loss but it has already restored Constant light there is a fault in the system tha...

Page 9: ...t slightly in indicated hole and perform slight lever movement toward the rear side of the casing 11 Anti Sabotage Switch After the keypad is assembled the switch contact is closed Unauthorized disass...

Page 10: ...an automatically arm in the away mode if proper conditions were met 4 2 1 Stay mode Arming the partition in stay mode is possibile only if it has perimeter zones assigned to it Partition will arm in t...

Page 11: ...the keypad until the system gets fully armed If the chirps are activated the arming will be confirmed by one chirp of siren 4 3 ARMING THE SYSTEM WITH FAULT If during the arming any faults are presen...

Page 12: ...different way by changing the partition state See item 6 PARTITION HANDLING 4 When system is disarmed alarm will be muted deactivated Note Incorrect code will be indicated with a long constant sound...

Page 13: ...cancel the entered changes press 4 If partition arming in the away auto mode was selected the keypad will indicate counting the time for leaving the facility Leave the facility before the time for lea...

Page 14: ...ing expires After it is armed the ARMED LED will be constantly on 3 If the partition arming in the stay mode was selected system will arm immidiately ARMED LED will turn on 4 If partition disarming is...

Page 15: ...lines 1 to 7 If no diodes are on and the ALARM led is blinking then there alarms that were triggered by the source other than input lines Other alarms history can be accessed by selecting following co...

Page 16: ...ion about sabotage of zones press button 1 Sabotage of zone 1 2 Sabotage of zone 2 7 Sabotage of zone 7 To return to the main fault menu press 2 Fault of outputs 1 3 To display more detailed informati...

Page 17: ...with quickly flashing LED marked with the number of the blocked zone Zone blocking 1 Enter the number of the function and confirm with Enter the user code and press 3 tone beep will confirm the corre...

Page 18: ...o exit without saving changes 8 Successful adding a new user will be confirmed with 3 beeps otherwise a constant sound will be emitted 7 5 USER DELETE You can delete a user here Codes can be deleted b...

Page 19: ...nistrator code hh mm where Administrator code Administrator code hh Hours mm Minutes In any moment you can press to exit without saving changes 7 8 PROGRAMMING DATE You can change system date here Dat...

Page 20: ...an alarm but not reporting the event to the monitoring station Thus the siren or other signalling devices can be checked Repeated pressing the key disables the output To exit the testing function pre...

Page 21: ...e device in order to configure it or poll its status For SMS to be accepted the phone number from which the text is being send has to be enlisted on the allowed numbers list CPX200NB can store up to 1...

Page 22: ...MED ERROR command rejected by the system Setting the name of partition Command syntax XXXX SETNAME PARTITION NR VALUE Command description Setting the name of the partition XXXX user code NR number of...

Page 23: ...ion GETNAME PARTITION NR VALUE partition name GETNAME ERROR command rejected by the system Setting the phone number Command syntax XXXX SETTELNUM ID NUMBER Command description Setting the phone number...

Page 24: ...message description GETTELNUM ID NUMBER information about phone number GETTELNUM ERROR command rejected by the system Setting the content of text message Command syntax XXXX SETMESSAGE ID MESSAGE Comm...

Page 25: ...ing the content of text message under the pointed index XXXX user code ID index of text possible values 1 to 32 Example 1234 GETMESSAGE 30 Feedback message GETMESSAGE ID MESSAGE or GETMESSAGE ERROR Fe...

Page 26: ...Each digit counting from the left represents an index of the phone number first digit for the first phone number second digit for the second number and so on 0 message will not be send to this number...

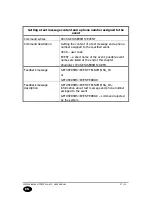
Page 27: ...mber assigned to the specified event XXXX user code EVENT a short name of the event possible event names are listed at the end of this chapter Example 1234 GETUSERSMS ARM1 Feedback message GETUSERSMS...

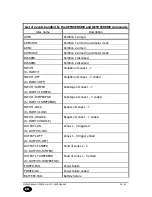
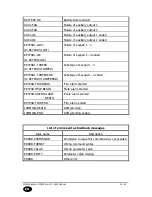
Page 28: ...INPUT1 OFF to INPUT7 OFF Violation of zones 1 7 ended INPUT1 TAMPER to INPUT7 TAMPER Sabotage of zones 1 7 INPUT1 TAMPEREND to INPUT7 TAMPEREND Sabotage of zones 1 7 ended INPUT1 LOCK to INPUT7 LOCK B...

Page 29: ...to KEYPAD3 TAMPER Sabotage of keypad 1 3 KEYPAD1 TAMPEREND to KEYPAD3 TAMPEREND Sabotage of keypad 1 3 ended KEYPAD FIRE BEGIN Fire alarm started KEYPAD HELP BEGIN Help alarm started KEYPAD SILENTALAR...

Page 30: ...n entered arming requires authorization prior to arming the control panel checks circumstances that may prevent arming the codes in the system must be at least 5 characters after entering an invalid c...

Reviews: