EXCEL 50 INSTALLATION INSTRUCTIONS
EN1B-0101
36
The contents of this listbox will depend upon the exact hard-
ware configuration of the controller. The listed interfaces to
be configured will be from among the following:
•
B-Port
•
C-Bus.
•
LON-Bus
•
Meter
Bus
•
Modem
NOTE:
The C-Bus configuration option may appear even on
controllers that do not have an application module
containing a C-Bus connection in order to support
use of the XI584 User Interface.
B-Port
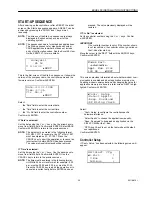
Select ‘B-Port” and confirm with ENTER. The following
screen appears:
B-Port Config.
Baudrate:
>
9600
>
BACK
Move the cursor with the arrow keys to the field to set baud
rate for the B-Port. Use the '+' and '–' keys to edit the fields.
Confirm with ENTER.
NOTE:
Live CARE is now capable of autodetecting the con-
troller baud rate setting, then switching it temporarily
to 38.4 Kbaud. When Live CARE is disconnected,
the controller will switch back to the previous baud
rate setting automatically within 15 seconds.
Move the cursor to the 'BACK' field with the arrow keys.
Confirm with ENTER.
C-Bus
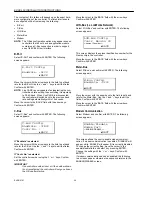
Select ‘C-Bus” and confirm with ENTER. The following
screen appears:
C-Bus Config.
Baudrate:
>
76800
Contr.No:
>
>
BACK
If 'Baudrate' is selected:
Move the cursor with the arrow keys to the field to set baud
rate for the C-Bus. Use the '+' and '–' keys to edit the fields.
Confirm with ENTER.
If 'Contr. No.' is selected:
Set the controller number using the '+' or '–' keys. Confirm
with ENTER.
IMPORTANT
If no controller number is set or if the number shown
is not reconfirmed, the controller will not go online on
the C-Bus after start-up.
Move the cursor to the 'BACK' field with the arrow keys.
Confirm with ENTER.
LON-Bus (i.e. LonWorks Network)
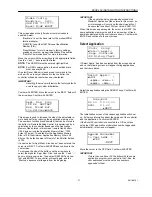
Select ‘LON-Bus” and confirm with ENTER. The following
screen appears:
LON-Bus Config.
Contr. Neuron ID
<
neuron ID number
>
>
BACK
This screen displays the unique identification number for the
Neuron chip in the controller.
Move the cursor to the 'BACK' field with the arrow keys.
Confirm with ENTER.
Meter-Bus
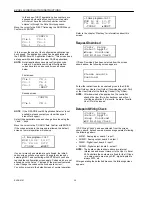
Select ‘M-Bus” and confirm with ENTER. The following
screen appears:
M-Bus Config.
Baudrate:
>
9600
>
BACK
Move the cursor with the arrow keys to the field to set baud
rate for the Meter Bus. Use the '+' and '–' keys to edit the
fields. Confirm with ENTER.
Move the cursor to the 'BACK' field with the arrow keys.
Confirm with ENTER.
Modem Communication
Select ‘Modem’ and confirm with ENTER. The following
screen appears:
Enable/Disable
Modem Part:
<
ENABLE/DISABLE
>
>
NEXT
This screen allows the user to enable modem communi-
cation. If modem communication is enabled, ‘DISABLE’ will
appear, while ‘ENABLE’ will appear if it is currently disabled.
To change the current setting, move the cursor to the
enable/disable field, and select it by pressing ENTER.
Change the setting with the ‘+’ or ‘-‘ keys. Confirm with
ENTER.
If modem communication has been enabled, the following
two screens appear, otherwise the sequence returns to the
ENABLE/DISABLE screen.

