EXCEL 50 INSTALLATION INSTRUCTIONS
37
EN1B-0101
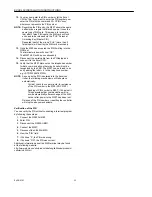
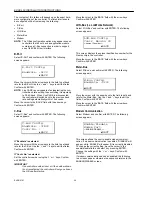
Modem Config.
Baudrate:
9600
GSM PIN ********
Reset Modm
>
NEXT
This screen appears only if modem communication is
enabled. Select:
—
‘Baudrate.’ to set the baud rate for the modem/ISDN
terminal adapter.
—
‘GSM PIN’ to set the GSM Personal Identification
Number (PIN).
—
'Reset Modem' to return modem to factory settings,
erasing any custom modem initialization. See section
"Remote Communications" for more information.
Move the cursor with the arrow keys to the appropriate fields.
Use the '+' and '–' keys to edit the fields.
NOTE:
The GSM PIN must be entered right-justified.
NOTE:
For GSM communication, the modem baud rate
must be set at 9600.
Or select Reset Modem to send a reset command to the
modem (if one is not yet attached to the controller, the
controller will send a reset when one is detected).
IMPORTANT
Resetting the modem will restore the factory defaults
and erase any custom initialization.
Confirm with ENTER. Move the cursor to the 'NEXT' field with
the arrow keys. Confirm with ENTER.
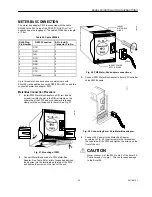
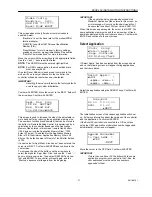
Appl. Mem. Size
128 KB
RESTART
Rem. Trend Buf.
104 Entries
>
BACK
This screen is used to increase the size of the adjustable re-
mote trend buffer by reducing the application memory size.
The number of entries (trend samples) that can be stored in
the buffer for Remote Building Central A is determined by a
calculation by the controller based upon the Application
Memory Size entered in this screen (remote trend buffer =
(128 Kbytes minus the Application Memory Size) * 1024
bytes / 47 bytes). The default for the Application Memory
Size is 128; the minimum Application Memory Size is 38
Kbytes. The default number of Remote Trend Buffer Entries
is 104.
If a new value for Appl. Mem. Size has not been entered, the
cursor is at NEXT. Confirm with ENTER and continue to the
next screen.
To increase the size of the buffer, use the arrow keys to
select the digits for ‘Appl. Mem. Size’ and use the ‘+’ and '–'
keys to enter a new value. Then select RESTART and con-
firm with ENTER. The controller will reset again, and the
‘Start-up’ sequence starts again from the beginning.
IMPORTANT
If the application being downloaded exceeds the
Maximum Application Size entered in this screen, an
error message will occur and the download will not
be executed (see Excel 50 User Guide, EN2B-137).
When this screen appears again, the cursor is at NEXT. The
new application memory size and the new number of trend
samples calculated by the controller are shown. Confirm with
ENTER and continue to the next screen.
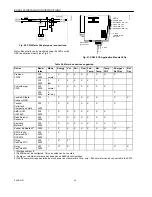
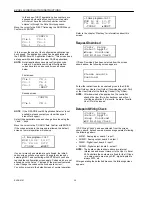
Select Application
>
Contr. Setup
>
Select Applic.
>
Requ. Download
>
DP Wiring Check
If 'Select Applic.' has been selected from the screen shown
above, the following screen will appear listing applications
and their burn dates:
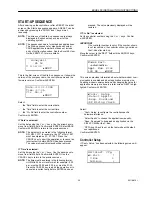
Select Applic.
>
AH01
↑
<
applic.
> <
date.
> 1
<
applic.
>
<
date.
>
↓
Select the application using the ARROW keys. Confirm with
ENTER.
Honeywell
XL 50
V 2.03.00
AH01
V 1.00
>
NEXT
The initialization screen of the chosen application will show
up. It displays information about the versions of the controller
and the application. Confirm with ENTER.
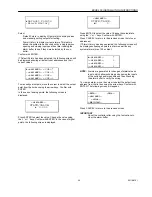
If the Excel 50 controller is connected to a C-Bus, unless
using the HE01 application module (bus number appended
automatically), this screen will appear:
Append Busnumber
to User Addr. ?
>
YES
>
NEXT
Move the cursor to the 'YES' field. Confirm with ENTER.
IMPORTANT
If more than one Excel 50 Controller with the same
application program is connected to the C-Bus, the
user addresses must have the bus numbers
appended to them.


