S
ERVICE
P
ROCEDURES
F
RONT
L
IFT
C
USHION
R
EPLACEMENT
49
5)
Assemble the new bumper to the cover.
6)
Assemble the bumper retaining screws, tighten
to 1.5 lbf• ft (2 N•m).
7)
Assemble the bumper caps.
8)
Connect the bumper cable to the bumper.
9)
Complete the Bumper Service Test.
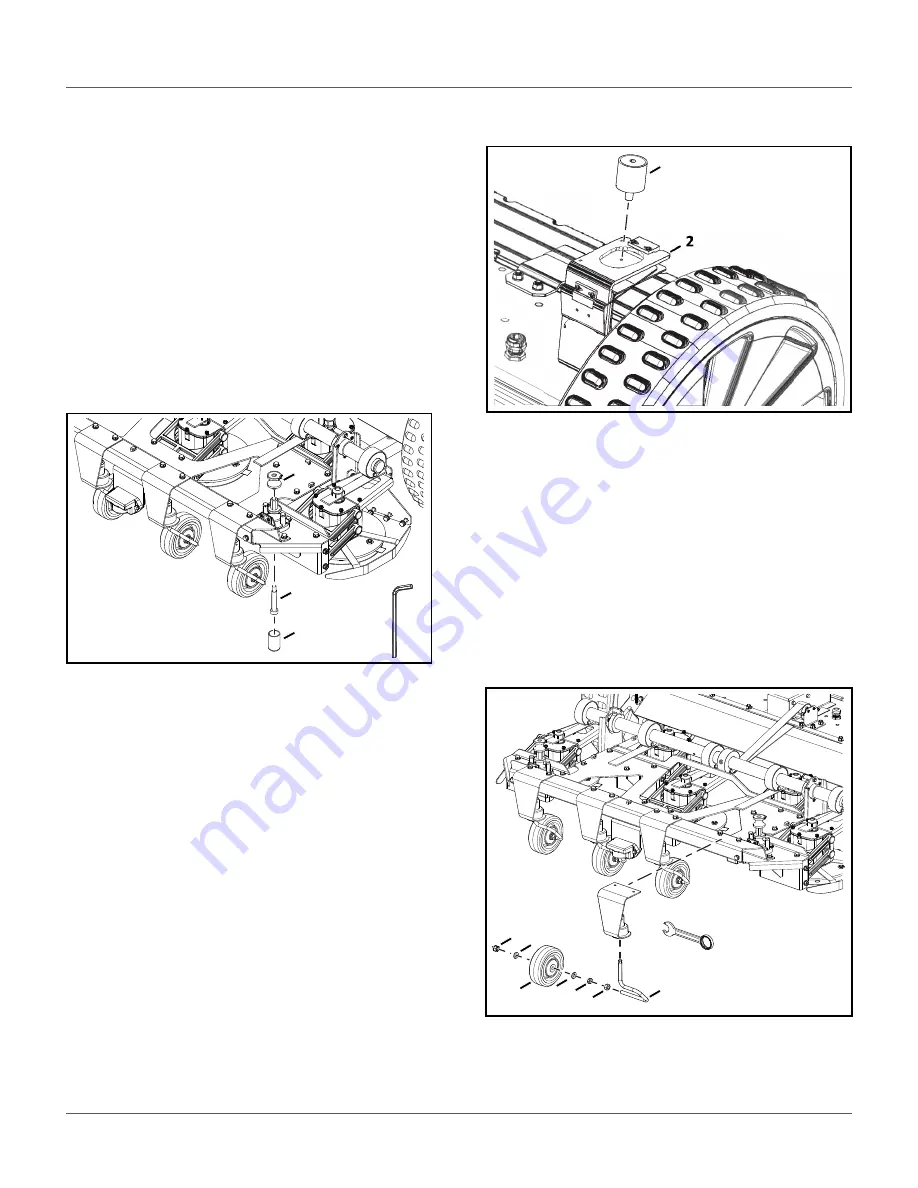
11.3 Front Lift Cushion Replacement
NOTE
: Detail of left side shown.
1)
Remove the flexible cap and screw.
2)
Remove the front lift cushion.
3)
Assemble the new front lift cushion.
4)
Assemble the screw, tighten to 4.5 lbf•ft
(6 N•m).
5)
Replace the flexible cap.
6)
Complete the Lift Sensor Service Test.
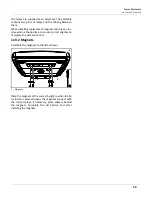
11.4 Rear Lift Cushion Replacement
1)
Remove the cover.
2)
Use pliers to loosen the rear lift cushion and
remove it from the bracket.
3)
Assemble the new rear lift cushion.
4)
Complete the Lift Sensor Service Test.
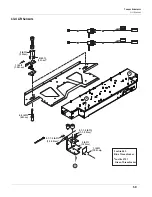
11.5 Front Wheel Replacement
1)
Remove the outside 8 mm nut and washer.
2)
Remove the wheel.
3)
Replace inside nuts and washer if required.
4)
Assemble the new wheel to the axle.
5)
Assemble the washer and nut. Tighten the nut to
7.5 lbf•ft (10 N•m).
1 – Flexible cap
2 – Screw
3 – Cushion
8 mm
3
2
1
1 – Rear lift cushion
2 – Bracket
1 – Nut
2 – Washer
3 – Wheel
4 – Axle
2
1
2
1
3
1
2 1
4
8 mm


