Echoflex Installation Guide
Access Interface
2. Use spacers as needed to provide a flush mounted installation.
a. Accordion fold the spacer and press the stack together to achieve
the thickness needed to fill the gap between the Interface, wall
surface, and the back box.
b. Cut off and discard the excess.
c. Place the stack between the electronics and the flush mounted
back box.
Note:
To ensure successful station and wall plate installation, do
not overtighten the screws.
3. Secure the Interface in place using the mounting screws provided. If
using spacers, insert the screws through the spacers as well.
Interface LEDs
Power - The top blue LED lights when the device has power
Bluetooth - The bottom yellow LED lights and blinks when an active
Bluetooth radio is paired with a mobile device.
Note:
For more information on configuring devices via Bluetooth
connection, see the ElahoAccess App integrated help system.
Additional information on Elaho systems is available at
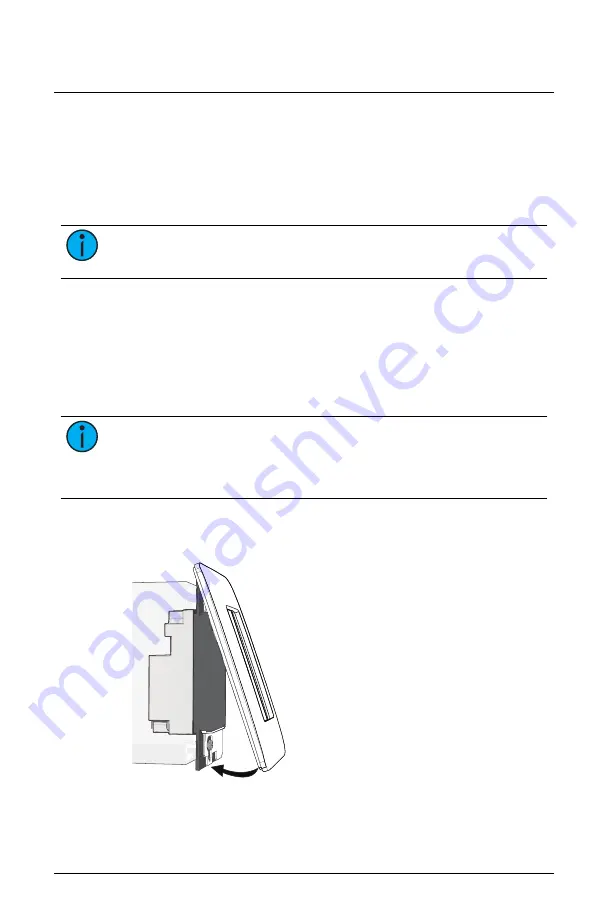
Install the wall plate
The wall plate is secured to the Interface with built-in magnets.
1. Align the top of the wall plate to the Interface and angle the bottom
approximately 20 degrees.
Access Interface
Page 5 of 8
Echoflex


