5. Operation and Menu Program
[0000]
Main Menu
Installation
1) LNB Setting
9
Main Menu
7. Common Interface
6. Select Satellite
5. Installation
1. TV Channels
2. Radio Channels
3. Parental Control
4. Edit & Erase
Main Menu
7. Common Interface
6. Select Satellite
5. Installation
1. TV Channels
2. Radio Channels
3. Parental Control
4. Edit & Erase
Installation Lock
Enter PIN code
[ ? ? ? ? ]
Installation
7. User’s Setting
6. A/V Output Setting
5. Local Time Setting
1. LNB Setting
2. Ant Setting/Auto Search
3. SMATV Configuration
4. Language Setting
LNB SETTING
LNB Freq . Low
LNB Freq . High
Universal
Switch Type
Disable
Switch Port
Disable
Polarity Control
Skew
LNB Freq . Band Control
13/18V
Ku/C Control
0/22kHz
0/22kHz Control
Off
0/12V Control
Off
To return to the previous Menu, press MENU
Universal
LNB Power
On
Satellite
?
ASTRA 1
?
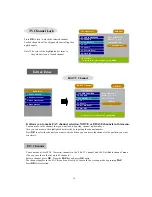
Press
MENU
to display the Main Menu on the screen.
Select a sub-menu using the
ÙÚ
keys or the numeric keys. Pl
ease note that
OK
is always a confirmation of your selection. T
o go back to the previous menu, press
MENU
.
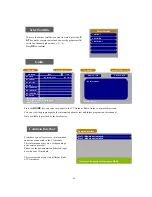
The initial code is set as
[0000
]
but you can change it (see change code on page 15).
The installation, enter your code Menu is displayed only when the Installation Lock is set as [ON].
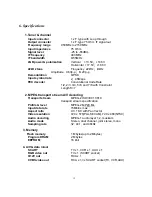
Select the appropriate Satellite using the
×
Ø
keys and press
STORE
.
As shown at the right,
ASTRA1
is selected.
By default a Universal LNB has been chosen but
you can change this manually (by using the cursor
keys) to select from a range of 7 other DRO
Frequencies.
Other parameter values are changed
automatically according to your satellite
selection. Press
OK
to confirm your selection.
Select in the Installation Menu “LNB Settings”,
using the
ÙÚ
keys.
If you select “Global” in the “ LNB Installation“ parameter, values of the parameters in this menu are saved
for all other satellites as well.
If you have a mechanical polarizer on your LNB, you have to set the “Polarity Control” parameter in this
menu to [Skew].


