Familiarization
Section 4
Digital Satellite Receiver
Page 4 - 7
©
2
001
E
c
hoS
tar
Inte
rnati
o
nal
C
o
rp
orat
io
n
A
ll
ri
g
hts
re
s
erved
4
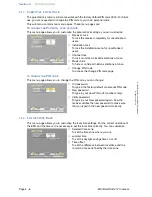
2.1.5. TV SYSTEM PAGE
This menu page allows you to customize the TV settings used for the receiver, you can
customize:
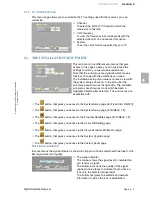
2.2. THE INSTALLATION SETUP MENU
■
The
button, that gives you access to the System Setup page (for Fixed dish, SMATV);
■
The
button, that gives you access to the System Setup page (for DiSEqC 1.2);
■
The
button, that gives you access to the Program Satellites page (for DiSEqC 1.2);
■
The
button, that gives you access to the User LNB Setting page;
■
The
button, that gives you access to the About EchoStar information page;
■
The
button, that gives you access to the System Upgrade page;
■
The
button, that gives you access to the Factory Reset page.
T
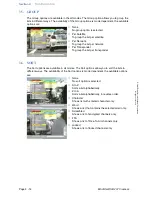
HE SIGNAL INDICATOR
In some menus the signal indicator is shown to help you to find a satellite and fine tune for the
best signal level and quality.
■
Channel
To select the (UHF) TV channel to which the
receiver is connected.
■
CH Frequency
To view the frequency that corresponds with the
selected channel. You cannot set this option.
■
System
To set the video format supported by your TV.
This main menu has different sub-menus that give
access to the pages where you can customize the
settings to match your personal requirements.
Note that the sub-menus are dynamic which means
that they change with the selections you make.
The installation setup menu always comes in view with
the system setup sub-menu. In the menu bar the
sub menus are shown at the right side. The available
sub menus are shown as icons which become a
highlighted button after selection. The sub-menus are
accessible with:
■
The signal indicator
The top bar shows the signal level to indicate that
you receive a signal.
The bottom bar shows the quality of the signal
(signal-to-noise ratio) to indicate that you have a
lock onto the selected transponder.
The bottom text gives the satellite and network
information to which the lock is established.


