background image

Familiarization

Section 4

Digital Satellite Receiver

Page 4 - 11

©

2

001

E

c

hoS

tar

Inte

rnati

o

nal

C

o

rp

orat

io

n

A

ll

ri

g

hts

re

s

erved

4

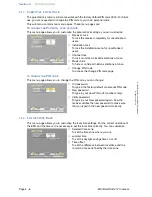
2.2.7. FACTORY RESET

The Factory Reset menu gives you the possibility to reset the receiver to the initial factory
settings. The memory erase option restores the factory settings over your personal settings.
All customized data like parental lock and favorites will be replaced with the factory settings.

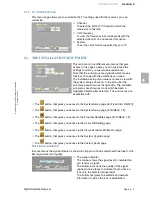
2.3. THE CONDITIONAL ACCESS MENU

The

button, that gives you access to the Viaccess smart card reader information page.

2.3.1. CONDITIONAL ACCESS

The conditional access sub-menu gives all the Information about the smart card that is
inserted. Note that the menu is dynamic which means that it changes with the type of smart
card inserted.

Memory Erase - User Data
To instruct the receiver to delete all personal
settings and replace them with the factory settings.

Confirm Reset
With this field you can confirm the selections made
and execute the selected procedure. After the
memory erase procedure is finished, you are taken
to the initial setup procedure. (for detailed
instructions, please refer to section Installation).

This main menu has different sub-menus that give
access to the pages where you can view the smart
card settings.
Note that the sub-menus are dynamic which means
that they change with the selections you make.
The conditional access information menu always
comes in view with the system setup sub-menu. In the
menu bar the sub menus are shown at the right side.
The available sub menus are shown as icons which
become a highlighted button after selection. The sub-
menus are accessible with:

Viaccess Embedded
Gives information about which smart card is
inserted in the embedded Viaccess smart card
reader.

Summary of Contents for DSB-707 Viaccess

Page 1: ...USER MANUAL DSB 707 Viaccess Digital Satellite Receiver Printed on recycled paper ...

Page 2: ...tional Corporation The Netherlands We encourage you to express your thoughts on this user manual Please send your comments to EchoStar International Corporation Technical Publications Department Schuilenburglaan 5a 7604 BJ Almelo The Netherlands ...

Page 3: ...and an index are provided 3 WARRANTY EMBEDDED VIACCESS SMART CARD READER AND SMART CARDS For pay services please only use smart cards which are approved by the service provider of the encrypted program you want to receive Only this will enable the receiver to work properly Anomalies can occur when unapproved smart cards are used EchoStar cannot and will not accept any responsibility for the perfor...

Page 4: ...l has been provided pursuant to an agreement containing restrictions on its use This user manual is also covered by Federal Copyright Law No part of this user manual may be copied distributed transmitted stored in a retrieval system or translated into any human or computer language in any form or by any other means electronically mechanically magnetically manually or otherwise or disclosure to thi...

Page 5: ...MENT 2 2 6 TO SETUP THE RECEIVER 2 2 Installation 1 CONNECT YOUR EQUIPMENT 3 1 2 CONNECT A DISH 3 2 3 TO SETUP YOUR RECEIVER FOR THE FIRST TIME 3 3 Familiarization 1 THE RECEIVER 4 1 2 THE ECHONAV INSTALLATION MENU 4 4 3 THE ECHONAV MODE AND SELECTION MENUS 4 12 4 THE ELECTRONIC PROGRAM GUIDE EPG 4 15 5 THE INFOBANNER AND POP UP MENUS 4 15 Operation 1 TO NAVIGATE THROUGH THE MENUS 5 1 2 USE THE FA...

Page 6: ... Page IV EchoStar DSB 707 Viaccess 2001 EchoStar International Corporation All rights reserved Index Appendix 1 1 LNB CONFIGURATION MATRIX A1 1 2 LNBF CONFIGURATION MATRIX A1 1 3 USER DEFINED LNB F MATRIX A1 1 ...

Page 7: ...where they can cause injury to persons and pets e g to stumble over eat the cable Do not install the receiver in a closed or poorly ventilated cabinet directly on top of or under another equipment on a surface which will obstruct the ventilation slots Do not expose the receiver and it s accessories to rain or excessive moisture to avoid the risk of shock or permanent damage to your receiver to dir...

Page 8: ...tion The Dolby Digital logo This logo tells you that this receiver is compliant with the Dolby Digital standard The Digital Video Broadcasting logo This logo tells you that this receiver is compliant with the DVB standards as registered under registration number 2348 The Viaccess logo This logo tells you that this receiver has an embedded Viaccess smart card reader The required smart card has to b...

Page 9: ...uring shipment If you find any damage stop to unpack the box and call the retail seller where you bought the receiver To help avoid possible damage to the receiver s electronics allow the receiver to adapt to the ambient temperature and humidity level This to avoid condensation caused by a sudden change in temperature e g from a cold car into a warm room 3 THE CONTENTS OF THE BOX The box contains ...

Page 10: ...well aligned for the best reception The dish is connected with the correct RF coaxial cable 75 Ohm and connectors The cables from the dish are in a good condition no excessive bends or damaged insulation 2 If necessary do any work 5 3 THE TV VIDEO RECORDER AND AUDIO EQUIPMENT 1 Make sure Safe access to the connections is available The equipment is switched off It is safe to remove and install the ...

Page 11: ...l the SCART cable between the VCR and the VIDEO SCART connector receiver 5 Install a full featured SCART cable between the TV SCART connector receiver and the SCART connector on the TV old SCART connection to the VCR CONNECTION WITH AUDIO VIDEO CABLE RCA CONNECTORS 1 On the rear panel of the receiver find the VIDEO AUDIO L and AUDIO R connectors 2 Install an audio video cable between a the VIDEO c...

Page 12: ... digital and the IF OUT connectors FIXED DISH INSTALLATION WITH LNB F 3 Install the F connector dish to the LNB IN connector receiver FIXED DISH INSTALLATION WITH DISEQC SWITCH 3 Install the F connector DiSEqC switch to the LNB IN connector receiver WARNING ALL EQUIPMENT INVOLVED IN THE INSTALLATION TASK MUST BE INSTALLED CORRECTLY AND SWITCHED OFF MAKE SURE THAT IT IS SAFE TO PROCEED WITH THE INS...

Page 13: ... the OK key to confirm the selection 4 Use the arrow keys to navigate between the left and right column of selectable menu items 5 Use the EXIT key to leave the menu and return to the live mode 1 Switch on the TV 2 On the receiver press the on standby key The receiver display shows first a moving dot then it shows The TV shows the first page 3 Make the required selections 4 Read the available help...

Page 14: ...re Fixed DiSEqC 1 2 and SMATV Fixed means set up a single dish or multiple dishes with DiSEqC1 4 switch DiSEqC 1 2 means set up a moveable dish according the DiSEqC 1 2 spec SMATV means set up for television distribution cable network in buildings 19 Make the required selections 20 Read the available help text for information Note that only the white fields are selectable other fields show referen...

Page 15: ...e fields are selectable other fields show reference information 24 Go to the Program Satellites field 25 On the RCU press the OK key to advance 26 Wait for the Checking Configuration to complete 27 Make the required selections 28 Read the available help text for information 29 Monitor the signal indicator for best signal when you set the location 30 On the RCU press OK to save the setting 31 Go to...

Page 16: ... it is possible to add more symbol rates Refer to section Maintenance for detailed instructions 23 Read the available help text for information 24 Go to the Search Channels field 25 On the RCU press the OK key to advance 26 Wait for the search to complete a the receiver display shows a moving dot b the search completed popup menu appears 27 On the RCU press the OK key to end the initial setup proc...

Page 17: ...oftware guides you through the required setup menu to allow for an easy and reliable installation setup of the receiver FEATURE HIGHLIGHTS EchoNAV Multi Lingual advanced User Interface 12 languages Embedded Viaccess 1 1 7 day EPG 4 000 Digital Channels 100 Satellites 1 300 Transponders 8 Favorite Channel Lists for TV and 8 for radio Powerful Channel Sorting and Grouping Multiple Scan Modes incl Up...

Page 18: ... sub D for the connection to the serial communication port of a PC The IF OUT connector F type for a loop through connection The VIDEO connector RCA for the connection to the composite video input of the TV monitor The ANT IN connector IEC for the connection of an terrestrial TV antenna The S PDIF connector RCA for the connection of Dolby Digital AC 3 compatible audio equipment The TV OUT connecto...

Page 19: ...bout the actual mode ON STANDBY To switch to standby or on EPG To view the EPG To return to current time SUBTITLE To choose another subtitle language MENU To go to the installation menu VOL To increase the volume VOL To decrease the volume ARROW CLUSTER To go left right down or left OK STORE To go to the favorites lists To make a menu selection To pull down a menu RED To go to another mode TV RAD ...

Page 20: ...an make a choice from the available options The button that gives you access to the User Preferences menu The button that gives you access to the installation setup menu The button that gives you access to the Conditional Access menu NOTE Unless otherwise specified this note explains the way you can navigate through the pages of the EchoNAV user menu 1 Use the OK key to pull down the menu selectio...

Page 21: ...at give access to the pages where you can customize the factory settings The user preferences menu always comes in view with the User Profile sub menu In the menu bar the sub menus are shown at the right side The available sub menus are shown as icons which become a highlighted button after selection The sub menus are accessible with Aspect ratio To set the screen size of the TV Banner time out To...

Page 22: ...on of the EPG and the timers it is necessary to set the local time correctly You can customize Receiver Lock To lock the receiver completely for unauthorized users Installation Lock To lock the installation menu for unauthorized users Channel lock To lock or unlock all locked selections at once Master hide To hide or unhide all hidden selections at once Change PIN Code To access the change PIN cod...

Page 23: ...est signal level and quality Channel To select the UHF TV channel to which the receiver is connected CH Frequency To view the frequency that corresponds with the selected channel You cannot set this option System To set the video format supported by your TV This main menu has different sub menus that give access to the pages where you can customize the settings to match your personal requirements ...

Page 24: ...nstallation if used LNB1 To set the LNB type s you use Program Satellites DiSEqC1 2 only To confirm the selections and go to next menu Satellite fixed only To set the satellite you want to scan for the LNB Check Signal fixed only To confirm the selections and go to next menu LNB Power SMATV only To select the distribution type cable Off IF On Symbol Rate 1 4 SMATV only To set the symbol rates you ...

Page 25: ...the Clarke Belt Transponder To select a transponder of the selected satellite Skew To adjust the Horizontal Vertical setting only for polarotor Location To move the dish for best signal level and quality Satellite offset To compensate for a dish offset caused by ambient conditions NOTE The satellite offset will affect all satellite positions this means that all scanned positions will change which ...

Page 26: ...er and the downloaded software from the EchoStar website Company This field shows the full name of EchoStar Address This field shows the address of EchoStar S W version This field shows the current software version loaded into the receiver Boot version This field shows the current boot version loaded into the receiver Web site This field shows the EchoStar web site where you can find the latest us...

Page 27: ...Erase User Data To instruct the receiver to delete all personal settings and replace them with the factory settings Confirm Reset With this field you can confirm the selections made and execute the selected procedure After the memory erase procedure is finished you are taken to the initial setup procedure for detailed instructions please refer to section Installation This main menu has different s...

Page 28: ...rds EchoStar has no control over the information provided by the related service provider therefor no specific information is given The mode and selection menu gives access to the current list related features and on screen help lines After you have entered the mode and selection menu you can manipulate the lists through The Mode bar red The List bar green The Edit bar white The Group bar yellow T...

Page 29: ...ist of scanned TV channels available on the scanned satellites Current Sat To access the list of all scanned TV channels available on the current selected satellite Favorites To access to your own favorite lists You can rename the favorites to something meaningful to yourself e g Film Sport Kids NOTE Sometimes a list seems to be empty because of the settings of the group and sort option If this ha...

Page 30: ... different ways The availability of the Sort options is mode dependent the available options are None No group option is selected Per Satellite To group the list per satellite Per Network To group the list per network Per Transponder To group the list per transponder None No sort option is selected A to Z Sorts a list alphabetically Z to A Sorts a list alphabetically in reverse order Character Sho...

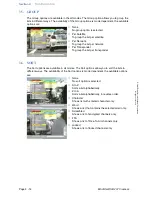
Page 31: ... program information bar to show the start time duration indicator and program name The i button to indicate that there is detailed program information available The additional information bar to show the additional service icons These icons show only if the additional service is available The icons are the icon for teletext the icon for alternate audio the icon for alternate subtitling the icon f...

Page 32: ...BTITLE 5 3 3 SATELLITE LIST If transmitted you can set per channel your alternate audio You can call up the pop up menu with the alternative audio key on the remote control unit You can navigate up and down between the audio languages or left and right for bi lingual programs For the radio channels you can navigate up and down between the different radio stations within the selected channel If tra...

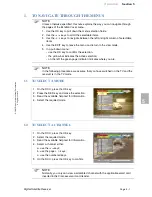
Page 33: ... a pull down menu use the OK key to confirm the selection the yellow bar indicates the active selection on the left the green page indicator indicates where you are NOTE In the following procedures we assume that you have switched on the TV and the receiver is in the TV mode 1 On the RCU press the OK key 2 Press the RED key and make the selection 3 Read the available help text for information 4 Se...

Page 34: ...equired mode 3 On the RCU press the YELLOW key 4 Read the available help text for information 5 Select the required group option 1 On the RCU press the OK key 2 Select the required mode 3 On the RCU press the BLUE key 4 Read the available help text for information 5 Select the required sort option Note that only for the Character and Word option a keyboard appears 6 When the keyboard appears a use...

Page 35: ...ions are not always available If an option is not presented select Group None and Sort None 1 In the Edit menu select the Move option 2 Read the available help text for information 3 Go to the channel you want to move 4 On the RCU press the OK key Note a red bullet appears behind the selection 5 If you want to undo the selection press the OK key again 6 Move the channel either a use the keys b use...

Page 36: ... correct PIN code 1 In the Edit menu select the LOCK option 2 Read the available help text for information 3 Go to the channel you want to lock 4 On the RCU press the OK key Note a red bullet appears behind the selection 5 If you want to undo the selection press the OK key again 6 Either a press the WHITE key to confirm the lock and end the session or b select the next channel you want to lock 7 Y...

Page 37: ...ances to the next channel 5 If you want to undo the selection press the OK key again 6 Either a press the WHITE key to confirm the deletion and end the session or b select the next channel you want to delete 1 In the Edit menu select the VOLUME option 2 Read the available help text for information 3 Go to the channel you want to edit 4 On the RCU use the keys to set the volume 5 Either a Press the...

Page 38: ...lect the next channel you want to rename CAUTION You can only hide a channel if you have set the parental lock and the PIN code correctly We recommend that you check if the hide option is set correctly NOTE After you have set a hide onto a channel the installation and the EDIT menu are automatically locked with an installation lock to prevent unauthorized access Now you can only access these funct...

Page 39: ... one step to the Sports TV favorite list Note that for each mode a separate number of favorite lists is available 1 In the Edit menu select the HIDE option 2 Read the available help text for information 3 Go to the channel you want to hide 4 On the RCU press the OK key Note a red bullet appears behind the selection 5 If you want to undo the selection press the OK key again 6 Either a press the WHI...

Page 40: ...selection and the cursor advances to the next channel 12 If you want to undo the selection press the OK key again 13 Press the WHITE key to end the session NOTE As an example this procedure details the instructions on how to add a group of channels to a favorite list In this example we add a complete network to the My TV Channels favorite list 1 On the RCU press the OK key 2 Select the required mo...

Page 41: ...oBanner a heart symbol appeared to indicate that this channel is a favorite channel 1 On the RCU press the OK key 2 Press the RED key and select Lists 3 Press the GREEN key and select the category 4 In the Edit bar select the RENAME option 5 Read the available help text for information 6 Go to the favorite list you want to rename 7 On the RCU press the OK key 8 When the keyboard appears a use the ...

Page 42: ...the now next infor mation or sometimes nothing at all EchoStar has no influence on this matter Make sure the local time is set otherwise you cannot view EPG information because it needs the correct time Refer to the Local Time menu 1 Use the EPG key to access the main EPG menu 2 Allow the receiver to collect the EPG information for the selected channel 3 Read the available help text for informatio...

Page 43: ...between the detailed program information and the InfoBanner 4 On the RCU press the EXIT key to remove the InfoBanner from the screen only in TV mode 1 On the InfoBanner find the alt audio symbol 2 On the RCU press the key 3 In the Alt Audio pop up menu select the required alternate audio Note that alternate audio information is provided by the service provider 4 On the RCU press the key twice 1 On...

Page 44: ...owards the selected satellite 1 On the RCU press a the MENU key b the key to select the menu c the OK key to select the menu 2 Press the OK key and make the selections 3 Read the available help text for information 4 On the RCU a press the MENU key to save the settings b press the EXIT key to leave the menu 1 On the RCU press a the MENU key b the key to select the menu c the OK key to select the m...

Page 45: ...e key to select the menu c the OK key to select the menu 2 Enter the correct PIN code as requested 3 Read the available help text for information 4 Make the selections 5 On the RCU a press the MENU key to save the settings b press the EXIT key to leave the menu 1 Select the parental Lock menu 2 Enter the correct PIN code as requested 3 Select the Change PIN Code bar 4 On the RCU press the OK key 5...

Page 46: ...p text for information 4 On the RCU a press the MENU key to save the settings b press the EXIT key to leave the menu 1 On the RCU press a the MENU key b the key to select the menu c the OK key to select the menu 2 Select the summer time option a off for winter time no daylight savings time b on for summer time 1 hour 3 Read the available help text for information 4 On the RCU a press the MENU key ...

Page 47: ...ection Operation 2 SOFTWARE MAINTENANCE 2 1 TO CHANGE THE SETUP OF THE RECEIVER WARNING RISK OF ELECTRICAL SHOCK REMOVE THE MAINS PLUG FROM THE POWER SUPPLY SOCKET BEFORE YOU CLEAN THE RECEIVER MAKE SURE IF USED CLEANING AGENTS CANNOT GET IN THE RECEIVER NOTE Make sure the local time is set correctly otherwise you cannot view and use the EPG information because the EPG and the related timers need ...

Page 48: ...he OK key 12 Wait for the search to complete a the receiver display shows a moving dot b the search completed popup menu appears 13 On the RCU a press the OK key to save the settings b press the EXIT key to leave the menu 1 On the RCU press a the MENU key b the key to select the menu c the OK key to select the menu 2 Press the OK key and make the selections 3 Read the available help text for infor...

Page 49: ...annel indication NOTE EchoStar offers on a regular basis software updates via the satellite and the EchoStar website If you have trouble to get a download with the latest software version please ask your retail seller or dealer for assistance NOTE Be sure if you select Memory Erase because all your personal settings will be deleted and replaced with the factory settings An example of the personal ...

Page 50: ...Select Mode TV c Select List All Channels d Select Group None e Select Sort None f Select Edit Add TP 3 On the RCU press the OK key 4 On the RCU press the OK key again to advance 5 Enter the required settings 6 Read the available help text for information 7 Monitor the signal indicator and make sure that you have sufficient signal strength and quality 8 Go to the Search Channels field 9 On the RCU...

Page 51: ...r equipment 1 Select a channel of the transponder to which you want to add a PID 2 On the RCU press a the OK key b Select Mode TV c Select List All Channels d Select Group None e Select Sort None f Select Edit Add PID 3 On the RCU press the OK key 4 Select the applicable transponder 5 On the RCU press the OK key 6 Enter the required settings 7 Read the available help text for information 8 Monitor...

Page 52: ...Page 6 6 EchoStar DSB 707 Viaccess 2001 EchoStar International Corporation All rights reserved ...

Page 53: ...s empty You have selected an empty favorites list Select another favorites list The selected program supports no EPG There is no solution for this The local time is not correct In the Local Time menu set the correct time 2 The EPG shows little grey balloons without text The time scale of the EPG is to big Use the zoom function blue bar to reduce the time scale until the information can be read Sel...

Page 54: ... 3 sound to my other equipment The equipment is connected to the receiver with a RCA or SCART cable only Connect the S P DIF connector of the receiver to the Dolby digital input of the receiving equipment 5 I can not view or listen to a scrambled channel The CI module smart card is not valid Insert for this service a valid CI module smart card The CI module smart card is not correctly inserted Ins...

Page 55: ...use What to do 1 Receiver does not respond to the RCU Batteries are empty Insert new batteries 2 Receiver does some times not respond to the RCU Direct sun light from behind the receiver Close the sun blinds or get closer to the receiver You do not aim sufficiently at the receiver Aim at the receiver display install a RCU extender Batteries are almost empty Insert new batteries ...

Page 56: ...Page 7 4 EchoStar DSB 707 Viaccess 2001 EchoStar International Corporation All rights reserved ...

Page 57: ...Access PIN Personal Identification Number DVB Digital Video Broadcasting PWM Pulse Width Modulation EL East Limit QPSK Quadrature Phase Shift Key EPG Electronic Program Guide RCA Connector type also known as Cinch ºF Fahrenheit RCU Remote Control Unit FTA Free To Air RF Radio Frequency Gb Gigabit S PDIF Sony Philips Digital Interface GB GigaByte SAT SATellite GMT Greenwich Mean Time SCART Connecto...

Page 58: ...ropean manufacturers and broadcasters EPG A electronic program guide that comes with the broadcast of a particular satellite Note that every station fills the EPG differently or not so differences in the EPG are not necessarily receiver errors FEC Is an invisible part of a broadcast which makes sure that possible errors in the reception of the satellite signal are corrected Feedhorn A part of the ...

Page 59: ...atellite receivers use normally four types of PID these are VPID video PID APID audio PID Program Clock Reference PCR PID and data PID EPG information Parental lock A feature which is introduced to give you the possibility to lock or hide several functions of the receiver to prevent unauthorized persons children to view broadcasts that are not suitable for them The use of the parental lock require...

Page 60: ...res the reception resources and is intended for the distribution of TV and radio signals to the user in one ore more buildings Stream The signal which is received from the transponder which contains the together with the video signal additional information that the receiver needs in order to process the received signal correctly Symbol rate Information in the stream which tells the receiver at whi...

Page 61: ... erroneous code Network In this mode the built in database or information from the received stream is used to search for the transponders that are included with the currently received network The digital channels that belong to this network are searched for and added to the all channel list TP In this mode the built in database or information from the received stream is used to search for or scan ...

Page 62: ...Page 8 6 EchoStar DSB 707 Viaccess 2001 EchoStar International Corporation All rights reserved ...

Page 63: ... dolby digital 4 15 dvb 1 II E echonav user interface 4 3 edit 4 13 edit a list 5 3 edit pid 4 13 edit tp 4 13 epg 3 4 4 15 5 10 7 1 F factory reset 4 11 6 3 favorite 4 15 7 1 favorite lists 5 7 features 4 1 ferrite 8 2 fixed dish setup 4 8 fixed installations 3 4 fta 4 14 G green key 5 2 group 4 14 group a list 5 2 H hide a channel 5 6 I i button 4 15 i key 5 10 indicator 4 7 infobanner 4 15 5 11...

Page 64: ... subtitle language 5 11 set the channel volume 5 5 set the local date and time 5 14 set the tv system 5 14 setup after memory erase 3 3 signal 4 7 4 8 signal indicator 4 7 smart card information 4 11 6 4 smatv 3 6 software update 6 3 software version 4 10 sort 4 14 sort a list 5 2 stb 8 1 subtitling 4 16 5 11 summertime 5 14 symbols 1 2 system setup menu 4 8 6 1 T teletext 4 15 tp 4 13 transponder...

Page 65: ...r own LNB F You can use the list below to note the settings LNB TYPE LO Frequency LO Selection 13 18V 0 22kHz H V H V Standard 10 000 13 18V 18 18 0 0 Enhanced 9 750 13 18V 18 18 0 0 Quattro 9 750 13V 13 13 0 0 10 750 18V 18 18 0 0 C Band 5 150 13 18V 18 18 0 0 DBS 10 750 18V 18 18 0 0 TELECOM 11 475 18V 18 18 0 0 LNBF TYPE LO Frequency LO Selection 13 18V 0 22kHz H V H V Standard 10 000 13 18V 18...

Page 66: ...Appendix 1 LNB F Configuration matrix Page A1 2 EchoStar DSB 707 Viaccess 2001 EchoStar International Corporation All rights reserved ...

Reviews: