4
Getting Started
Watching TV
-
Follow the instructions for
Using the Setup Wizard
on page 6 to
complete the initial setup of your DTVPal DVR. Tune to live TV.
-
Turn up the volume on your HDTV and confirm you have sound.
OPTIONAL: If you don’t have sound, your system may require you
to connect a pair of RCA-type audio cables (one red and one white)
between the DTVPal DVR’s audio outputs and your TV’s audio
input connections.
5.
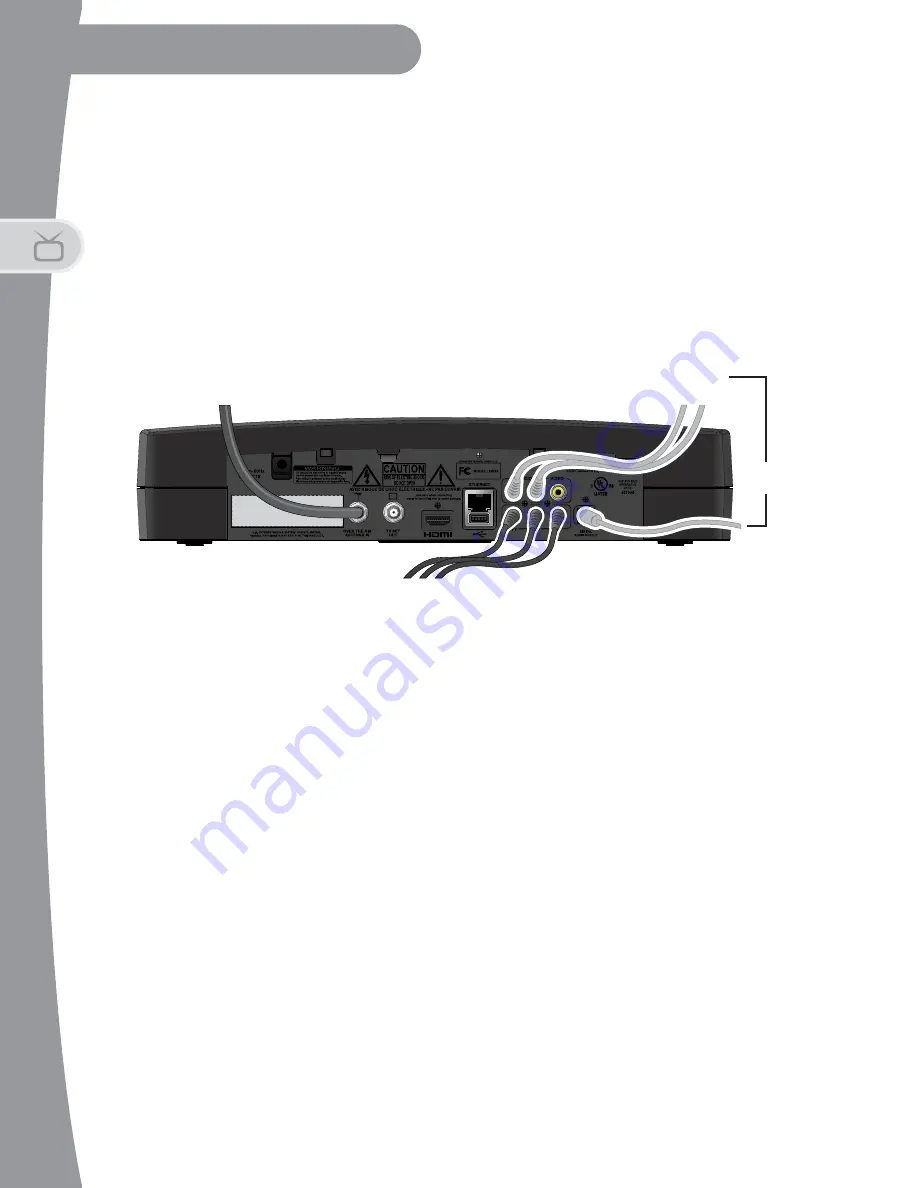
To connect your DTVPal DVR to your TV using component cables (red,
blue, and green connections):
-
Connect a set of component cables from the DTVPal DVR’s
YP
R
P
B
(Red, Blue, and Green) component connections to your TV.
-
Connect audio (red and white) RCA-type cables between the
DTVPal DVR’s audio outputs and the audio input connections that
go with the
YP
R
P
B
video connectors on your HDTV. You can also
use the optional optical connection if you use a device to decode
Dolby Digital audio, for example for 5.1-channel surround sound.
-
Plug the power cord of the DTVPal DVR into an electrical outlet.
Make sure your TV also is plugged in to power and turned on.
-
The DTVPal DVR first displays a startup screen.
-
Confirm that you are getting a picture from the DTVPal DVR.
Consult your HDTV user’s guide if you need to change your
HDTV’s settings to display from the component video input.
-
Follow the instructions for
Using the Setup Wizard
on page 6 to
complete the initial setup of your DTVPal DVR. Tune to live TV.
Connection
From Antenna
Optional RCA-type
Audio Connection
Optional Optical
Audio Connection
Component Connection
From Television
OR
Summary of Contents for DTVPal
Page 1: ......
Page 3: ...i SAFETY IMPORTANT SAFETY INSTRUCTIONS PROPER CARE OF YOUR EQUIPMENT ...
Page 8: ...SAFETY vi ...
Page 26: ...18 Notes Watching TV Notes ...
Page 49: ...41 Getting Help Getting Help FINDING MORE INFORMATION TROUBLESHOOTING ...
Page 54: ...46 Finding More Information Getting Help ...
Page 55: ...47 APPENDIX LIMITED WARRANTY FCC COMPLIANCE ...
Page 60: ...Appendix 52 ...


