www.echostar-int.com
Page 1 - 1
©
20
04
Ech
o
S
tar
In
te
rn
ati
o
nal
C
o
rp
or
at
io
n
Al
l ri
g
h
ts
r
e
s
e
rv
e
d
GETTING STARTED
1.
F
IRST
TIME
INSTALLATION
Installation of this receiver is not difficult but each installation has its advantages and disadvantages. Normally a generic dual tuner PVR receiver lets
you watch and record two different programs at the same time. In principle it is the same as with an ordinary TV-VCR installation. The TV uses its own
tuner to let you watch a program while the VCR uses its own tuner for recording a program.
In this receiver, EchoStar has added some intelligence to the usage of the two built in tuners. This receiver can record up to four programmes at the
same time while you watch another with the possibility to view the sixth programme in a picture-in-picture view. Due to technical reasons, you will find
that there are some limitations is selecting the programs. These limitations depend on the installation type and program choice
In the next paragraphs you will learn about the basics of satellite broadcasts, installation configurations and their impact on your daily use.
S
ATELLITE
BROADCASTS
The digital signal that is transmitted from the satellite, is for more economy (more channels at the same time) divided by using different transmission
techniques. In satellite jargon, the digital signal is divided in High/Low band, frequencies, horizontal/vertical polarization and symbol rates. For
maximum efficiency the digital signals are spread over so called transponders (TP). But what about the band? All transponders with a frequency under
11700 Mhz are in the low band where transponders with a frequency over 11700 Mhz are in the high band. Thus the transponder (12188/H) in our
example belongs to the high band as its frequency (12188) is over 11700 MHz.
I
NSTALLATION
CONFIGURATIONS
If this receiver replaces your current satellite receiver, there is no need to replace your dish installation or LNB. In this case follow the instructions on
how to install a Loop-through configuration.
You can connect the receiver in different ways, each with its own advantages and disadvantages.
You can use the Loop-through configuration where you connect a single dish to the first tuner and the output of tuner 1 to the input of tuner 2. Now each
tuner has access to the same satellite and transponders. While recording, the band and polarity of the recorded program will limit the channel list
temporarily for the second tuner because only one tuner can control the LNB for band and polarity.
You can use the Twin configuration, where you connect a single dish with a twin LNB (two LNBs in one house), connection 1 to the first tuner and
connection 2 to the second tuner. Now each tuner has access to the same satellite and transponders. While recording, the band and polarity of the
recorded program will not influence the channel list for the second tuner as they operate as two independent receiver-LNB installations.
You can use the T1-T2 configuration where you connect a single dish (aimed at satellite 1) to the first tuner and where you connect another single dish
(aimed at satellite 2) to the second tuner. Now each tuner has access to its own satellite and transponders. While recording, the band and polarity of
the recorded program will not influence the channel list for the second tuner as they operate as two independent receivers aimed at different satellites.
For connection diagrams and explanation of more advanced installation types, please refer to the appendix of this user guide.
DAILY
USE
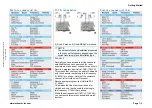
The explanation above sounds difficult but you have to know a bit about it to understand why sometimes your channel list seems to loose channels.
This is not the case, they are temporarily not selectable and therefor they are not shown. So at every moment you will access a channel list that has the
channels that are available for watching and recording.
Note that the channels lists in the next examples are fiction and do not necessarily reflect your current situation.


