


Accessor
Accessor
ies
ies
T
T
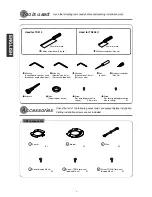
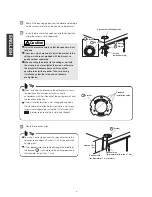
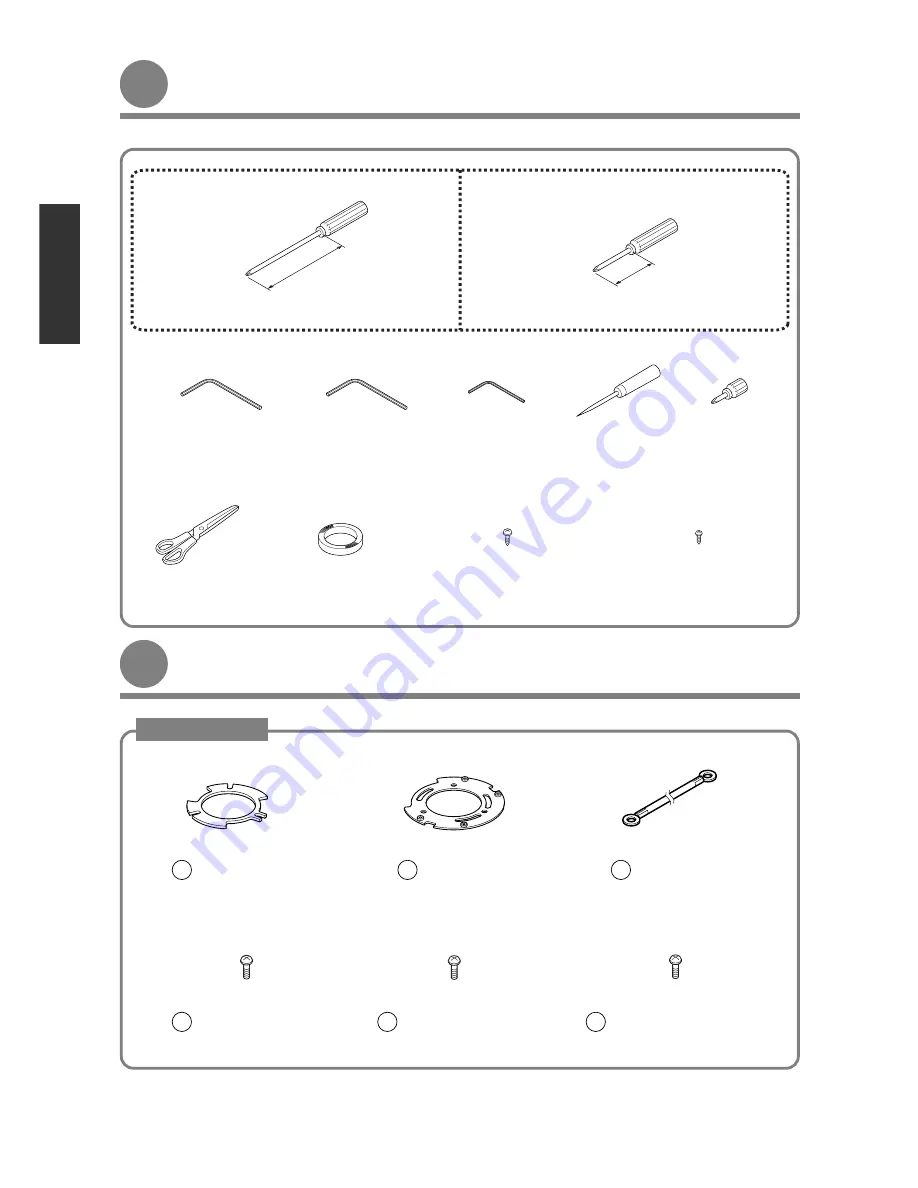
ools used
ools used
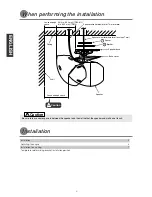
Have the following tools ready before commencing installation work.
Have the following tools ready before commencing installation work.
6
– 2 –
JA
P
ANESE
ENGLISH
G
ERMAN
F
RENCH
IT
ALIAN
S
P
ANISH
•
•
Phillips screwdriver (Plus tip)
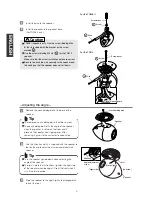
CB1 components
Spacer
X1
1
Bracket
X1
2
Wire
X1
3
Screw(binding M5 x 8)
X4
4
5 Screw (TD510 for wires)
(binding M4 x 8) X1
Screw (TD508 II for wires)
(binding M5 x 8) X1
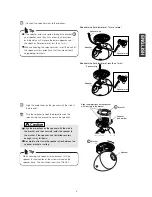
•
•
Allen key
(Nominal size 1.5 mm)
(For cover wire)
•
•
Phillips screwdriver (Plus tip)
•
•
Allen key
(Nominal size 3 mm)
(For neck holding bolt)
•
•
Awl
(or drill)
•
•
Stubby screwdriver
(Plus tip)
•
•
Scissors
•
•
Tape
(Paper tape or similar)
•
•
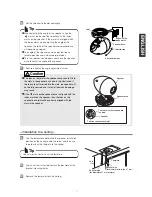
Screw
(For installing bracket to
ceiling) X3 or more
150 mm or more
90 mm or more
Used for TD510
Used for TD508 II
•
•
Screw
(For securing drop-prevention
wire to ceiling) X1
Check that all of the following accessories are present before installation.
Check that all of the following accessories are present before installation.
Ceiling installation screws are not included.
Ceiling installation screws are not included.
•
•
Allen key
(Supplied with speaker, used
for speaker angle adjustment)


