


– 7 –
JA
P
ANESE
GERMAN
FRENCH
IT
ALIAN
S
P
ANISH
ENGLISH
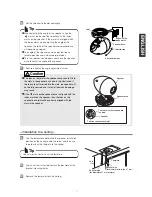
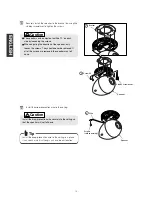
•
•
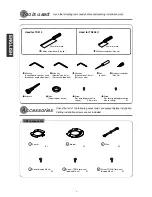
The tabs on the joint of the speaker base should fit into
the slots in the speaker as shown in the illustration. If
the tabs are not inserted into the slots, the speaker will
not be fully secured and it may fall down and damage
may result.
•
•
If the
mark on the speaker base is aligned with the
index marks on the speaker, then the tabs on the
speaker base joint will be correctly aligned with the
slots in the speaker.
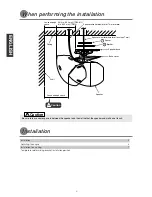
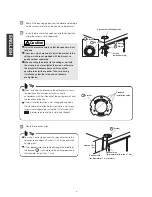
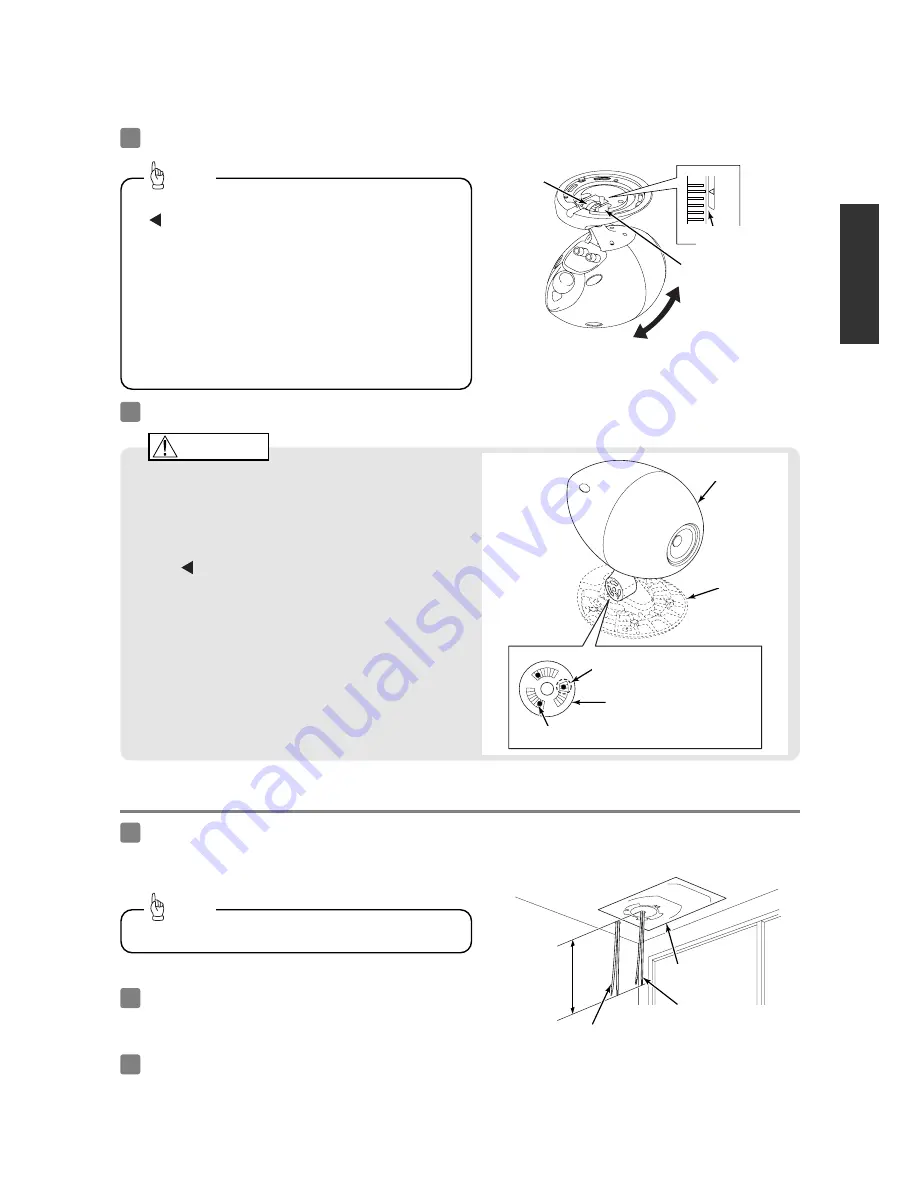
– Installation to a ceiling –
Use the template to determine the speaker installation
position on the ceiling inside the room, and then use
tape to attach the template to the ceiling.
12
Use an awl or similar tool to mark the positions of the
bracket mounting holes.
13
Tabs on speaker base joint
The tabs must be inserted into
the slots.
Template
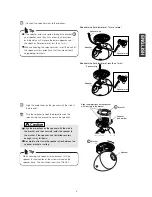
Remove the template from the ceiling.
14
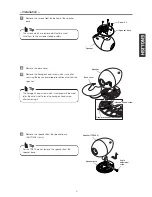
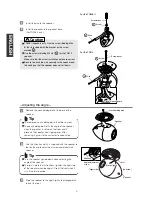
Set the speaker to the desired angle.
10
Securely tighten the angle adjustment screw.
11
Align with the
index marks
1 forward step
6 backward steps
Speaker
Speaker base
Joint
40 in.
(1m)
Speaker base
Speaker
Speaker wire
(for diameter of 7 mm or more)
Caution
•
•
When adjusting the angle of the speaker, align the
mark at the base of the speaker with the index
marks on the speaker. If the mark is not aligned with
the index marks when adjusting the angle of the
speaker, the joints of the speaker and speaker base
will become damaged.
•
•
The angle of the speaker can be adjusted to one
forward position and six backward positions.
•
•
Turn the speaker upside-down and move the speaker
base to adjust the angle of the speaker.
Tip
Use scissors or similar to cut the template.
Tip
Speaker wire
(for diameter of less than 7 mm)


