417101634_Lubo-DryExx_Advanced
- 49 -
Rev. 07-01.15
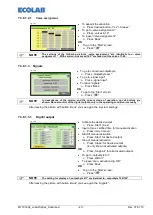
7.3.8.1.2.1
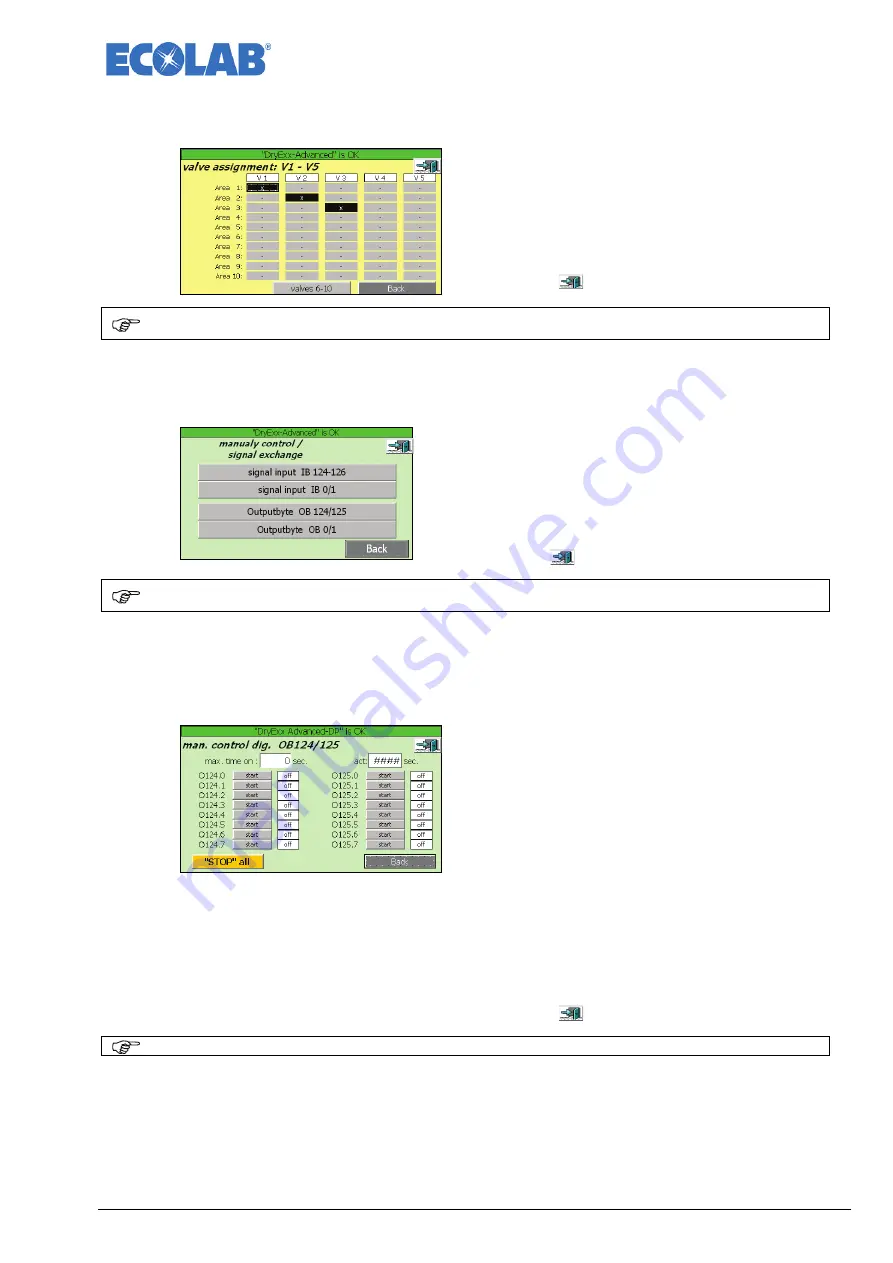
Valve assignment
fig. 7.27
•
To appoint the allocation
Press desired button „V xx“/ „Area xx“
•
To go to „valve assignment 2“
Press „valves 6-10“
•
To leave “Valve assignement“
Press ‘Back’
OR
•
To go to the ‘Start’ screen:
Press "
"
NOTE
The settings of the following pictures „valve assignment “are identically too „valve
assignment 1 “. With version „Advanced 16V “are faded out the valves 17-24.
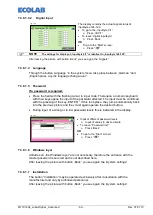
7.3.8.1.3 Signals
fig. 7.28
•
To go to concerned outputbyte
Press „Outputbyte xxx“
•
To go to „signal input“
Press „signal input“
•
To leave “signals“
Press ‘Back’
OR
•
To go to the ‘Start’ screen:
Press "
"
NOTE
In dependence of the version and the current mode of operation, not all buttons are
shown. Manual control of the digital outputs only in the operating condition „manually “.
After leaving the picture with button „Back“ you see again the „System settings”.
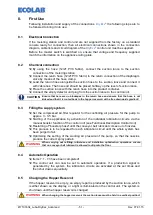
7.3.8.1.3.1
Digital output
fig. 7.29
•
Activate the desired output
Press „Start“ (A x.x)
•
Input of max. certified time for manual activation
Press „max. time on“
•
Start of manual activation
Press „Start“ for desired output
•
Stop of manual activation
Press „Stopp“ for desired output
(is only shown at activated outputs)
OR
Press „Stopp all“ for all activated outputs
•
To go to „outputbyte 0/1“
Press „OB 0/1“
•
To leave “man. activation dig. OB“
Press ‘Back’
OR
•
To go to the ‘Start’ screen:
Press "
"
NOTE
The setting for display of „outputbyte 0/1” are identical to „outputbyte 124/125”.
After leaving the picture with button „Back“ you see again the „Signals”.

