background image

- 13 - 

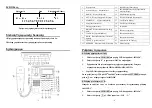
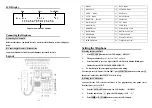
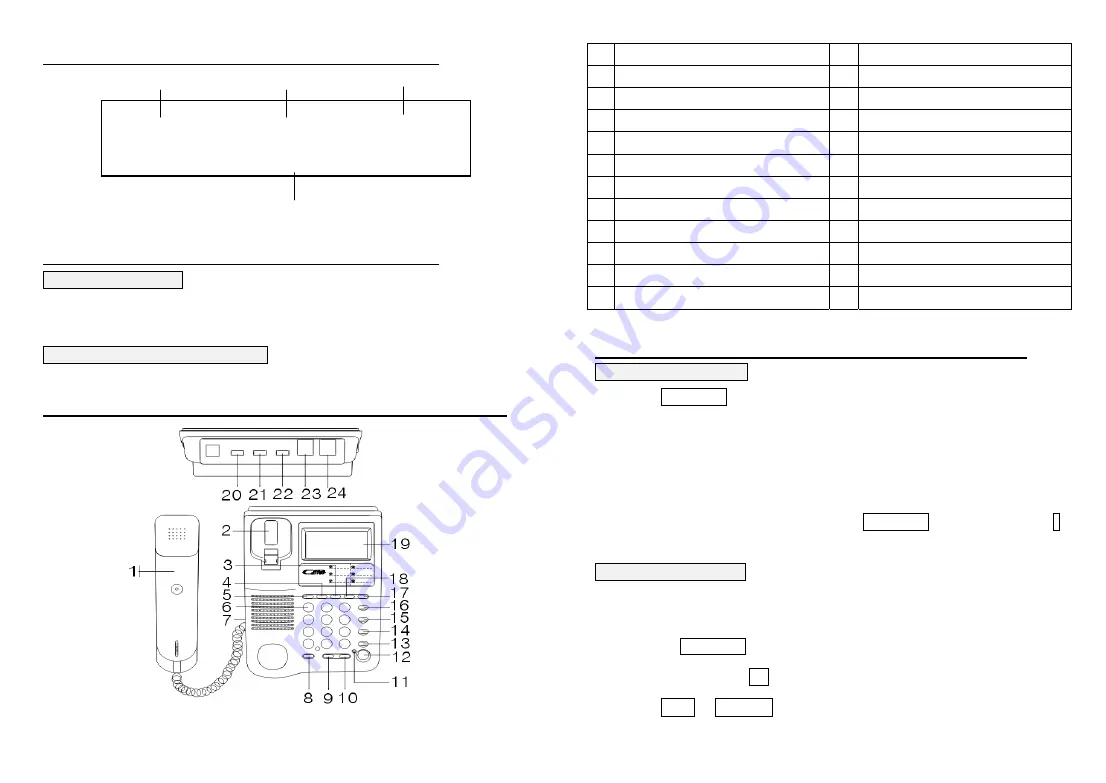
LCD Display   


Date


Time


Total Calls


0 1 

M

  0 1 

D                                   

0 8 : 3 0                   

IN

 0 1 

1 2 3 4 5 6 7 8 9 0 1 2 3 4 5 6 


  Telephone number and Calculator 


Connecting 

the 

Telephone       

(1) Inserting 3 AA batteries 

Before use this phone, you should insert 3 AA batteries in the Battery socket of this phone 

firstly

(2) Connecting the Handset / Telephone line 

Connect the Handset Coiled Line and Telephone Line to the Base Unit

.


Layout                                                                                   


- 14 - 

1 Handset 

13 BACK 

Button 

Hook Switch 

14 

SET/HOLD Button 

3 DOWN/- 


Button 

15 DEL 

Button 

OUT/X  Button 

16  RECALL Button 

STORE/VIP/

÷ 

Button 

17 CAL 

Button 

Number Keypad 

18 

UP/+ Button   

Headset Socket 

19 

LCD Display 

BRIGHT Button 

20 

Volume Hi/Low Switch 

FLASH Button 

21 

Ringer Hi/Low Switch 

10

RD/PA Button 

22 

Tone/Pulse Switch 

11

IN-USE Indicator 

23 

Extension Line Socket 

12

SP-PHONE Button 

24 

Telephone Line Socket 

 
Setting 

the 

Telephone 


(1) Setting the Date and Time 

1.


Press SET/HOLD button once, the LCD display “-0123456-”. 

2.


Then press number key “1” , 

the Year “2003” will flash.


3.


Press Number Key to set two-digits of the YEAR. Then the Month will flash, press 

Number Key to set MONTH, DATE, HOUR, MINUTE.   

2.


LCD will display the corresponding Calendar after setting.   

For example, to set “3:58 p.m., 25

th

 Jan 2003”, press SET/HOLD button once, then press 1 , 

then press Number Key“0301251558” directly to set up. 

(2) Setting the LCD Contrast 

You can select the LCD contrast level from 1 to 5 by programming.


Your phone comes 

from the factory set to “LCD 3” 

1.


Press the SET/HOLD button once, the LCD display:      “-0123456-” 

2.


Press the number key    2    again, the LCD display: “ LCd    – 3 - ” 

3.


Press UP/

 or DOWN/

  button to select the LCD Contrast. 
Summary of Contents for VT178iCID

Page 1: ...θόνη Χειρακουστικό ΚαλώδιοΤηλεφωνικής Συσκευής Σπιράλ Καλώδιο ικτύου RJ11 Έντυπο Οδηγιών Χρήσης Χαρακτηριστικά και λειτουργίες 1 FSK DTMFεπιλογή για αναγνώριση καλούντοςCID 2 Εµφάνιση αριθµού µε δυνατότητα αποθήκευσης αναθεώρησης 3 Εξερχόµενος αριθµός µε δυνατότητα αποθήκευσης αναθεώρησης 4 10 οµάδες µνηµών 5 Λειτουργία αριθµοµηχανής 6 Λειτουργία υπενθύµισης ραντεβού 7 Μουσική στην αναµονή 8 Αυτόµ...

Page 2: ...θµισηέντασης φωνής 9 FLASH Πλήκτρο Μεταβίβασης 21 Ρύθµισηκουδουνισµού 10 RD PA Πλήκτρο ΕπανάκλησηςΤελευταίου Αριθµού 22 Ρύθµισητονικάπαλµικά 11 IN USE ΛυχνίαΛειτουργίας 23 ευτερεύουσα εισ Γραµµής 12 SP PHONE ΠλήκτροΑνοικτήςΣυνοµηλίας 24 Είσοδοςγραµµής Ρυθµίσεις τηλεφώνου 1 Ρύθµιση ηµεροµηνίας και ώρας 1 Πιέστε το πλήκτρο SET HOLD µία φορά η LCD θα εµφανίσει 0123456 2 Πιέστε το πλήκτρο 1 η χρονολογ...

Page 3: ...θµητικό πληκτρολόγιο π χ 1300 5 Πιέστε το πλήκτρο SET HOLD για επιβεβαίωση ΗLCD θα εµφανίσει AL123 ξανά ρυθµίστε την 2η και την 3η οµάδαΥπενθύµισης εάν επιθυµήτε Μετά τη ρύθµιση η συσκευή θα κουδουνίσει στον προκαθορισµένο χρόνο για ακύρωση πιέστε οποιοδήποτε πλήκτρο 6 Ρύθµιση προκαθορισµένου κωδικού για εξερχόµενες κλήσεις 1 Πιέστε το πλήκτρο SET HOLD µία φορά η LCD θα εµφανίσει 0123456 2 Πιέστε ...

Page 4: ...ιέστε SP PHONE για να απαντήσετε 2 Τερµατίστετηνκλήσηκατεβάζονταςτοχειρακουστικόήπιέστε SP PHONE 8 Λίστα εισερχοµένων 1 Ανασκόπηση της λίστας των εισερχοµένων 1 Πιέστε τα πλήκτρα UP ή DOWN για να δείτε τη λίστα µε νούµερα ηµεροµηνία και ώρα των εισερχοµένων κλήσεων 2 Για εύρεση της τελευταίας κλήσηςπιέστε το πλήκτρο UP επαναλαµβανόµενα 3 Για εύρεση παλαιοτέρων κλήσεων πιέστε το πλήκτροDOWN επαναλα...

Page 5: ... πλήκτρο STORE VIP ξανά για να διαγράψετε τηνVIPµνήµη ΛειτουργίαΑριθµοµηχανής 1 Πιέστε το πλήκτρο CAL η LCD οθόνη θα εµφανίσει CAL 0 2 Η συσκευή µπορεί να χρησιµοποιηθεί σαν 12ψήφια αριθµοµηχανή Χρησιµοποιήστε τοΑριθ Πληκ Για εισαγωγή ψηφίων Πλήκτρο OUT x Πολλαπλέςλειτουργίες 10 Πλήκτρο STORE VIP ιαίρεση Πλήκτρο UP Πρόσθεση Πλήκτρο DOWN Αφαίρεση Πλήκτρο Τελεία Πλήκτρο Αποτέλεσµα Πλήκτρο DEL ιαγραφ...

Page 6: ...σχετικά µε τα απόβλητα ειδών ηλεκτρικού και ηλεκτρονικού εξοπλισµού ΑΗΗΕ τα περιλαµβανόµενα στις οδηγίες προϊόντα και επιµέρους εξαρτήµατααυτών µετά τη χρήση ή την απαξίωση τους δεν πρέπει να πετιούνται στα σκουπίδια µε ταάλλα οικιακά απορρίµµατα αλλά να επιστρέφονται στο σηµείο πώλησης ή σε κατάλληλοσηµείο ανακύκλωσης ηλεκτρικού και ηλεκτρονικού εξοπλισµού Για περισσότερες πληροφορίες επικοινωνήσ...

Page 7: ...0 RD PAButton 22 Tone PulseSwitch 11 IN USEIndicator 23 ExtensionLineSocket 12 SP PHONEButton 24 TelephoneLineSocket Setting the Telephone 1 Setting the Date andTime 1 Press SET HOLD button once the LCD display 0123456 2 Then press numberkey 1 theYear 2003 will flash 3 Press NumberKey to set two digitsof theYEAR Then the Monthwillflash press NumberKeytosetMONTH DATE HOUR MINUTE 2 LCD will display ...

Page 8: ...to select the ON OFFstate LCD will display AL1 12 00 and 12 00 will flash afterselected the ON state and then press NumberKey to set the alarm time forexample press 1300 that means theAlarm Clock time is preset at 1 00 a m 5 Press the SET HOLD button toconfirm afterfinished LCD will display AL123 again set the second the third alarm clock as above steps Aftersetting the alarm clock the phone will ...

Page 9: ...hold pick up the handset orpress the Hands free SP PHONE button again 18 Answering Calls 1 When the unit rings lift the handset or press Hands free SP PHONE button to answer 2 When finished talking hang up the handset or press Hands free SP PHONE button again Using the Caller List 1 Review the CallerList 1 Press UP or DOWN button to backward or forward review the number date and time of the incomi...

Page 10: ...tored asVIPmemories Therewill be a Lock Symbol on the left side of the LCD Display 2 EraseVIPMemories 1 Press UP DOWN or OUT x button repeatedly to find the desired VIP 20 Memoriesyouwant toerase 2 Press STORE VIP button again to erase the desiredVIPMemory Calculator Function 1 Press CAL button the LCD display CAL 0 2 You can start to use this phone as a 12 digitscalculator Press NumberKeypad To i...

Page 11: ...w agls gr Collection of Products The present product is arranged with the requirements of directive of2002 95 EC EUROPEAN PARLIAMENTAND COUNCILof 27 January 2003 with regard to the restriction of use of certain dangerous substances intypes electric andelectronic equipment and brings the following labeling According to the requirements of directive of 2002 96 EUROPEAN PARLIAMENTAND COUNCILof 27 Jan...

Reviews: