background image

29

30

https://www.altonindustries.com

info@altonindustries.com

2

3

1

2

3

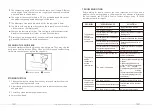
Pay particular attention to branches under tension. Do not cut unsupported

branches from below.
Do not stand on the felled trunk when limbing.

BUCKING

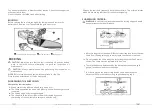
Before carrying the tool, always apply the chain brake and remove the

battery pack from the tool. Then attach the guide bar cover.

Front hand guard/chain brake

Guide bar cover

Battery pack

BUCKING

CAUTION:

Always be sure that the tool is switched off and the battery

pack is removed before attempting to perform inspection or

maintenance.

CAUTION:

Always wear gloves when performing any inspection or

maintenance.

NOTICE:

Never use gasoline, benzine, thinner, alcohol or the like.

Discoloration, deformation or cracks may result.

SHARPENING THE SAW CHAIN

Sharpen the saw chain when:

Mealy sawdust is produced when damp wood is cut;

The chain penetrates the wood with difficulty, even when heavy pressure

is applied;

The cutting edge is obviously damaged;

The saw pulls to the left or right in the wood.(caused by uneven

sharpening of the saw chain or damage to one side only)

Sharpen the saw chain frequently but a little each time. Two or three strokes

with a file are usually sufficient for routine resharpening.

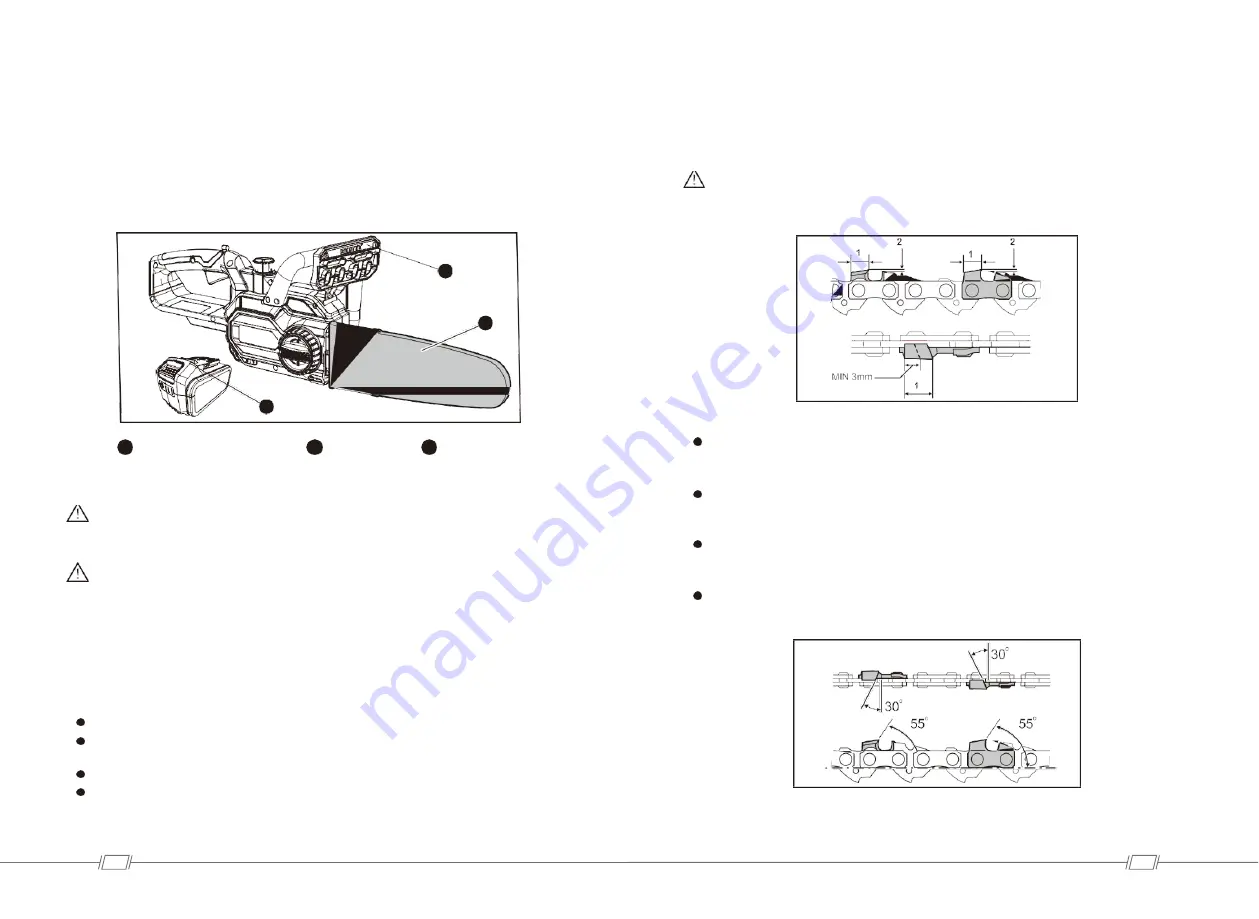
SHARPENING CRITERIA:

WARNING:

An excessive distance between the cutting edge and depth

gauge increases the risk of kickback.

All cutter length must be equal. Different cutter lengths prevent the saw

chain from running smoothly and may cause the saw chain to break.

Do not sharpen the chain when the cutter length has reached 3 mm or

shorter. The chain must be replaced with new one.

The chip thickness is determined by the distance between the depth

gauge (round nose)and the cutting edge.

In order to obtain the best cutting results, you'd better keep the

distance of 0.65mm between cutting edge and depth gauge

.

1

Summary of Contents for ELG05

Page 1: ...www altonindustries com info altonindustries com MADE IN CHINA WARNING Read carefullyand understandallINSTRUCTIONS beforeoperating Failureto followthe safety rules and other basic safety precautions...

Page 2: ...CONTENTS SPECIFICATIONS 1 0 SAFETYWARNINGS 03 COMPONENTS 09 FUNCTIONALDESCRIPTION 10 OPERATION 18 MAINTENANCE 23 TROUBLESHOOTING 26 ACCESSORYINFORMATION 27 WARRANTY 28...

Page 3: ...instruction manual Wear safety glasses Wear ear protection Wear a helmet goggles and ear protection Use appropriate protection for foot leg and hand arm This saw is to be used by properly trained ope...

Page 4: ...match the outlet Never modify the plug in any way Do not use any adapter plugs with earthed grounded power tools Unmodi ed plugs and matching outlets will reduce risk of electric shock 2 Avoid body c...

Page 5: ...it was designed 2 Do not use the power tool if the switch does not turn it on and o Any power tool that cannot be controlled with the switch is dangerous and must be repaired 3 Disconnect the plug fr...

Page 6: ...he chain saw with your right hand on the top handle and your left hand on the front handle Holding the chain saw with a reversed hand con guration increases the risk of personal injury and should neve...

Page 7: ...ing procedures or conditions and can be avoided by taking proper precautions as given below Maintain a rm grip with thumbs and ngers encircling the chain saw handles with both hands on the saw and pos...

Page 8: ...22 layers of nylon and protects the operator against cuts It is always to be worn when working from elevated platforms cherry pickers lifts from platforms mounted on ladders or when climbing with rop...

Page 9: ...en if it is severely damaged or is completely worn out The battery pack can explode in a re 8 Be careful not to drop or strike battery 9 Do not use a damaged battery 10 The contained lithium ion batte...

Page 10: ...trigger 3 Lock o lever 4 Machinebody 5 Oi tankcap 6 Front handle Front hand guard chainbrake Battery pack Oil tank 10 Chain cover 11 Chain tensioningrequlator 12 Guide bar plate compression twist 13 G...

Page 11: ...green In this situation turn the tool o and stop the application that caused the tool to become overloaded Then turn the tool on to restart OVERLOAD PROTECTION When the tool or battery is overheate th...

Page 12: ...TION The saw chain and the guide bar are still hot just after the operation Let them cool down enough before carrying out any work on the tool CAUTION Carry out the procedure of installing or removing...

Page 13: ...behind the guide bar 4 Hold the saw chain and guide bar and then put the saw chain loop around the sprocket Protrusion Chain cover Bolt 6 Insert the protrusion on the chain cover to the chain saw bod...

Page 14: ...bit to loosen the chain cover lightly 3 Lift up the guide bar tip slightly and adjust the chain tension Turn the Guide bar plate compression twist Make sure the saw chain ts snugly against the lower s...

Page 15: ...ur foot and do not allow anyone else to hold or steady it CAUTION Secure round pieces against rotation CAUTION Keep all parts of the body away from the saw chain when the motor is operating CAUTION Ho...

Page 16: ...al cuts switch the chain saw o between cuts CAUTION If the upper edge of the bar is used for cutting the chain saw may be de ected in your direction if the chain becomes trapped For this reason cut wi...

Page 17: ...roduced when damp wood is cut The chain penetrates the wood with di culty even when heavy pressure is applied The cutting edge is obviously damaged The saw pulls to the left or right in the wood cause...

Page 18: ...lean the tool before storing Remove any chips and sawdust from the tool after removing the chain cover 2 After cleaning the tool run it under no load to lubricate the saw chain and guide bar 3 Cover t...

Page 19: ...Charge the battery pack Thelockout buttonand the trigger is not pushedat the sametime 1 Pushthelockoutbuttonand holdit 2 Pushthetriggertostartthe machine Thebatteryis toohot or too cold Refer to batt...

Reviews: