Assembly Instructions for Ecore DuroRacks
Fixed Wall Mount Cabinets 6, 9, and 15RU
BOX INCLUDES:
(1pc) Locking Plexiglass Front Panel
(1 pc) Front Frame
(2 pcs) Side Frame
(2 pcs) Locking Side Panel
(1 pc) Top Panel including Fan
(1 pc) Back Panel
(4 pcs) Cage-Nut Style Rack Rail
(1 pc) Bottom Panel
Assembly Hardware (Cage Nuts, Rack Screws, Washers and Keys)
TOOLS Required:
Phillips Head Screwdriver
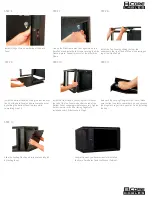
STEP 1
Remove the Locking Side Panels from the Side
Frames and set aside.
STEP 2
Remove Locking Plexiglass Front Panel and plastic
spacer washer from the Front Frame and set aside.
STEP 3
Prepare Rack Screws for installation by inserting the
Washers on to the Rack Screws.
STEP 4
Install (4) Cage Nuts in the corner holes of the Side
Frame. Then install (2) Cage Nuts onto the front
facing ports of the Side Frame. Repeat for second
Side Frame.
Make sure to use the appropriate mounting
hardware for your application. Due to the various
types of walls that the cabinet may be installed on,
mounting hardware is not included. Mount the Back
Panel to the wall and proceed to Step 1.
STEP 5
Align the Rack Rails to the side panel so that the
screw holes match up to the Cage Nuts. Tighten
the Rack Screws into the Cage Nuts. Repeat for the
second Side Frame and two remaining Rack Rails.


