| © 2018 All rights reserved. | EcoSmart™ | www.ecosmartus.com |
Page | 11
Activity E | Required Maintenance
When scale forms on elements, it is due to minerals such as calcium and magnesium found in
water. There are three ways to deal with this this issue. Manual Maintenance, Recirculating
Maintenance, and Filtration Maintenance.
Please Note: It is the responsibility of the unit owner to be aware of your water quality and its effect
on the heater. Failure to properly maintain your unit may result in damage to the heating elements
or heat exchangers if sediment/mineral and/or lime build up. This damage is not covered by the
warranty.
Manual Maintenance
Depending on how hard the incoming water is, maintenance may need to be performed every 6
to 12 months. What is needed: 1 five gallon bucket and 3 to 4 gallons of undiluted white vinegar
(food grade).
1.
Turn OFF breaker
a.
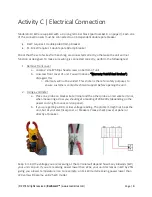
Once breaker is off, turn round knob to ensure no power is at the unit.
LED display will not light up if the correct breaker is off.
b.
If LED display does light up, correct breaker was not turned off.
2.
Turn off water going into unit
a.
Per national plumbing codes, there must be a shut-off valve within 5 to 10 feet from
the water heater. If there is not a dedicated shutoff valve, shut off the main water
line to home.
b.
Once water is off, verify this by turning a tap ON at a sink. Turn tap on to hot side
and let run until water is dripping lightly and leave open to relief pressure.
3.
Remove front cover of unit
d.
To remove front cover, locate the 2 Phillips head screws on the bottom of unit.
Remove front cover of unit. You will notice a “Warranty Void if Seal Broken”; disregard
this.
i.
Warranty will not be voided. This sticker is there for safety purposes to ensure
customers
contact technical support before opening the unit
.
4.
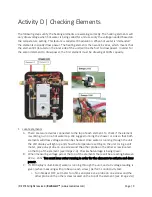
Locate heating elements (
see Image 1 - A on page 10
)
a.
Depending on model, the unit may have either 1 or 2 heating elements.
b.
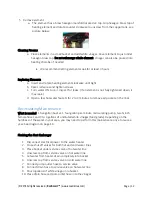
Locate heating elements and remove both Philips head screws on top of element
and fold red wires back (
see images below
).


