14
3.9
Setting the Language (Language Menu)
To set the language, proceed as follows:
1.
Remove and reset the electricity supply of the stove using the general switch on the back.
2.
The display will show FINAL CLEANING and then OFF.
3.
Keep button P4 pressed for 2 seconds, CLOCK SETTING MENU will appear.
4.
Press button P4 twice; the display will show LANGUAGE MENU.
5. Access with button P6: the display will show the language selected.
6. With buttons P4 and P5, select the language desired.
7. Confirm with button P6 to return automatically to MENU’ 03 SELECT LANGUAGE MENU.
3.10 Settings Menu
In this menu you can check the values of the parameters set in the control unit. This menu is used when
a Service Technician has to understand the parameters set in the machine, to find any modifications to
improve the functioning of the stove.
To enter this menu, proceed as follows:
1.
Keep button P4 pressed for 2 seconds: CLOCK SETTING MENU will appear.
2.
Press button P4 3 times; the display will show SEE SETTINGS MENU.
3.
Access with button P6: the display will show the screen desired.
4.
Scroll using the button P6 to display the parameters set.
5. Scroll till last parameter to return automatically to MENU’ 04 SEE SETTINGS MENU’.
3.11
Modifications of the room temperature setting
The modes of functioning of the stove with the ambient thermostat activated can be divided into two
types:
- with room sensor supplied (not available on INSERTS) positioned on the back of the stove.
- with external thermostat (not supplied)
3.12 Mode with Room Sensor Supplied
If the room sensor supplied is used, the room temperature will be shown on the display.
To set the desired temperature (modification of the room temperature setting), press button P4 to
enter the appropriate menu and with buttons P4 and P5 adjust the desired value. When temperature is
reached on the display, MODULATION WORK will appear on the screen and the stove will reduce the
consumption of pellets to a minimum, reducing heating power.
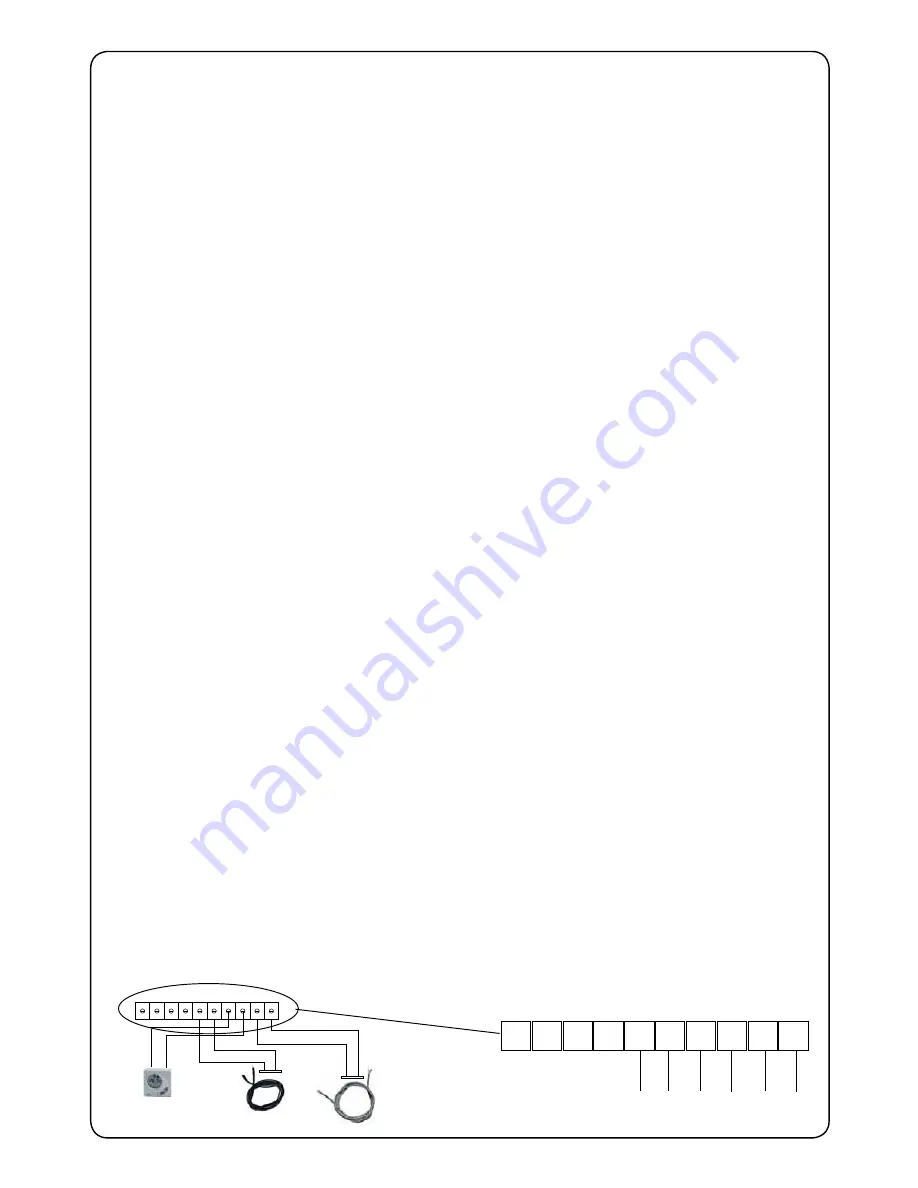
3.13 External Thermostat Mode
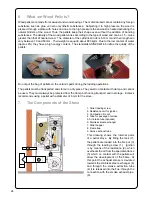
If an external thermostat is used, correctly connected to the board as shown in the electric wiring
diagram below, the room temperature will no longer be shown on the display but will show instead T
ON, when the contact is closed, or T OFF, when the contact is open.
1
2
3
5
6
7
8
9
10
4
-TC1+
TERM.
N.AMB.
SMOKE
PROBE
ROOM
TERMOSTAT
ROOM
PROBE
-TC1+
TERM.
N.AMB.
N.H2O
N.PEL.
Rosso
Blu
Nero
Nero
BLACK
BLACK
RED
BLU


