18
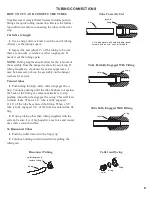
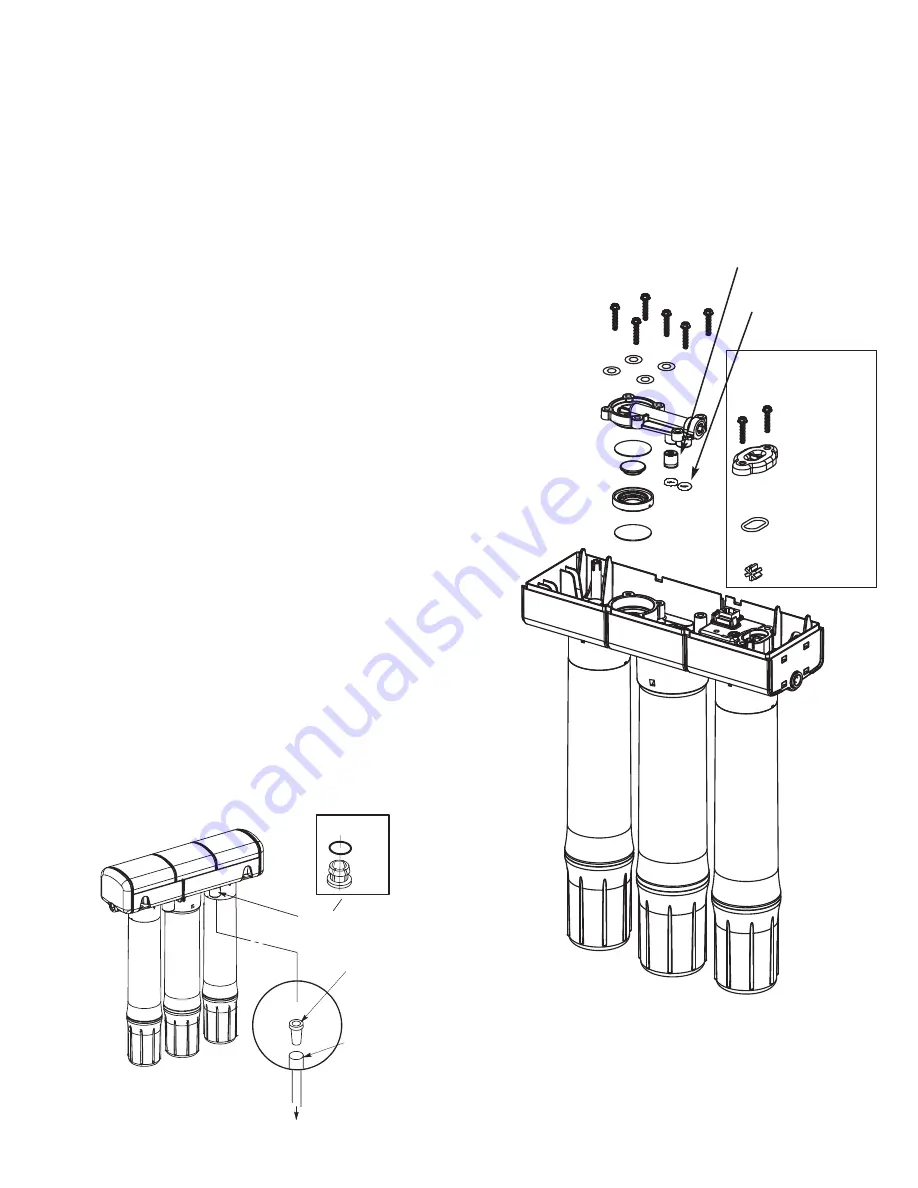
AUTOMATIC SHUTOFF / PADDLEWHEEL
SERVICE
If either the shutoff assembly or paddlewheel requires
service, be sure to reassemble parts exactly as shown
below.
FIGURE 18
screw (6)
automatic
shutoff cover
diaphragm
diaphragm
plunger
spacer ring
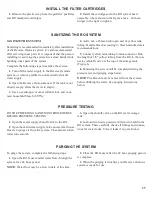
FIGURE 17
flashes or the production rate and/or quality of product
water drops. Product water may begin to taste different
or bad, indicating solids and organics are passing through
the RO membrane. When replacing the RO cartridge,
replace the prefilter and postfilter cartridges as well.
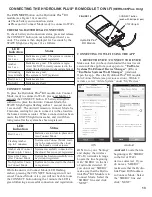
To replace the RO cartridge (see Figure 16):
1.
Remove (turn to the left) the pre filter cartridge from
the filter head to relieve pressure on the Reverse
Osmosis cartridge.
2.
Remove the RO cartridge.
3.
Remove the post filter cartridge.
4.
Discard the cartridges in a proper manner.
5.
Install new cartridges in reverse order (post filter,
Reverse Osmosis and then prefilter). Turn cartridges to
the right to re-attach to the filter heads.
6.
Model ERO-385E only: replace the battery with new
(CR 2032 or equivalent).
7.
On the ERO-385E or HERO-385Plus, press and
hold the button on the RO electronics enclosure until the
green light begins flashing. Release the button during the
3 seconds that the light flashes.
8.
Purge the RO membrane cartridge following instruc-
tions on Page 11.
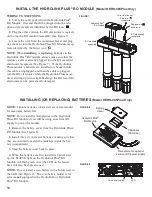
FLOW CONTROL
The flow control is vital for proper operation of the RO
membrane cartridge. The control keeps water flow
through the membrane at the needed rate to obtain the
best quality product water.
Periodically check the flow control to be sure the small
hole through it is clean and unrestricted.
continued from previous page
washer (4)
o-ring (2) assemble
onto manifold
check valve, assemble
into shut off cover
ERO-385E or
HERO-385Plus
screw (2)
paddlewheel
cover
o-ring
paddlewheel
TO
DRAIN
CARE OF YOUR REVERSE OSMOSIS SYSTEM
collet
o-ring
drain port
flow control
insert
1/4” tubing

