15
Optional:
Place the Mount Standoffs under both ends of the Mounting
Plate. Use these optional Standoffs when there is not enough clearance
between the Mounting Plate and the vehicle’s mounting surface.
4. Attach the Mounting Plate to your vehicle with the provided ¼-20 Hex
Bolts, Washers, Lock Washers, and Nuts. Tighten securely.
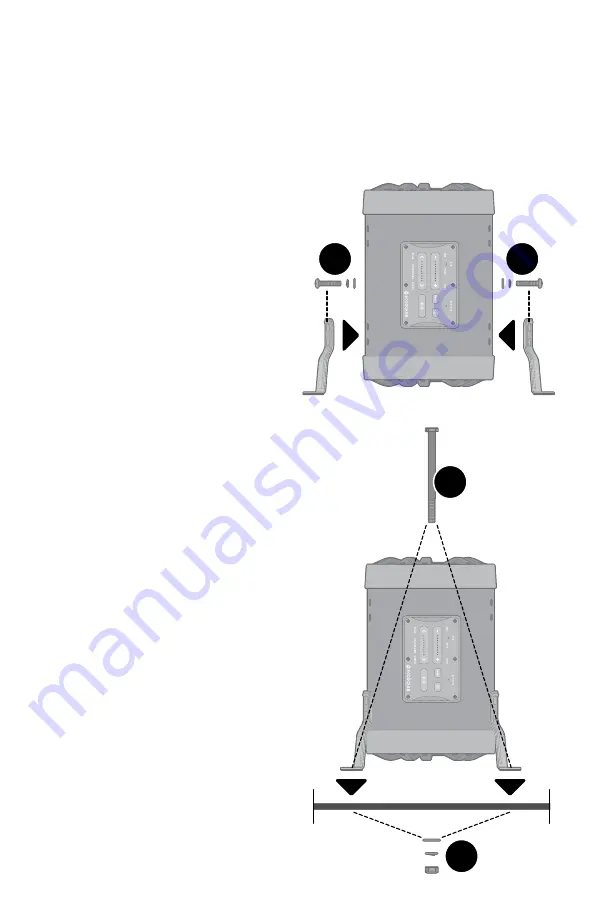
Vertical Mounts
1. To mount the subwoofer in
a vertical orientation, first
attach both Vertical Mounting
Plates to either side of the
subwoofer, using four 29/32”
Screws, Lock Washers, and
Washers on either side.
Tighten securely.
2. Ensure that the subwoofer fits
in the desired location and
mark where the mounts will be
attached to your vehicle.
3. Drill holes at the desired mounting
points on your vehicle, large enough
for the provided Hex Bolts to fit.
4. Attach the Mounting Plates to
your vehicle with the provided
¼-20 Hex Bolts, Washers,
Lock Washers, and Nuts.
Tighten securely.
Note:
When the Control Panel
is facing you, the Extreme Sub’s
active subwoofer is on the left
side. Depending on your vehicle,
the active or passive subwoofer
may sound better facing down.
Please listen to the Extreme
Sub oriented both ways before
finalizing the installation.
x4
x4
x8
x8


