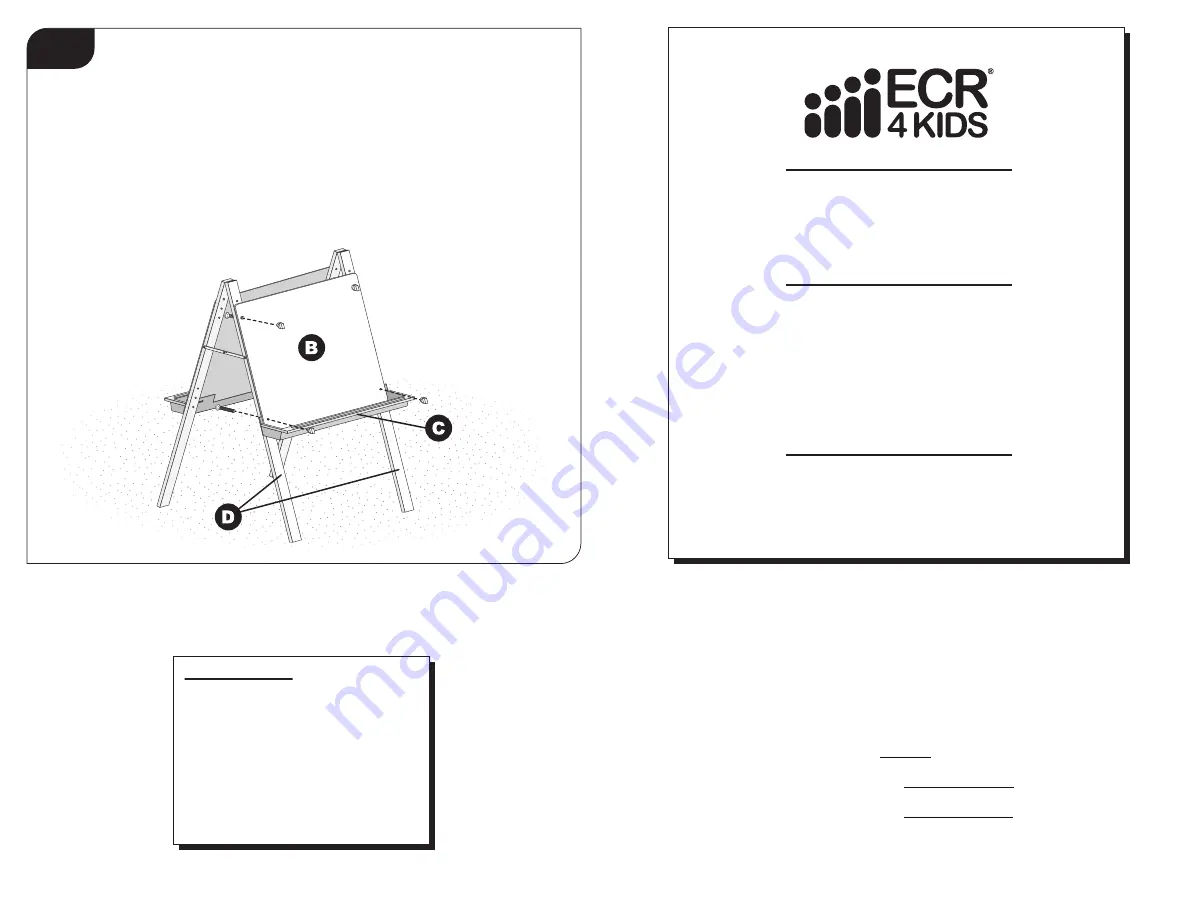
Complete Dry Erase Board Installation
3
©2015 ECR4KIDS, LP
Version: ELR-008-B_EP_2015.05.19
Care and Cleaning
Clean wood with a damp cloth or sponge
using warm water and mild soap. Wipe dry.
Do not place near heat, moisture or
vaporizer which may cause wood to warp
and peel.
Check for loose or worn parts periodically
and tighten or replace as necessary.
Record the manufacture date here.
Information is located on the Batch ID
sticker and on the shipping carton.
Save this sheet in an accessible place.
Model Number:
ELR-008-B
Factory Code: EP
Manufacture Date:
Batch ID Number:
(Located on Part B)
Complete the installation of
Dry Erase Board (B)
onto left
Easel Leg (D)
with two
Hex Screws
&
Plastic Nuts (E1/E2).
Remove the lower
Hex Screws & Plastic Nuts (E1/E2)
on the
Dry Erase Board (B).
Align a
Tray (C)
behind the
Dry Erase Board (B)
and re-install the lower Hex screws & Plastic nuts.
Reminder:
Do not overtighten, as the plastic threads can be stripped.
Clip paper from the top edge of your Easel with the four
Clips (F).
We appreciate your purchase of the Adjustable Art Easel.
ECR4KIDS has made every effort to supply a quality product that with proper
use and care, will provide many years of trouble-free use.
Warranty:
Visit our website for product specific warranty information at:
www.ecr4kids.com
If you experience any difficulties with this product, please email us at
ecrcs@ecr4kids.com
or call toll-free at (855) ECR-4KIDS
(Monday - Friday, 7:00am - 4:00pm Pacific Standard Time)
Please do not return
to place of purchase as ECR4KIDS will
replace defective part(s) and/or product.


