CACG/CAHG & CACH/CAHH
Air Handlers
• Installation, Operation and Maintenance Manual •
P/N 240007756, Rev. A [051509]
11
Made in the USA
Mounting the Unit
(continued)
Mounting method
In existing construction, remove enough
•
ceiling panels to provide clearance space
for mounting unit to ceiling joists.
Before beginning the installation, inspect
•
the unit location, test the strength of the
ceiling joists to insure they will support
the weight of the unit.
Determine mounting method:
•
On wooden beams use threaded rods,
–
washers, and nuts to suspend support
brackets.
With metal structures, secure thread-
–
ed rods on an existing angle or install
a new support angle.
On newly built concrete slabs secure
–
threaded rods with inserts and em-
bedded bolts.
For previously built concrete slabs
–
install hanging bolts with an expan-
sion anchor.
Follow local building codes for required
•
safety cables, braces, etc.
Ceiling opening
NOTICE
Make sure the ceiling grid is supported
separately from the Cassette. The ceiling
must not be supported by any part of the
Cassette unit, fascia or any associated
wiring or pipe work.
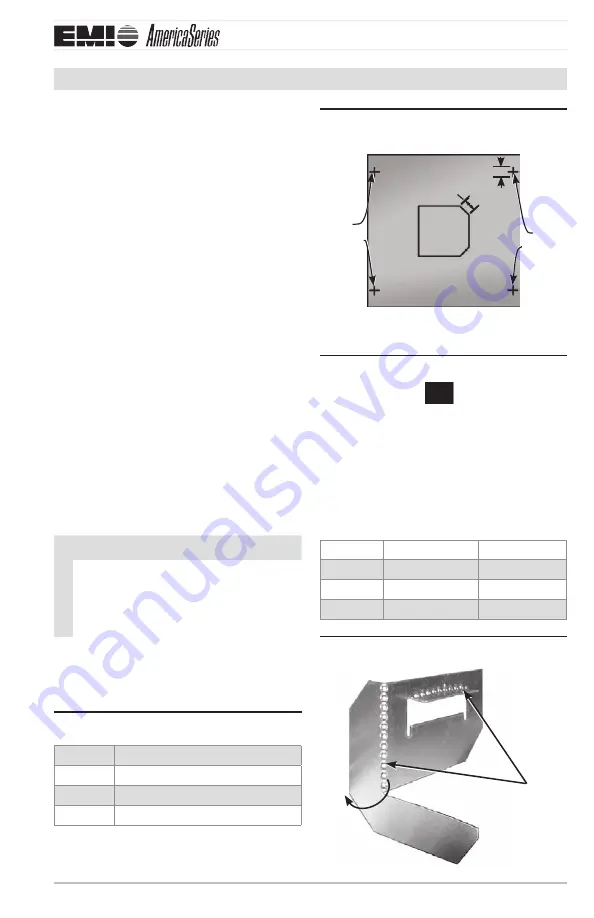
Cut an opening in the false ceiling with the
size shown in Table 2, Page 11.
Ceiling opening sizes
Table 2
Model
Dimensions
9 & 12
23¼” x 23¼” (591 x 591 mm)
24
337/8” x 337/8” (860 x 860 mm)
36
46” x 337/8” (1168 x 860 mm)
Ceiling cutout/rod placement
Figure 6
template (shipped with unit)
(51mm x 45°)
2.000 x 45° TYP
rod
Positions
1.500 TYP
rod
Positions
(38mm TYP)
Ceiling rod positions
Table 3
Model
Dimension A
Dimension B
9 & 12
19 50” (495mm) 22 87” (581mm)
24
29 19” (740mm) 30 80” (782mm)
36
29 19” (740mm) 43 06” (1094mm)
Mounting brackets
Figure 7
Fold
bracket along
perforations


