background image

82

User Interface Display

Explanation

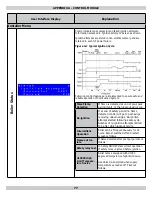
CH Settings

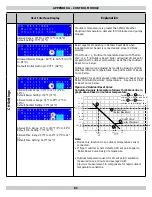
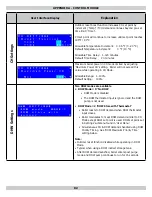
Outdoor reset boost function increases CH set point by           

increment (‘Temp’) if CH demand continues beyond pre-set 

time limit (‘Time’).

CH set point will continue to increase until set point reaches 

195°F / 91°C

Allowable Temperature Increment:   0..36 °F (0..20 °C)

Default Temperature increment:        0 °F (10 °C)

Allowable Time Delay:  1..120 minutes

Default Time Delay:     20 minutes

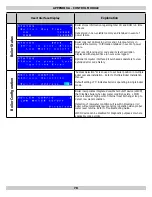
Maximum boiler power in CH mode limited by adjusting       

‘Maximum Power CH’ setting.  Boiler will not exceed this 

value while operating in CH Mode.

Allowable Range:  1..100%

Default Setting:    100%

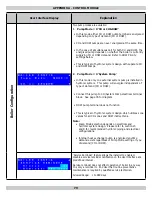
DHW Settings

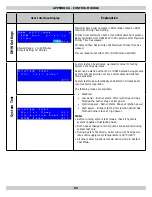
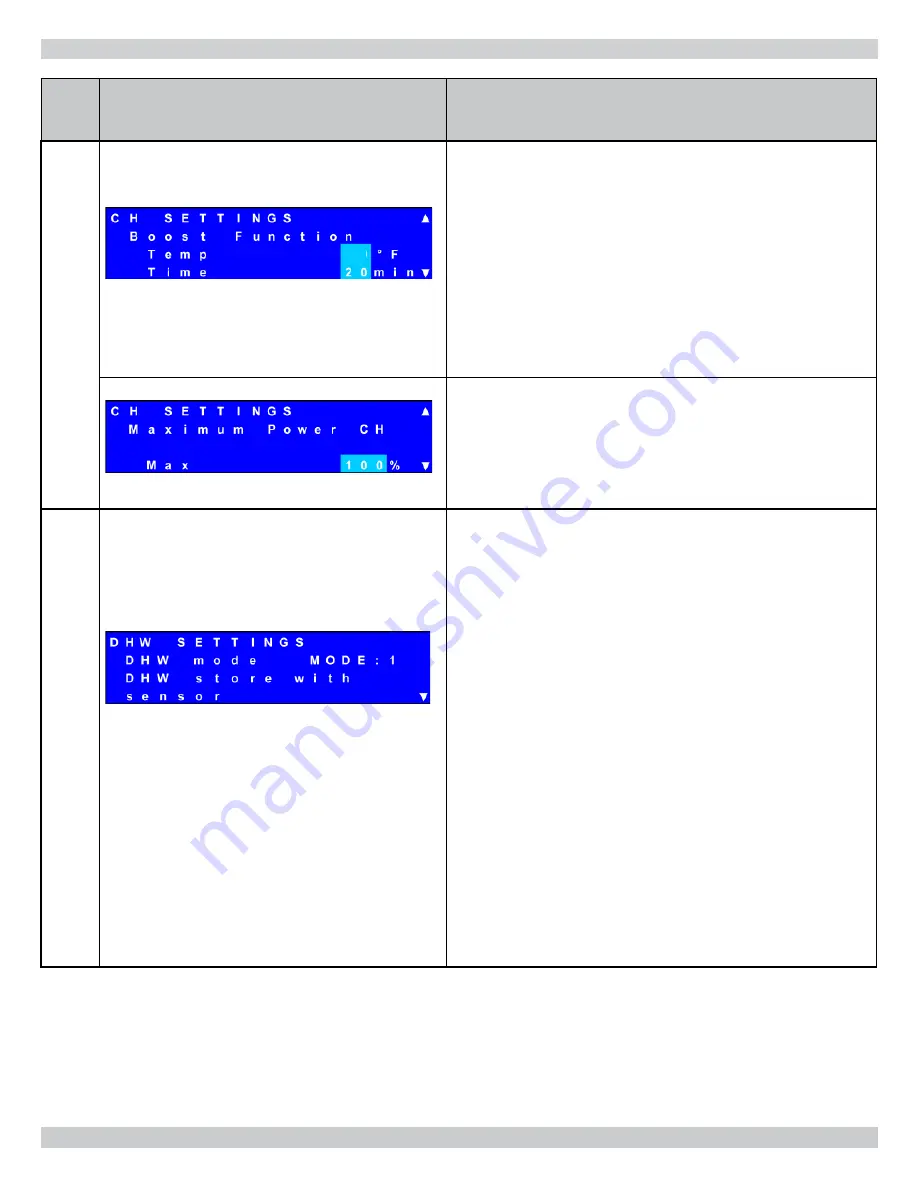
Two DHW modes are available

•  DHW Mode = 0 ‘No DHW

•  DHW Mode is disabled
•  The DHW thermostat input is ignored and the DHW 

pump is not used.

   DHW Mode = 2 ‘DHW Store with Thermostat’

• Boiler reacts to DHW demand when DHW thermostat 

input closes.

• Boiler modulates to meet DHW demand similar to CH 

Mode except DHW set point is used. DHW set point set 

in Settings’ submenu found in 'User Menu’.

• Simultaneous CH & DHW demands handled using DHW 

Priority Timing. See ‘DHW Maximum Priority Time’ 

setting below.

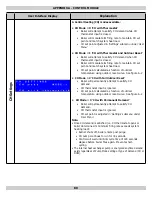
Note:

• Outdoor reset function disabled while operating in DHW  

Mode.

• Typical when using a DHW indirect storage tank.
• After DHW demand satis

fi

 ed, boiler enters post purge 

mode and DHW pump continues to run for 15 seconds.

0

APPENDIX A - CONTROL MODULE

Summary of Contents for Olsen OLSSC-299

Page 1: ... An ISO 9001 2008 Certified Company P N 240008852 Rev H 06 2013 Manufactured by ECR International Inc 2201 Dwyer Avenue Utica NY 13501 web site www ecrinternational com Models OLSSC 050 OLSSC 075 OLSSC 100 OLSSC 150 OLSSC 200 OLSSC 299 050 075 100 150 200 SIZE SHOWN ...

Page 2: ... 5 16 2 ea 17 Used for packaging holes on back of boiler Plastic Plug 2 ea 18 Used for packaging holes on back of boiler Outdoor Sensor 19 Used for measuring outside temperature Critical Installation Instruction 20 11 x 17 Page for critical installation issues Document Package 21 Includes essential documents 4 5 6 7 8 2 3 9 10 12 13 14 11 15 299 SIZE SHOWN Boiler provided with 30 psig 206 kpa safe...

Page 3: ...m Depth C 14 356mm 16 0 406mm 18 3 465mm Bracket D 28 711mm 40 1016mm Height E 31 787mm 42 1092mm Water Connections Size F 1 1 4 NPT 1 1 4 NPT Location G 2 51mm 2 51mm Location H 5 127mm 3 76mm Location I 3 76mm 4 114mm Gas Connection Location J 4 1 2 114mm 4 1 2 114mm Size K 1 2 NPT 3 4 NPT Condensate Drain Connection L 3 4 NPT 3 4 NPT Weight Shipping 111 lb 50 kg 182 lb 83 kg 225 lb 102 kg Unit ...

Page 4: ...ments 28 6 8 Multiple Boiler Venting Installation 30 6 9 Condensate Piping 31 7 Gas Supply Piping 32 8 Electrical Connections 34 8 3 Line Voltage Connections 34 8 4 External Connections 34 9 Start Up Procedure 36 9 6 Perform CSD 1 Compliance Test 40 9 7 Complete Start Up Procedure 41 10 Operating Instructions 42 11 General Maintenance And Cleaning 43 12 Ratings And Capacities 46 13 Trouble Shootin...

Page 5: ...ressure Exceed 195 F 90 5 C system design temperature 1 3 Operational Features Modulating 20 100 Integral Dual Limit Integral Low Water Cutoff with test button Outdoor Temperature Reset Integral Multiple Boiler Control Heat exchanger over heat protection Information and specifications outlined in this manual in effect at the time of printing of this manual ECR International reserves the right to d...

Page 6: ...alified agency See glossary for additional information WARNING Fire explosion asphyxiation and electrical shock hazard Improper installation could result in death or serious injury Read this manual and understand all requirements before beginning installation 2 3 Installation shall conform to requirements of authority having jurisdiction or in absence of such requirements United States National Fu...

Page 7: ... quantity of combustion air receives fuel from gas valve mixes air combustion air receives fuel from gas valve mixes air and fuel sending mixture to burner for combustion and fuel sending mixture to burner for combustion 20 Gas Control Valve Gas Control Valve Delivers proper quantity of fuel Delivers proper quantity of fuel to Combustion Air Blower See section 7 to Combustion Air Blower See sectio...

Page 8: ...T FIGURE 3 2 Lower Jacket Viewed from front of boiler Disconnect connector before removing Lower Jacket Lower Jacket Connector to User Indicator Lights FIGURE 3 3 Upper and Lower Jacket Latch Viewed from front of boiler Lift Jacket up engage jacket with chassis push down 27 WALL MOUNT 27 WALL MOUNT SUPPORT BRACKET SUPPORT BRACKET Upper and Lower Jacket Latch 3 COMPONENT LISTING 30 Lower Jacket Pan...

Page 9: ...14 SUPPLY WATER TO 14 SUPPLY WATER TO HEATING SYSTEM OUT HEATING SYSTEM OUT 4 LOW VOLTAGE TERMINAL STRIP 15 VENT TEMPERATURE SENSOR 26 GAS CONNECTION 26 GAS CONNECTION 33 COMBUSTION ANALYSIS TEST PORT PORT 24 HIGH VOLTAGE JUNCTION BOX JUNCTION BOX 9 HEAT EXCHANGER 29 BOILER CONTROL MODULE Fuse and Holder 5 IGNITER 6 FLAME SENSOR 7 SIGHT GLASS 32 FLUE AIR MIXTURE PRESSURE TEST PORT 16 CONDENSATE 16...

Page 10: ...SUPPLY WATER TO HEATING SYSTEM OUT HEATING SYSTEM OUT 4 LOW VOLTAGE 4 LOW VOLTAGE TERMINAL STRIP TERMINAL STRIP 33 COMBUSTION ANALYSIS TEST PORT 26 GAS CONNECTION 26 GAS CONNECTION 24 HIGH VOLTAGE 24 HIGH VOLTAGE JUNCTION BOX JUNCTION BOX 9 HEAT 9 HEAT EXCHANGER 29 BOILER CONTROL MODULE Fuse and Holder 5 FLAME SENSOR SENSOR 16 CONDENSATE 16 CONDENSATE DRAIN DRAIN 2 2 E E S 31 TRANSFORMER 1 USER IN...

Page 11: ... from safety relief valve discharge See section 5 Access to system water piping gas supply and electrical service See sections 5 7 and 8 Clearances to combustible materials and service clearances See Table 2 and figure 4 1 Multiple Boilers can be wall mounted placed side by side or back to back TABLE 2 BOILER CLEARANCES Dimension Combustible Materials 1 Service 1 2 Model 050 075 100 150 200 299 05...

Page 12: ...ion hazard Mount boiler vertically or slightly tilted backward to insure proper function of low water cutoff Failure to follow these instructions could result in death or serious injury When mounting boiler onto wall insert two plastic stoppers and two plastic plugs to packaging holes on back of boiler See parts listed on page 2 number 17 and 18 Mount boiler vertically or slightly tilted backward ...

Page 13: ...d to refrigerated air circulation Install flow control valves or other automatic means to prevent gravity circulation of boiler water during cooling cycle 5 3 Safety Relief Valve and Air Vent NOTICE Boiler rated at 150 psig 1 03 MPa maximum allowable working pressure Boiler provided with 30 psig 206 kPa safety relief valve Field source safety relief valve for system pressures greater than 25 psig ...

Page 14: ...B for general guidance Additional considerations Boiler control is designed for single central heating pump Installer responsible for integration of multiple central heating pumps Boiler control allows domestic hot water prioritization Function could be lost if central heating pump not directly connected to control system Multiple boiler system See figure 5 8A B C for general guidance Additional c...

Page 15: ...pe to condensate drain Table 3 System Piping Configurations Single Boiler Two Pipe Zoned System With Zone Valves figure 5 5 With Zone Pumps figure 5 6 Primary Secondary Pumping Closed External Primary Loop figure 5 7A Open External Primary Loop figure 5 7B Multiple Boilers Two Pipe Zoned System With Zone Valves figure 5 8A With Zone Pumps Not Shown Primary Secondary Pumping Closed External Primary...

Page 16: ...alves FIGURE 5 6 Single Boiler Two Pipe Zoned System With Zone Pumps Heat exchanger ball valve open as shipped Heat exchanger ball valve open as shipped DHW Pump CH System Pump DHW Pump Zone Pump 3 8 10mm Open End Wrench 3 8 10mm Open End Wrench 5 HYDRONIC PIPING ...

Page 17: ...p Heating system with existing primary loop Internal primary loop ball valves closed 3 8 10mm Open End Wrench FIGURE 5 7B Single Boiler Using Primary Secondary Pumping With Open External Primary Loop CH System Pump 12 305mm Maximum separation Existing closely spaced tees in primary system loop Limit length to 5 1 6m 12 305mm Maximum separation Limit length to 5 1 6m Internal primary loop ball valv...

Page 18: ...e 5 HYDRONIC PIPING Up to 16 boilers 3 8 10mm Open End Wrench DHW Pump See Multiple Boiler Guide CH System Pump 12 305mm Maximum Separation System Temperature Sensor Size common piping per maximum heat capacity of entire system All internal primary loop ball valves closed Limit length to 5 1 6m ...

Page 19: ...Load Heating Load Existing closely spaced tees in primary system loop 12 305mm Maximum Separation Up to 16 boilers 3 8 10mm Open End Wrench CH System Pump 12 305mm Maximum Separation System Temperature Sensor Size common piping per maximum heat capacity of entire system All internal primary loop ball valves closed Limit length to 5 1 6m ...

Page 20: ...d tees in primary system loop 12 305mm Maximum Separation 3 8 10mm Open End Wrench CH System Pump 12 305mm Maximum Separation System Temperature Sensor Size common piping per maximum heat capacity of entire system Heat exchanger ball valve open as shipped Limit length to 5 1 6m 5 HYDRONIC PIPING Up to 16 boilers ...

Page 21: ...ance being inspected Follow lighting instructions Adjust thermostat so appliances will operate continuously Test for spillage at draft hood relief opening after 5 minutes of main burner operation Use flame of match or candle smoke from cigarette cigar or pipe Determine each appliance remaining connected to common venting system properly vents when tested as outlined above Then return doors windows...

Page 22: ...with other vent systems or unlisted pipe fittings Canadian installations only All venting material primer and glue must be listed to ULC S636 Canadian installations only First 3 ft 0 9 m of plastic vent pipe from vent connector must be readily accessible for visual inspection 6 5 Vent Termination Terminate combustion air and vent pipes with fittings or concentric vent kit A See Parts Kits and Opti...

Page 23: ...6 1 Concentric figure 6 7 Side Wall Single Pipe figure 6 8 Inside Air Single Pipe figure 6 9 Side Wall Roof Single Pipe figure 6 10 Side Wall Two Pipe figures 6 2 6 3 Concentric figures 6 4 6 5 6 6 Inside Air Single Pipe figure 6 11 Table 7 Venting Configurations 6 COMBUSTION AIR AND VENT PIPING NOTICE Use of vent covers may cause freezing If using vent covers overall vent length must be considere...

Page 24: ...en combustion air intake and vent of different appliances 15 381mm Maximum horizontal length of vent Minimum vent intake between different appliances 12 305mm Maximum allowable total vertical vent length with outside exposure is 10 ft 3 05m Abandoned unused masonry chimney may be used as chaseway for combustion air and vent Both combustion air and vent pipe must exit above top of chimney with clea...

Page 25: ...p must be field installed to prevent movement of termination kit in side wall Vent Combustion Air 1 25 4mm Maximum See Note 2 or 3 51 or 77 mm Diameter PVC intake combustion air Combustion Air 2 51mm Diameter 41 Length 1 1m 3 77mm Diameter 47 Length 1 2m Note Overall length may be modified by cutting or extending both combustion air and vent pipes 12 305mm is minimum allowable length and 60 1 2m i...

Page 26: ...ighest anticipated snow level 24 610mm above roof FIGURE 6 8 Flue on Roof Air Intake on Side Wall FIGURE 6 9 Flue on Roof Combustion Air Grade Snow Ice Terminate vent system bottom minimum 12 300 mm above highest anticipated snow level Avoid locations where snow may drift and block vent and combustion air Ice or snow may cause boiler to shut down if vent or combustion air becomes obstructed Doors ...

Page 27: ... Line 6 COMBUSTION AIR AND VENT PIPING NOTICE Configurations of single pipe vent with flue on the sidewall requires a tee as the vent terminal See figures 6 10 and 6 11 Maintain 12 305mm US 18 457mm Canada clearance above highest anticipated snow level 24 610mm above roof Ground Level 12 305mm Anticipated Snow Line Vent Combustion Air Ground Level Air ...

Page 28: ... may condense forming moisture may be corrosive Protect building materials at vent from exhaust of vent gas Termination must be 12 305mm from or below doors windows or gravity inlet 12 305mm Minimum Termination Forced Air Inlet 3 0 9m If located within 10 3m of forced air inlet Termination Less than 10 3m Minimum 3 0 9m Minimum FIGURE 6 12 FIGURE 6 13 FIGURE 6 14 6 7 Side Venting Terminal Requirem...

Page 29: ...orn leaves snow or recirculated vent gases Give consideration to excessive wind and locate away from windward side of building Vapors Position termination where vent vapors are not objectionable Walkways Locate vent termination minimum 7 2 1m above any public walkway with consideration to condensate Meters Regulators deck porch Vent termination US only 4 1 2m Canada 6 1 9m horizontally from no cas...

Page 30: ...ent flue gas back flow External terminals follow same rule as single boiler venting as described in Section 6 6 and 6 7 FIGURE 6 17 Mulitple Boilers With Common Venting Pipe Model Minimum Diameter 050 2 51mm 075 3 73mm 100 3 73mm 150 3 73mm 200 3 73mm 299 3 73mm Table 8 Minimum Diameter for Individual Boiler in Common Venting System Total Firing Rate Minimum Diameter of Common vent pipes if L 50 f...

Page 31: ...m away from boiler Use field source condensate pump if boiler located below disposal point Field source condensate neutralizing kit as required by authority having jurisdiction or for environmentally friendly condensate disposal FIGURE 6 18 Condensate Drain URE R RE RE E 6 6 6 1 1 18 8 8 C C Con on onde de dens ns nsat at ate e e Dr Dr Drai a a ain 8 o Condensate Tee field installed on condensate ...

Page 32: ...gas valve Install manual main shutoff valve outside of jacket See figure 7 2 7 2 Conversion Kit Instructions See Gas Conversion Kit Instructions included with Boiler Table 10 Gas Supply Pressure CAUTION WHAT TO DO IF YOU SMELL GAS Do not try to light any appliance Do not touch any electrical switch do not use any phone in your building Immediately call your gas supplier from a neighbor s phone Fol...

Page 33: ...ing gas detector noncorrosive detection fluid or other leak detection method acceptable to authority having jurisdiction Do not use matches candles open flames or other methods that can provide ignition source Correct leaks immediately and retest Manual Main Gas Shutoff Valve FIGURE 7 3 Gas Shutoff Valve 050 075 100 150 200 DANGER Fire Hazard Do not use matches candles open flames or other methods...

Page 34: ...3 and Table 11 B Connect pump to line voltage terminal strip CH PUMP L N G Domestic Hot Water Pump if used A Isolate pump from control module if pump FLA exceeds maximum allowable current draw See Figure 8 3 and Table 11 B Connect pump to line voltage terminal strip DHW PUMP L N G 8 4 External Connections figure 8 4 User Interface Terminals A Factory wired to USER INTERFACE terminals B Optional Re...

Page 35: ...ge wire C Connect wires interchangeable to DHW T T terminals Wires are interchangeable Central Heating Thermostat A Use thermostat or boiler system control with dry contacts related 0 5 amps 120 VAC Boiler control does not provide 24 VAC power to central heating thermostat B Locate and install thermostat per manufacturer s instructions Maximum wire length is 330 ft 100m for 22 ga wire C Connect wi...

Page 36: ...hut off valve Let system run for 30 minutes When boiler goes into lockout reset boiler by pressing Reset button until boiler resets Do not open gas shutoff valve until all air is purged from system 9 2 Fill Condensate Trap with Water Disconnect spring tension clip from condensate hose barb See figure 9 1 Disconnect tubing below from hose barb Pour approximately 2 cups 473 ml of water into condensa...

Page 37: ... 91 C Temperature Units F F C Installer Menu Boiler Configuration Boiler Address 0 0 15 Low Water Cutoff Enabled Enable Disabled Pump Mode 0 0 4 Service Reminder Status On ON OFF Service Reminder Days 365 Days 1 999 Days CH Settings CH Mode 1 0 1 2 3 Warm Weather Shutdown 70 F 21 C 35 100 F 2 38 C Reset Curve Design Temperature Boiler 180 F 82 C 60 195 F 40 91 C Reset Curve Design Temperature Outd...

Page 38: ...adequately and is disposed properly 8 Check control module operation 9 Check field sourced limits low water cutoffs etc per manufacturer s instructions 9 5 Check Combustion Natural Gas 1 Measure input English units Turn off gas to all other appliances Activate some heating zones to dissipate heat Set boiler on high fire Use 1 or 2 cu ft dial on gas meter Measure time required for one or more compl...

Page 39: ... If CO2 is high decrease gas flow following figure 9 3 9 4 FIGURE 9 3 Gas Valve Models 050 075 100 150 200 MBH To increase gas flow turn throttle left or counter clockwise To decrease gas flow turn throttle right or clockwise Limit adjustment to one turn and retest 9 START UP PROCEDURE FIGURE 9 4 Gas Valve Model 299 MBH To increase gas flow turn throttle left or counter clockwise To decrease gas f...

Page 40: ...e drops below limit boiler will automatically refire then Lockout A 06 requiring manual reset of control module Press Reset button on User Interface OR C Shut off burner E39 Flue Temperature Sensor This is a soft lockout When flue sensor drops below limit boiler will automatically refire then Lockout A 06 requiring manual reset of control module Press Reset button on User Interface 6 After safety ...

Page 41: ...CE page 42 if boiler is not being placed into immediate operation 3 Enter installer information on Warranty Registration Card 4 Gather all instructions manuals wiring diagrams warranty registration card and other supporting information Review with user and or affix in conspicuous location adjacent to boiler FIGURE 9 8 Control Module J7 Connector J7 CONNECTOR 9 START UP PROCEDURE ...

Page 42: ... shutoff valve clockwise to closed position Handle should be perpendicular to gas pipe Wait 5 minutes for any gas to clear Smell for gas including near floor If you smell gas STOP Follow instructions on this page What To Do If You Smell Gas If you do not smell gas go to next step Turn gas shutoff valve counter clockwise to the open position Handle should be parallel to gas pipe Replace upper jacke...

Page 43: ...r vent check venturi air inlet for blockage and clean as required verify pressure test port cap and combustion test port are in place return temperature sensor clip must be securely seated on pipe Check boiler for any sign of leaks Check low water cutoff using user interface Check operation by pressing test button on low water cutoff Low Water LED should illuminate and burner should shut down Shou...

Page 44: ...y residual sleeve and or gasket material from removed burner Clean burner using air hose directed into top of burner opening to dislodge any debris in burner ports Inspect burner for foreign matter in flame ports or inside burner Remove foreign matter by blowing with compressed air or vacuuming Replace burner if it cannot be cleaned or is showing deterioration Clean heat exchanger with low pressur...

Page 45: ...g 7 16 deep well socket See figures 11 3 11 4 Remove condensate collector assembly from heat exchanger and flue pipe Flush collector and condensate trap with water Follow Burner Inspection Kit instructions to reassemble boiler and resume operation 11 GENERAL MAINTENANCE AND CLEANING ...

Page 46: ...on for installations above 4500 feet 1350 m above sea level SEA LEVEL RATINGS NATURAL AND PROPANE GASES Size Boiler Input Rate MBH 1 Heating Capacity MBH 1 2 Net AHRI Rating Water MBH 1 3 AFUE 2 Maximum Minimum 050 50 10 46 40 95 0 075 75 15 69 60 95 0 100 100 20 91 79 95 0 150 150 30 139 121 95 0 200 200 40 185 161 94 0 299 299 60 273 239 94 0 1 1000 Btu hr British Thermal Units Per Hour 2 Heatin...

Page 47: ...47 13 TROUBLE SHOOTING ...

Page 48: ...ce Control Module High Temperature opens during normal operation Go to Page 54 Control Module detects flame after gas valve is closed more than 10 seconds Replace Gas Valve Flame is detected before gas valve opens Replace Gas Valve Control module internal error Replace Control Module Lost flame signal 3 times during one heat call Go to Page 55 Control Module internal error Replace Control Module C...

Page 49: ...to 61 Hz Go to Page 59 Boiler power supply ground wire is not grounded Go to Page 60 Control board internal error Power down then power up boiler If error repeatedly occurs replace control module Replace Control Module Supply temperature sensor is open No continuity Go to Page 60 Return water temperature sensor is open No continuity Go to Page 61 Flue temperature sensor is open No continuity Go to...

Page 50: ... connector on Control Module NO YES Disconnect J13 connector on Control Module Measure resistance across third connected to blue wire and fourth connected to brown wire terminals Is resistance between 1 0 and 1 2 kΩ NO YES Disconnect harness from Gas Valve Does each wire have continuity between Gas Valve and Control Module NO YES Is supply pipe copper pipe at top of boiler hot NO YES Boiler has be...

Page 51: ...51 13 TROUBLE SHOOTING ...

Page 52: ...h system if water is dirty Is boiler supply pipe above heat exchanger hot Wait for boiler to cool down YES NO Replace Broken Switch Unplug molex connector on supply temperature sensor Check continuity between two pins on sensor two pins connected to two pink wires before removing the connector Is continuity available YES NO Check for loose connections on two pink wires on J13 connector supply sens...

Page 53: ...53 13 TROUBLE SHOOTING ...

Page 54: ...54 Disconnect harness from High Temperature Supply Switch and Control Module J13 Continuity from J13 5 to Switch 1 Continuity from J13 6 to Switch 3 Continuity of two purple wires 13 TROUBLE SHOOTING ...

Page 55: ...TURN OFF GAS TO APPLIANCE Replace Gas Valve Turn off manual gas shutoff valve Follow instructions TO TURN OFF GAS TO APPLIANCE Replace Gas Valve Follow Operating Instructions to initiate boiler operation Enter Installer Menu Boiler Status Flame Signal Is fl ame signal greater than 3 7μA Boiler may be running at any fi ring rate YES NO Replace Control Module Replace Flame Sensor and Burner 13 TROUB...

Page 56: ...nect harness to Transformer Disconnect harness from Low Water Cutoff Is 24 vac at terminals 1 2 Between blue and yellow wires YES NO Repair System Piping remove any remaining air in system 13 TROUBLE SHOOTING ...

Page 57: ...roblem if any purging all air out of the system Replace Flue Gas Sensor Replace Control Module Use thermal couple to measure fl ue gas temperature through sampling port Is the measured temperature and fl ue temperature reading on User Interface signifi cantly different YES NO B l o c k i n g E r r o r F l u e G a s E r r o r 13 TROUBLE SHOOTING E 39 ...

Page 58: ...onnector on return sensor Is there moisture or liquid on metal pins Liquid might be water or antifreeze solution NO Is Heat Exchanger Pump properly oriented Pump arrow pointing down YES NO Disconnect harness from Return Water Sensor Measure resistance using digital ohm meter Is resistance between 950 to 33 000 ohms Install Heat Exchanger Pump in proper orientation YES NO 13 TROUBLE SHOOTING g n n ...

Page 59: ...r supply rated at 60 Hz 2 Replace Control Module YES YES NO NO Replace circuit breaker 13 TROUBLE SHOOTING Fix the connection These error messages are displayed when the control board detects fault in blower motor system Check wire connector to blower Check connector J9 on control board is any connection loose YES NO Replace blower motor Does this correct the problem YES NO Boiler is operating pro...

Page 60: ...stimate Sensor temperature Does it fall in the range of the Resistance Chart Replace Wires 50 to 90 10 to 32 9K to 24K ohms 150 to 200 90 to 130 F C Resistance 130 to 150 2K to 1K ohms 2K to 3K ohms 3K to 9K ohms 54 to 66 32 to 54 66 to 94 Supply Water Sensor Resistance Chart Disconnect field wiring Is continuity between field wiring neutral and ground less than 10 ohms Is field grounding conducto...

Page 61: ...or and Control Module J5 4 and J5 12 Continuity Measure Return Temperature Sensor resistance with digital meter Estimate Sensor temperature Do temperature and resistance fall within ranges shown in chart Replace Wires 50 to 90 10 to 32 9K to 24K ohms 150 to 200 90 to 130 F C Resistance 130 to 150 2K to 1K ohms 2K to 3K ohms 3K to 9K ohms 54 to 66 32 to 54 66 to 94 Return Temperature Sensor Resista...

Page 62: ...62 Supply Water Temperature Sensor Resistance Chart 13 TROUBLE SHOOTING ...

Page 63: ...r Sensor Replace Control Module Disconnect wire harness from Vent Temperature Sensor Measure Sensor resistance Does resistance match estimated flue temperature NO YES _ P _ _ _ Blocking Error E 6 5 Flue Sens Shorted Replace Vent Temperature Sensor 50 to 90 10 to 32 9K to 24K ohms 150 to 200 90 to 130 F C Resistance 130 to 150 2K to 1K ohms 2K to 3K ohms 3K to 9K ohms 54 to 66 32 to 54 66 to 94 Ven...

Page 64: ...64 14 1 Connection Diagram 050 075 100 150 200 MBH 14 WIRING DIAGRAM EXTERNAL PUMP RELAY LIMIT OF 1 AMP PER PUMP SEE SECTION 8 ...

Page 65: ...ARGUS LINK MULTI BOILER OPTIONAL ARGUS LINK POWER ON OFF SUPPLY SENSOR RETURN SENSOR DHW THERMOSTAT FLUE SENSOR OUTDOOR SENSOR SYSTEM SENSOR OPTIONAL L L N G N G ARGUS CONTROL J5 9 J5 1 J5 10 J16 5 J16 6 120V 24V 15VA TRANSFORMER LWCO 24 VAC 1 2 4 3 4 2 BURNER G POWER INDICATOR HEAT INDICATOR RESET INDICATOR J13 5 J13 6 J13 3 J13 4 J13 1 GAS VALVE LIMIT 1 3 HEAT EXCHANGER TEMPERATURE SWITCH N L L ...

Page 66: ...66 14 3 Connection Diagram 299 MBH 14 WIRING DIAGRAM EXTERNAL PUMP RELAY LIMIT OF 1 AMP PER PUMP SEE SECTION 8 ...

Page 67: ...D DC N GROUND FLAME SENSOR IGNITION LWCO CH THERMOSTAT USER INTERFACE DISPLAY ARGUS LINK MULTI BOILER OPTIONAL ARGUS LINK POWER ON OFF SUPPLY SENSOR RETURN SENSOR DHW THERMOSTAT FLUE SENSOR OUTDOOR SENSOR SYSTEM SENSOR OPTIONAL L L N G N G ARGUS CONTROL J5 9 J5 1 J5 10 J16 5 J16 6 LIMIT 120V 24V 15VA TRANSFORMER LWCO 24 VAC 1 2 4 3 4 2 1 3 BURNER G CH PUMP 120 VAC HEAT EXCHANGER TEMPERATURE SWITCH...

Page 68: ...production of heat or heat and light Complete combustion of fuel is possible only in presence of adequate supply of oxygen COMBUSTIBLE MATERIAL Materials made of or surfaced with wood compressed paper plant fibers or other materials capable of being ignited and burned Such material shall be considered combustible even though flame proofed fire retardant treated or plastered CONDENSATE Liquid separ...

Page 69: ...VE Valve designed to relieve pressure in hot water supply system when pressure exceeds pressure capability of equipment SAFETY SHUTOFF DEVICE Device that will shut off gas supply to controlled burner in event source of ignition fails SEDIMENT TRAP Gas piping arrangement designed to collect any liquid or solid contaminant before reaching gas valve VENT Passageway used to convey flue gases from appl...

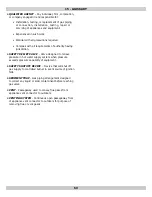
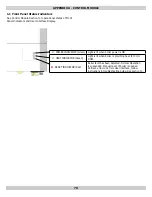
Page 70: ...reen Light is lit when boiler power is ON HEAT INDICATOR Green Light is lit when boiler is providing heat for CH or DHW RESET INDICATOR Red Boiler fault has been detected Normal Operation is suspended Manual reset of boiler is needed Retrieve error code from User interface follow instructions in troubleshooting guide See section 13 APPENDIX A CONTROL MODULE ...

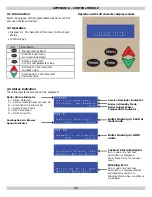
Page 71: ...m Increase value Scroll down to next menu item Decrease value Key Boiler Status Indicator F Flame Detected P Central Heating System pump On B Combustion Air Blower On S Safety Relay Check G Gas Valve Open D DHW Pump On Service Reminder Indicator Boiler in Standby Mode Boiler Supply Water Temperature Indicator Boiler Running in Central Heat mode Combustion Air Blower Speed Indicator Boiler Running ...

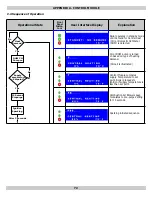
Page 72: ...on based on type of heating demand CH call is illustrated Control Module compares supply Temperature to set point Boiler proceeds to ignition if supply temperature is less than set point Combustion Air Blower speed modulates to pre purge setting for 15 seconds Sparking initiated sequence Heat Demand DHW CH Pump on Supply Temperature Setpoint 15 Second Prepurge Ignition Sparking No Yes No Yes After...

Page 73: ...ing rate according to heating demand When Boiler detects demand met will enter post purge mode then standby mode If simultaneous demand for Central Heat and DHW boiler will enter DHW Priority Mode Priority mode limits amount of time boiler can run in DHW mode to meet CH demand Max DHW Priority Time setting determines maximum time allowed for DHW heating mode Please refer to section Appendix A sect...

Page 74: ...nction as part of multiple boiler installation submenu used to view runtime parameters See Multiple Boiler Manual Boiler Status Supply Temperature set point displayed If boiler running in CH mode CH set point displayed Note While running in Outdoor Reset mode this value may change in proportion with the outdoor temperature If the boiler is running in DHW mode the DHW supply set point is displayed ...

Page 75: ...ll change to OD Reset Setpoint and cannot be changed Controller calculates set point based on outdoor temperature Note For explanation of available CH heating modes refer to CH Mode section located in CH Settings submenu Setting Range 104 F to 195 F 40 C to 91 C Default Value 180 F 82 C DHW set point determines supply water temperature set point while operating in DHW mode User interface temperatu...

Page 76: ...rity time Cascade Settings Refer to Multiple Boiler Manual System Test Tool aids setup of boiler installation or diagnosis of common problems Boiler Status Combustion air Blower provides airflow through Combustion and Vent systems Fan speed status screen indicates actual and operational fan speeds in RPM high low and ignition power speed settings Settings are for information only to aid in trouble...

Page 77: ...ition If at end of safety period no flame detected control will go to post purge removing unburned gas Re ignition attempt started following same cycle Number of re ignition attempts limited to 4 after which lockout occurs Intermittent Operation Boiler can be firing continuously for 24 hours Burner switched off and restart sequence follows Flame out too late If flame detected after post purge lock...

Page 78: ...ler Confi guration Address Selection screen used to set boiler position in multiple boiler cascade installation Refer to Multiple Boiler Installation Manual Default setting of 0 indicates boiler is operating in single boiler mode Boiler incorporates integrated Low Water Cutoff device LWCO that disables boiler when low water condition exists LWCO device located at high point of internal Heat Exchan...

Page 79: ...his pump to CH System Pump electrical terminal block See page 35 for diagram DHW pump terminal does not function This is typical of hydronic system design which utilizes zone valves for all CH zones and DHW indirect tank Note Pump Mode selection depends on electrical and hydronic system design Please refer to sections 5 and 8 for recommended hydronic piping and electrical configurations Internal h...

Page 80: ... with Full Outdoor Reset Boiler will permanently attempt to satisfy CH demand CH thermostat input is ignored CH set point calculated as function of outdoor temperature using outdoor reset curve See figure A 2 CH Mode 3 CH with Permanent Demand Boiler will permanently attempt to satisfy CH demand CH thermostat input is ignored CH set point is adjusted in Settings submenu under User Menu Note Once C...

Page 81: ...tdoor Reset Curve Calculated supply temperature follows thick black line in graph above based on outdoor temperature 25 F 170 F 20 180 200 160 140 120 100 80 60 40 60 100 70 F A D C B Reset Curve Boiler Minimum Reset Curve Boiler Maximum Points A and B define a straight line Boiler min and max C and D define a section on that straight line F C 93 82 71 60 49 38 27 16 C F 6 4 16 38 21 C 21 C 70 F 7...

Page 82: ... 100 Default Setting 100 DHW Settings Two DHW modes are available DHW Mode 0 No DHW DHW Mode is disabled The DHW thermostat input is ignored and the DHW pump is not used DHW Mode 2 DHW Store with Thermostat Boiler reacts to DHW demand when DHW thermostat input closes Boiler modulates to meet DHW demand similar to CH Mode except DHW set point is used DHW set point set in Settings submenu found in U...

Page 83: ...emand being present System Test has priority over any system demand while test mode activated System test mode automatically ends after 30 minutes boiler resumes normal operation The following modes are available Disabled Low power Burner starts After ignition period has finished the burner stays at low power Ignition power Burner starts Stays at ignition power High power Burner starts After ignit...

Page 84: ...ECR International Inc 2201 Dwyer Avenue Utica NY 13501 web site www ecrinternational com ...

Reviews: