EN
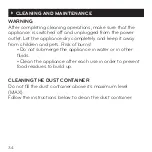
CLEANING THE DUST CONTAINER
Do not fill the dust container above its maximum level
(MAX).
Follow the instructions below to clean the dust container:
2. Take out the dust container from the vacuum cleaner.
1. Grab the dust container by the transport handle and press
the Open button.
FILTER CLEANING
• The filter needs to be cleaned periodically, i.e. around two
times a year or, in any case, whenever a reduction in the
vacuum cleaning power is identified.
• DO NOT clean the filter in a washing machine: DO NOT dry
it in an electrical appliance OR with a hair dryer.
• Using a wet filter will result in a reduction of the vacuum
cleaning power and in motor damage.
• After the filter has been cleaned and dried, it must be put
back in the correct position before starting the vacuum
cleaner.
Steps for correct filter maintenance
• Fig. 1 – Press the button to stop the air outflow and open
the grid at the back of the appliance.
• Fig. 2 – Take the filter out.
• Fig. 3 – Pull the button placed on the top part and open
the cover in which the HEPA filter is fitted.
• Fig. 4 – Turn the cover upwards and remove it from the
dust container.
• Fig. 5 – Take out the HEPA filter and wash it.
• Wash the filter cover, the compartment, the air outflow
sponge and the dust container with water (no need to use a
detergent). Then dry these elements in the air before fitting
them back.
• Place the filter compartment in the cover of the dust con-
tainer and make sure that the 3 clamps perfectly fit in the
slots provided in the dust container.
• Turn the filter compartment in the direction shown by the
mark on the cover.
• Put the cover and the dust container in position, as shown
by the external mark.
• Fig. 6 – Gently tab the filter with your fingers.
• Insert the compartment of the dust container in the appli-
ance. First, place the dust container in suitable position and
then press the transport handle. The “click” indicates that the
container has been installed correctly.
35
Summary of Contents for 15KC
Page 2: ...2 ...
Page 19: ...19 ES Fig 3 Fig 4 Fig 5 Fig 6 ...
Page 23: ...EN 23 ...
Page 39: ...EN Fig 3 Fig 4 Fig 5 Fig 6 39 ...
Page 43: ......

