FloormapX System Overview
25
User Control
This is a quick release, detachable module that connects to the rear of the mainframe and contains
all the necessary controls buttons to operate the system. At the rear of the mainframe is a connecting
cable that attaches to the bottom of the user control. The height of the user control can be adjusted
to suit the operator. Pull the knob situated directly below the user control to disengage the plunger.
To set the height, slide up or down until the plunger engages. There are five height adjustment
positions available.
NOTE
To avoid damage when the user control is removed ensure the mainframe connecting cable is disconnected
.
IMPORTANT
After installation or adjustment of the user control height, ensure the locking plunger is
properly engaged before using the system. Failure to do so will invalidate the warranty.
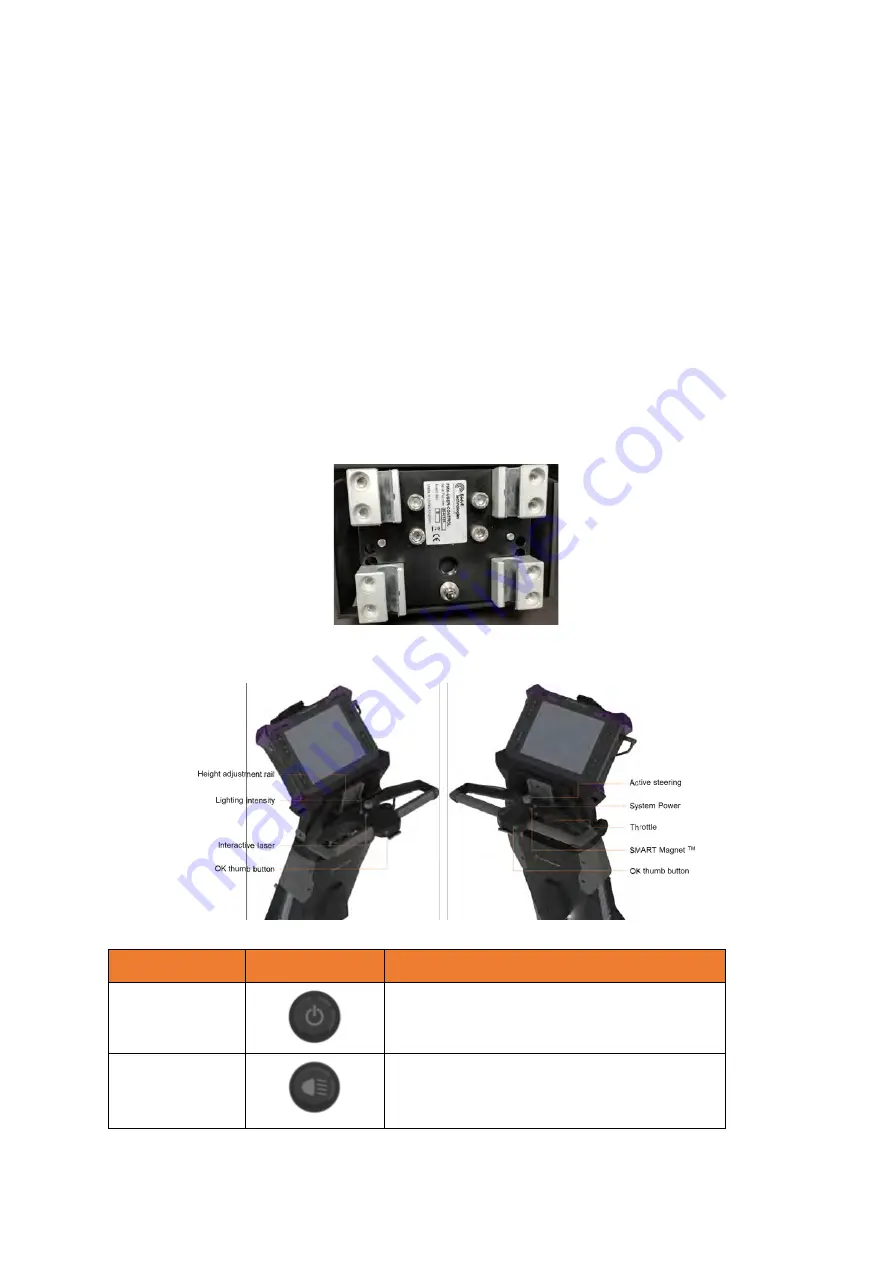
The user control product and serial number label is located at the rear of the unit on the user control
rail sliders and is only visible when the user control is not attached.
Figure 10: User control product and serial label
The location and function of each button on the user control is provided below.
Figure 11: User control button overview
Name
Button
Description
System power
Hold for 2 seconds to turn system on or off.
Hold for 4 seconds to force a power off shutdown.
Lighting power
Turn the front lights on and off.
Press the button to cycle through the brightness settings.
The rear light is always on and at a constant brightness.
Summary of Contents for Floormap X
Page 1: ...User s Manual Floormap X MFL Array Tank Floor Inspection Solution...
Page 10: ...10 Chapter 1 Precautions and conventions...
Page 16: ...General Precautions and Conventions 16 1 5 EU Declaration of Conformity...
Page 19: ...19 Chapter 2 FloormapX System Overview...
Page 35: ...35 Chapter 3 Inspection Preparation Setup and Operation...
Page 43: ...43 Chapter 4 SIMS GO Data Acquisition Software...
Page 69: ...69 Chapter 5 SIMS PRO...


