30
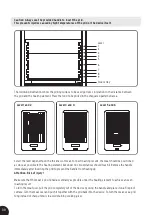
Level 3 and 4
Level 1 and 2
Level 5 and 6
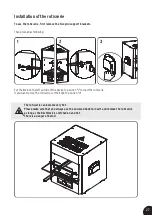
Caution: Always use the provided handle to insert the grid.
This prevents injuries caused by high temperatures of the grid or the device itself.
The following illustrations show the grilling surface to be used per level, in relation to the distance between
the grid and the heating element. Place the food to be grilled in the chequered patterned area.
Select the level depending on the thickness of meat. For best roasting results, the meat should be positioned
as close as possible to the heating element, but under no circumstances should touch it. Remove the handle
immediately after inserting the grid to prevent the handle from heating up.
Attention: Risk of injury!
Make sure that the meat is positioned as centrally as possible under the heating element to achieve an even
roasting result.
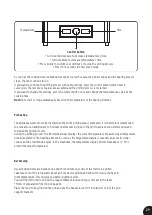
To turn the meat over, pull the grid completely out of the device by using the handle and place it on a fireproof
surface. Turn the meat over and push it together with the grid back into the device. To turn the meat, use a grill
tong instead of sharp utensils to avoid draining cooking juices.
Level
1
2
3
4
5
6
7
8
9
Grease tray
Summary of Contents for 33112202
Page 2: ...2 ...

