background image

4

MAINTENANCE & CLEANING

•  Always allow the unit to cool completely before cleaning.

•  DO NOT clean ceramic core or burner box.

•  DO NOT use abrasive cleaners or cleaning pads 

  on the outside of your cooker.

•  Wash your cooker with warm soapy water, and then 

  rinse with clean water. Use the same steps to clean 

  the grease tray after removal from the cooled unit.

•  Grates and internal burner tubes may be cleaned

  with a stainless steel bristle wire brush. Use a soft  

  bristle brush for stubborn debris on the outside 

  of the unit to prevent scratching.

•  Stainless steel cleaner may also be purchased. 

   For best results, always clean with the grain of 

  the stainless steel and use only a soft cloth.

•  DO NOT use aluminum foil. Disposable trays 

  are available (see pg. 9 to order replacements).

•  Cleaning is important to avoid grease fires.

•  DO NOT use water on a grease fire. Personal injury  

  may result. If a grease fire develops, turn knob off  

  and disconnect Liquid Propane tank.

REMOVING AND INSERTING

THE DRAWER

Removing the drawer:

1.  Slide drawer into closed position.

2.  Lift the drawer upward with rear end angled up 

  to unlock the wheels from tracks.

3.  Pull drawer out of unit.

Inserting the drawer:

1.  Place drawer over rails and slowly slide into 

  closed position.

2.  Allow wheels to set into slots in the rear 

  of railings for secured position.

Inserting the drawer latch:

For your convenience, the Namath Rapid Cooker

includes a drawer latch. This latch is designed to 

keep the drawer from sliding open on bumpy car rides

or when it’s being carried from one place to  another.

To insert the drawer latch, please follow these steps: 

1.  Remove the drawer from unit.

2.  Remove the steel grate from the top of the drawer 

  (See Figure 1).

3.  Acquire the front piece of the drawer, two screws  

  (included) and the drawer handle.

4.  Make sure the front of the drawer is positioned 

  with the latch down.

5.  Position the screws, the front of the drawer and the 

  door handle so that they all line up with the two holes  

  cut into the drawer handle. (See Figure 2).

6.  Screw the two pieces together.

BATTERY INSTALLATION/

REPLACEMENT

•  To replace or install the battery, first unscrew the ignitor  

  knob on the front of the unit. Next, insert the AA lithium  

  battery (included), negative end first.
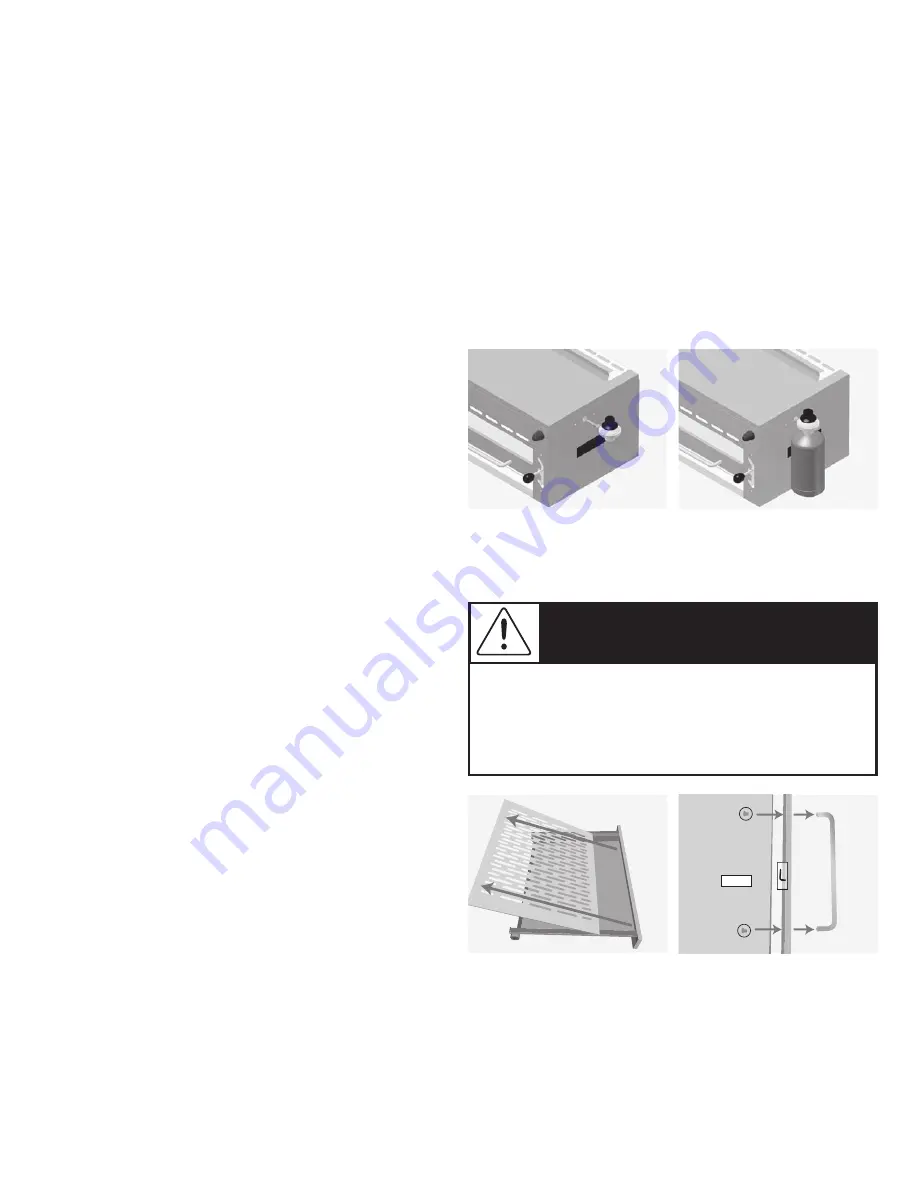
ATTACHING REGULATOR

& PROPANE TANK

•  Attach regulator to thread on right side (See Figure A)  

  and propane (not included) to the regulator 

  (See Figure B). 

•  All other items ship fully assembled and ready for use.

Figure A

Figure B

Figure 1

Figure 2

Latch on

the Bottom

If a gas leak cannot be stopped, or a fire 

occurs due to gas leakage, call the fire 

department.

DANGER

Summary of Contents for namath

Page 1: ...estions or need assistance during assembly please call 888 444 4134 To ensure your satisfaction and for follow up service register your appliance online at www namathproducts com register Read and follow all safety statements assembly instructions and use and care directions before attempting to assemble and cook CAUTION Failure to follow all manufacturer s instructions could result in serious per...

Page 2: ...rnings 8 Warranty 9 10 SAFETY SYMBOLS The symbols and boxes shown below explain what each heading means Read and follow all of the messages found throughout the manual DANGER Indicates an imminently hazardous situation which if not avoided will result in death or serious injury DANGER WARNING Indicates a potentially hazardous situation which if not avoided could result in death or serious injury W...

Page 3: ...ff position Always check that they are turned off before using Check by pushing down on the black knob and turning in a clockwise direction If the knob does not turn in a clockwise motion when it is depressed it is off Make sure that the burner valve is set to the OFF POSITION before opening the gas valve TO IGNITE COOKER Attach 1 lb propane tank to the regulator located on the side of the Namath ...

Page 4: ...ver rails and slowly slide into closed position 2 Allow wheels to set into slots in the rear of railings for secured position Inserting the drawer latch For your convenience the Namath Rapid Cooker includes a drawer latch This latch is designed to keep the drawer from sliding open on bumpy car rides or when it s being carried from one place to another To insert the drawer latch please follow these...

Page 5: ...ropane Cylinder Page 4 Fire coming through control panel Fire in burner tube section of burner due to blockage Turn off control knob and liquid propane cylinder valve Leave drawer open to allow flames to die down After fire is out and grill is cold remove burner and inspect tube for spider nests or rust Grease fire or continuous excessive flames above cooking surface Too much grease buildup in bur...

Page 6: ...pane cylinder Refill replace if necessary Vapor lock at coupling nut Liquid Propane cylinder connection Turn off knobs and Liquid Propane cylinder valve Disconnect coupling nut from cylinder Reconnect and retry Flames blow out High or gusting winds Turn front of grill to face wind or increase flame height Low on Liquid Propane gas Refill Liquid Propane cylinder Persistent grease fire Grease trappe...

Page 7: ... zone depending on the desired doneness and level of crispness you prefer Sautéing Create sautéed dishes by simply placing a metal sauté pan into the Namath Rapid Cooker Do not use pans that are made from materials other than metal Place the food in the pan along with the appropriate liquids or oils Place the pan on the grate and adjust the Namath Rapid Cooker to Grill Medium High Monitor pan and ...

Page 8: ...tinues to rise which destroys harmful germs CATEGORY FOOD TEMP F REST TIME Ground Meat Meat Fixtures Beef Pork Veal Lamb 160 F None Turkey Chicken 165 F None Fresh Beef Veal Lamb Steaks Roasts Chops 145 F 3 minutes Poultry Chicken Turkey Whole Poultry Breasts Roasts Poultry Thighs Legs Wings Duck Goose Stuffing cooked alone or in bird 165 F None Pork Ham Pork Fresh Ham Raw 145 F 3 minutes Precooke...

Page 9: ...MS MANUFACTURER WILL NOT PAY FOR 1 Shipping cost standard or expedited for warranty and replacement parts 2 Service calls to your home 3 Repairs when your product is used for other than normal single family household or residential use 4 Damage failures or operating difficulties resulting from accident alteration careless handling misuse abuse fire flood acts of God improper installation or mainte...

Page 10: ... vary from state to state In the state of California only if refinishing or replacement of the product is not commercially practicable the retailer selling this product or the Manufacturer will refund the purchase price paid for the product less the amount directly attributable to use by the original consumer purchaser prior to discovery of the nonconformity In addition in the state of California ...

Page 11: ......

Page 12: ...namathproducts com ...

Reviews: