Quick Start Guide
– 3 –
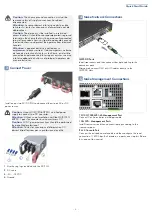
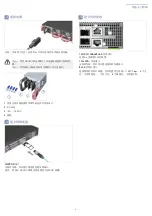
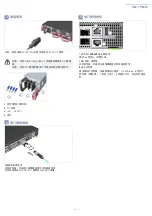
Connect Power
1.
Use the ring lugs included with the DC PSU.
2.
DC return
3.
-40 – -75 VDC
4.
Ground
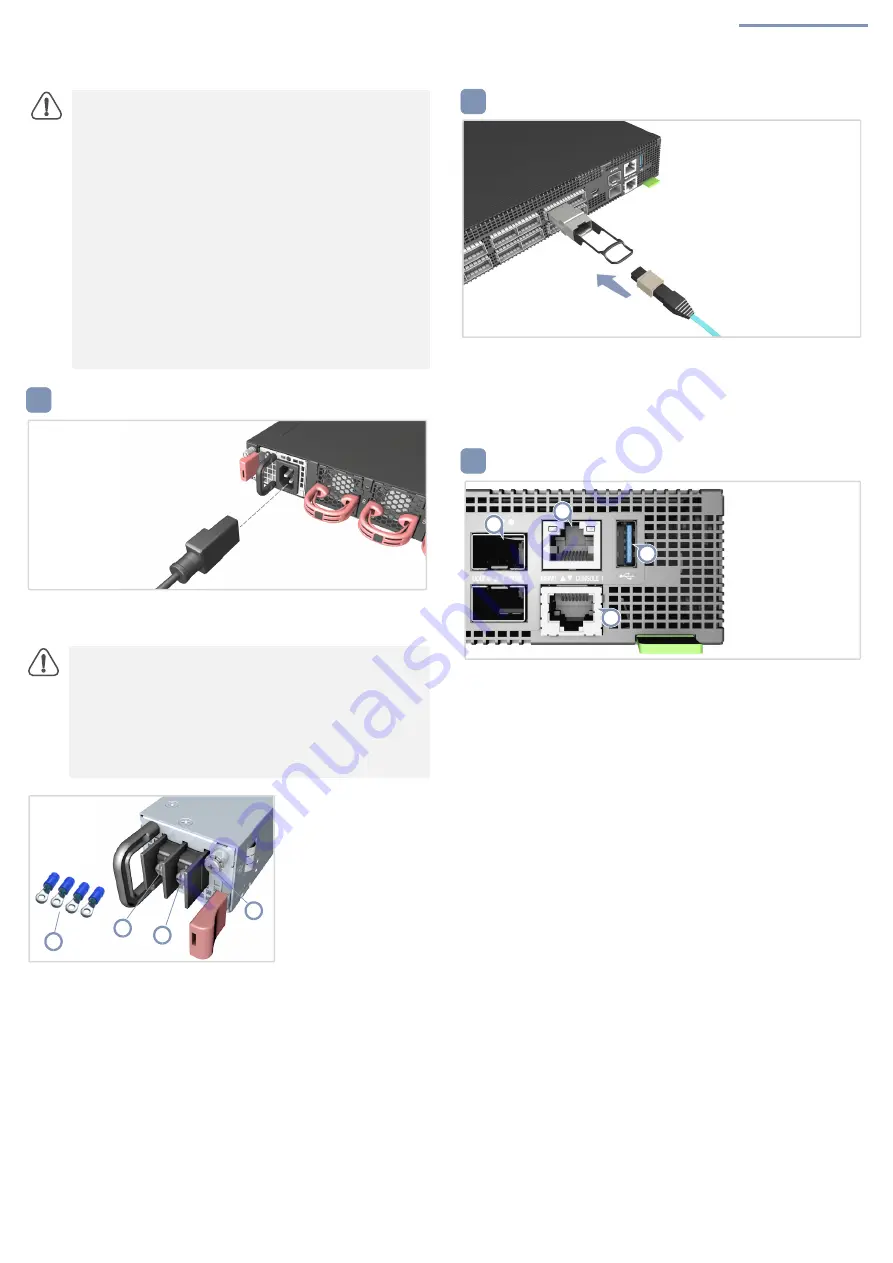
Make Network Connections
Make Management Connections
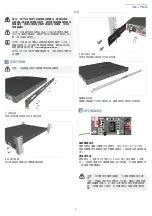
Caution:
The chassis ground connection must not be
removed unless all supply connections have been
disconnected.
Attention:
Le raccordement à la terre ne doit pas être
retiré sauf si toutes les connexions d’alimentation ont été
débranchées.
Caution:
The device must be installed in a restricted-
access location. It should have a separate protective ground
terminal on the chassis that must be permanently connected
to a well grounded chassis or frame to adequately ground
the device chassis and protect the operator from electrical
hazards.
Attention:
L'appareil doit être installé dans un
emplacement à accès restreint. Il doit comporter une borne
de terre de protection distincte sur le châssis, qui doit être
connectée en permanence à la terre pour assurer une mise
à la terre adéquate du châssis et protéger l'opérateur des
risques électriques.
Caution:
Use a UL/IEC/EN 60950-1 certified power
supply to connect to a DC converter.
Attention:
Utilisez une alimentation certifiée UL/IEC/EN
60950-1 pour le connecter à un convertisseur CC.
Caution:
All DC power connections should be performed
by a qualified professional.
Attention:
Toutes les connexions d’alimentation CC
doivent être effectuées par un professionnel qualifié.
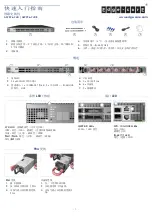
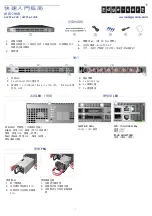
3
Install one or two AC/DC PSUs and connect them to an AC or DC
power source.
2
3
4
1
4
QSFP-DD Ports
Install transceivers and then connect fiber optic cabling to the
transceiver ports.
Alternatively, connect DAC or AOC cables directly to the
QSFP-DD slots.
5
10/100/1000M RJ-45 Management Port
Connect Cat. 5e or better twisted-pair cable.
10G SFP+ Management Ports
Install transceivers and then connect fiber optic cabling to the
transceiver ports.
RJ-45 Console Port
Connect the included console cable and then configure the serial
connection: 115200 bps, 8 characters, no parity, one stop bit, 8 data
bits, and no flow control.


