background image


Important: Before you begin, unplug the kegerator. 


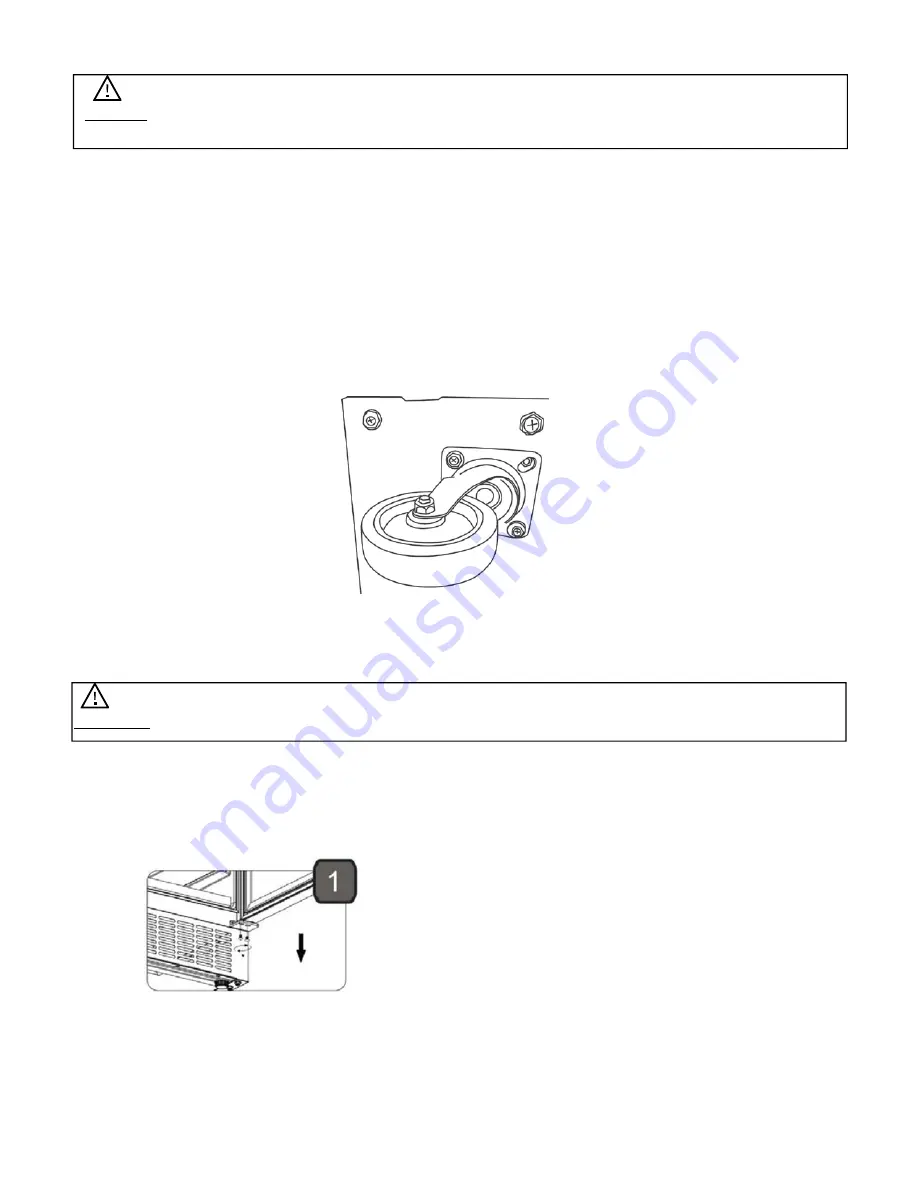
Installing the Casters 


This unit comes with four (4) casters.  These are an optional accessary to assemble if you would 
like to make the unit more mobile.  To install the casters: 
1.    Remove the four leveling legs from the bottom of the unit. 
2.   Separate the front casters and back casters. The front casters have a lever for a brake lock. 
3.   Place the top plate of the caster over the area of the removed leveling leg and align the 

opening to the screw hole openings. 

4.   Insert the screws to attach the caster to the cabinet. 
5.   Make sure the screws are tight so the caster is installed firmly. 


Reversing the Door Swing 


Follow the instructions below to reverse the door swing. 


To reverse the door from right swing to left swing: 

1.   Open the door and, using a Phillips screwdriver, remove the bottom screws from the 

lower hinge. 


Caution: Do not over-tighten the screws as this may cause damage to the handle or to the 
stainless steel door. 

Summary of Contents for BR7001BL

Page 1: ...For more information on other great EdgeStar products on the web go to https www edgestar com To use the EdgeStar self diagnostic tool go to https support edgestar com BR7001SS BR7001SSOD BR7001BL Re...

Page 2: ...ordinances is required Use outlets that cannot be turned off by a switch or pull chain Always turn the unit off and unplug it from the outlet when cleaning Unplug the unit if it is not going to be us...

Page 3: ...e installed indoors except for the BR7001SSOD and protected from rain sleet snow and or moisture all units This unit is not intended to be used by children Children should be supervised to ensure that...

Page 4: ...S 9 REVERSING THE DOOR SWING 9 FREE STANDING INSTALLATION 11 Guard Rail 11 Drip Tray 11 BUILT IN INSTALLATION 12 Countertop Opening for Dispense Kit 12 Installation Requirements 13 Enclose Space Betwe...

Page 5: ...ing in case you need to safely transport your kegerator For Your Records Please write down the model number and serial number below for future reference Both numbers are located on the ratings label o...

Page 6: ...5 Tip Gather the model and serial number from the product label and write them down before installing the kegerator Parts Identification Front View Back View...

Page 7: ...ccessories Installing the Kegerator The kegerator should be installed in accordance with local electrical code requirements The Note The variation of kegerator you purchase will determine the type of...

Page 8: ...supply be sure to let it stand upright for at least 24 hours to allow the compressor s oils to settle Unpacking the Kegerator Carefully remove the packaging materials Remove any shipping tape and glue...

Page 9: ...ed or lowered by rotating the plastic sheaths around each of the feet on the bottom of the machine If you find that the surface is not level rotate the feet until the kegerator becomes level You may n...

Page 10: ...ace the top plate of the caster over the area of the removed leveling leg and align the opening to the screw hole openings 4 Insert the screws to attach the caster to the cabinet 5 Make sure the screw...

Page 11: ...rews through the left hinge to the cabinet Insert the plastic caps into the upper right corner 4 Remove the bottom right support bracket Remove the plastic caps from the bottom left hinge corner Inser...

Page 12: ...binet 2 Place the guard rail onto the four installation pegs You may need to push down on the guard rail to ensure the rail has clicked into place on the pegs 3 Screw the four small guard rail screws...

Page 13: ...ut depending on the material of your countertop an opening into your counter the same size as the opening of the top of the kegerator Do not cut it larger than that size as the dispense tower will be...

Page 14: ...ed under counter Move the kegerator so the opening on the top of the cabinet is aligned with the opening in the counter The kegerator should be installed on a firm and level surface that will be able...

Page 15: ...the opening you will need to run a short connecting tube from the cabinet to the countertop There is not an accessory included for this connection with the unit Common materials for this connection i...

Page 16: ...15 Keg Loading Half Barrel Keg 5 lb CO2 tank Double Gauge Regulator Slim Quarter Keg Sixth Barrel Keg 5 lb CO2 tank Double Gauge Regulator Three Sixth Barrel Kegs 5 lb CO2 tank Double Gauge Regulator...

Page 17: ...renheit or Celsius This kegerator has a temperature range from 32 F to 60 F This kegerator has one display The unit will display the set temperature only The kegerator also has a memory function that...

Page 18: ...st under most ambient conditions However on colder settings some frost may build up Additionally the more humid the ambient conditions the more frost may build up Keep the door closed as much as possi...

Page 19: ...ts 3 Wait until the unit defrosts 4 With a clean cloth wipe down the interior of the unit 5 Reconnect power to the unit Troubleshooting Before Calling for Help If the unit appears to be malfunctioning...

Page 20: ...The unit is not level or is touching another appliance Check to make sure that the kegerator is level and that it is not in contact with another appliance or furniture Frost is forming in the kegerat...

Page 21: ...Door Refrigerant R600a 1 2 oz R600a 1 2 oz R600a 1 2 oz Temperature Range 32 F 60 F 32 F 60 F 32 F 60 F Dimensions Height x Width x Depth 34 3 8 X 23 13 16 X 27 3 8 34 3 8 X 23 13 16 X 27 3 8 34 3 8...

Page 22: ...or service transportation and shipping charges for the removal and replacement of defective parts beyond the initial 12 month period Products that have been modified to perform outside of specificatio...

Reviews: