12.
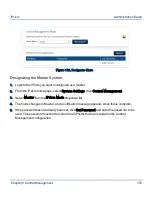
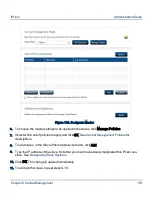
If you want the master to handle all overrides and access requests that come to the slaves, check
Slave appliances route overrides and access requests back to Master.
Note: If this option is selected and the current policy is to synchronize overrides,
the initial connection to the slave appliances synchronizes the overrides from
the master. This results in the slave appliances losing their current list of
overrides. Subsequent overrides created on the slave appliances will be
synchronized with the master.
Once you have designated a master system, any slave systems added are automatically slaved to
and synchronized with the master. If you want to update and synchronize slaves at any time, click
Update in the Central Management window.
Changing the Master System
Changing which system is your master may be useful in certain situations, such as if the original
master will be unavailable for a long period of time due to network problems, a hardware failure, etc.
Before you change the master, consider the following:
•
If you choose an iPrism that was previously a slave to become the new master, it is imperative
to use an iPrism with an up-to-date configuration. If you choose a previously-slaved iPrism
that was not reachable by the master, that iPrism will be outdated. If your iPrism detects that
another slave has a more recent configuration, you will be prompted to confirm or cancel your
selection.
•
Confirming your selection of an outdated iPrism may cause problems, such as changes or
settings that are no longer in sync between master and slave.
To change the master system:
1.
Log into the iPrism you want to designate as a master.
2.
From the iPrism home page, select System Settings, then Central Management.
3.
Select Master from the iPrism Mode dropdown list.
4.
If you want to add slaves, follow the steps (beginning with step 5) in
Designating the Master
System
.
Chapter 9 Central Management
155
iPrism
Administration Guide


