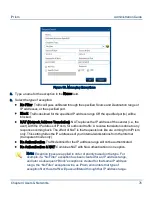
Important: The Machine Identifier identifies a particular remote machine and
defines a policy for all users on that machine. It is treated like a username, and
by default is the hostname of the machine when the client is installed (to locate
the computer’s hostname, see Locating a Hostname in the
iPrism Remote
Filtering Client Guide
). Thus, the names of the Remote Users you create in the
table below must match exactly the names of the mobile laptops to which they
are being mapped.
For example, if a mobile laptop’s Machine Identifier is “jsmith012-companyA”, the corresponding
Remote User must also be called “jsmith012-companyA”. Conversely, if you set up the Remote
User first, you must also make sure that when you provision the Remote Client (see the
iPrism
Remote Filtering Client Guide
), you give it the same name (“jsmith012-companyA”).
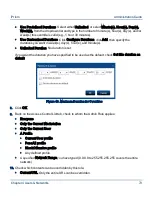
Generally speaking, the first thing to do is designate a default profile that will apply to remote clients.
If you want all remote clients to be controlled by that policy, you don’t need to do anything else here.
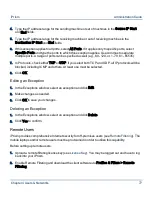
If you want to create exceptions to that default profile, specify those in Client Exceptions.
(Exceptions are specifically identified Machine IDs, whereas the default profile applies to all
undefined Machine IDs.) If exceptions are specified, iPrism remote filtering will first check if a user is
defined that matches the client Machine ID, and apply the specified profile. If there is no (exact)
matching Machine ID, then the default profile is applied. It is unlikely you will have more than a few
users defined in Client Exceptions.
Even though profile assignment is defined on a per-client machine basis, access events that make
their way into iPrism reporting will record the currently logged-on user and iPrism reporting events.
Note: Remote Filtering must be enabled via Profiles & Filters > Remote
Filtering prior to setting up remote clients.
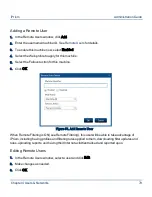
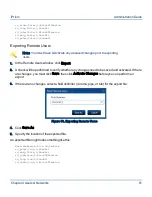
To work with remote users:
1.
From the iPrism home page, select Users & Networks, then Remote Users.
2.
Add, edit, and delete remote users as needed.
3.
Click Save to save your changes.
4.
If you have completed all your administrative changes, click Activate Changes to activate the
changes immediately. If you do not Activate Changes now, you will be prompted to do so before
logging out of iPrism.
Chapter 4 Users & Networks
78
iPrism
Administration Guide

