


ENGLISH
40
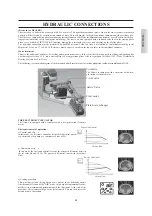
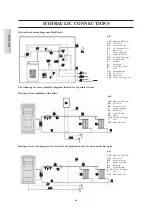
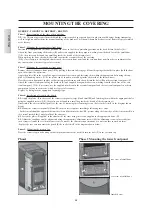
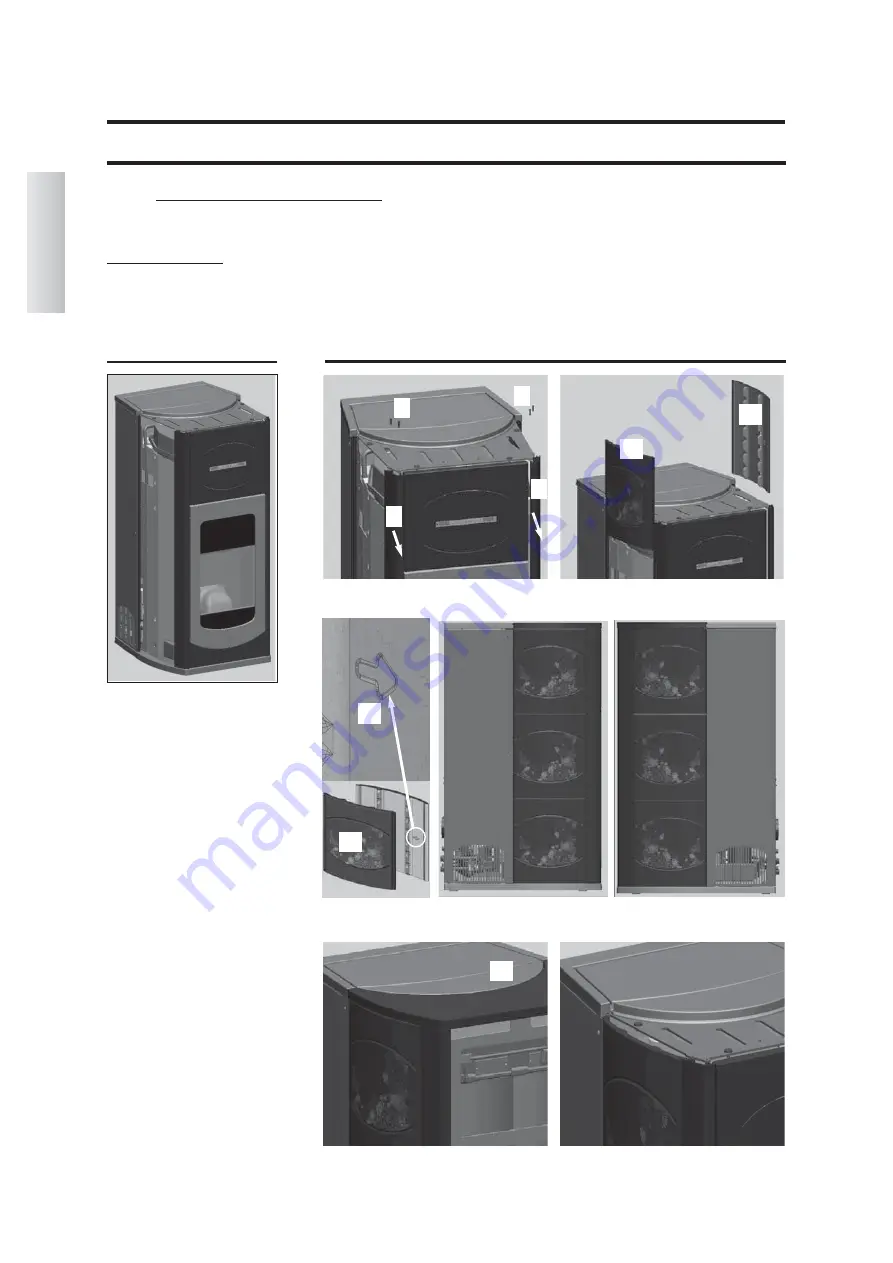
MOUNTING THE COVERING
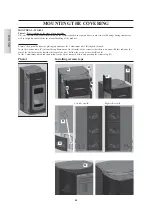
Photo 1:
Representation of the stove after unpacking
N.B.: the Thermo-stoves come furnished with the ceramics packed in separate boxes in order to avoid damage during transport as
well as to lighten and facilitate the manual handling of the product.
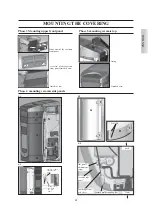
Installing ceramic tops
Remove the 4 pins (
A
) from the plating top and move the 2 aluminium sides (
B
) slightly forward.
Put in the ceramic sides (
C
) in from the top downwards. On the inside of the ceramic sides there is an arrow (
D
) that indicates the
side of the tile that must be towards the front of the stove (follow the views of the sides
E
and
F
).
Put the 2 aluminium sides back in position, fix the 4 pins removed before, and position the ceramic top (
G
).
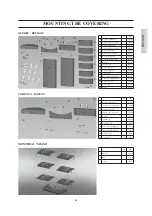
MONTREAL - MIAMI
Photo 1
Installing ceramic tops
C
C
B
B
A
A
Left side view
E
Right side view
F
D
G
C
Summary of Contents for Atlanta
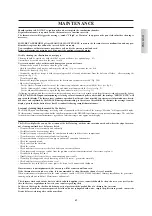
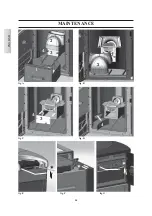
Page 24: ...24 ITALIANO MANUTENZIONE 2 fig A 3 1 fig B fig C fig D 4 3 4 3 2 4 fig E fig F fig G ...
Page 50: ...ENGLISH 50 MAINTENANCE 2 fig A 3 1 fig B fig C fig D 4 3 4 3 2 4 fig E fig F fig G ...
Page 76: ...76 FRANÇAIS ENTRETIEN 2 fig A 3 1 fig B fig C fig D 4 3 4 3 2 4 fig E fig F fig G ...
Page 102: ...102 ESPAÑOL MANUTENCIÓN 2 fig A 3 1 fig B fig C fig D 4 3 4 3 2 4 fig E fig F fig G ...
Page 128: ...128 DEUTSCH WARTUNG 2 Abb A 3 1 Abb B Abb C Abb D 4 3 4 3 2 4 Abb E Abb F Abb G ...
Page 154: ...154 NEDERLANDS ONDERHOUD Afb A Afb B Afb C Afb D 3 4 3 2 4 Afb E Afb F Afb G 2 3 1 4 ...
Page 179: ...664550 03 14 L w w w e d i l k a m i n c o m ...


